Project Packages
- Chandresh Patel
- Keith Ecker (Unlicensed)
- Jay-Ar Brouillard
- Erick Jones
Package definition is introduced with FlexDeploy 5.0, where user can define package with list of files which can used during build request or with release definition. Package details can change during development life cycle as necessary. Users can continue to build ad-hoc packages i.e. without any name as before.
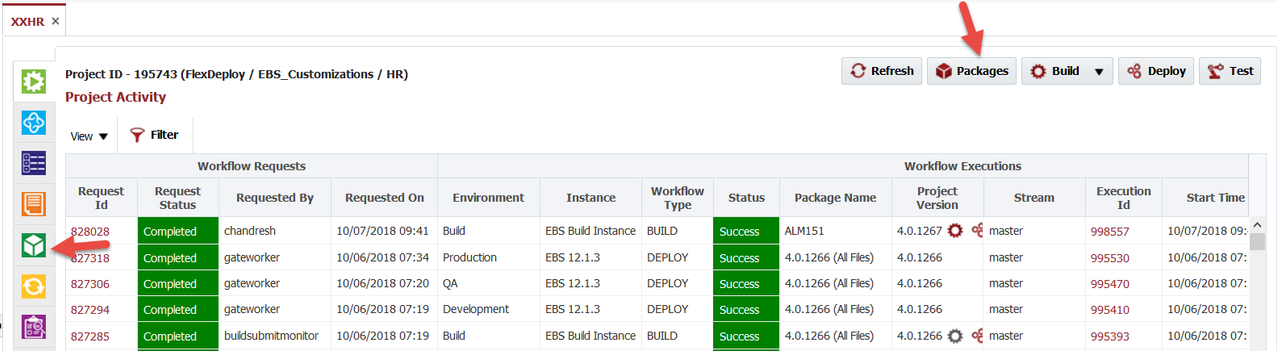
Packages are uniquely defined at partial deployment project, hence you can have package with same name in two different projects if necessary. Package list can be accessed from Packages button or green packages tab.
Project Packages tab and Packages button on Project Activity screen are only available when Package Build Type is set to "Packages Only" or "Both".
Security Permission
Execute Project permissions is needed for package create and edit. Users can create or update package from build request form also, hence this approach is taken for package security. Users will configure permission can also edit packages.
Package list will display all configured packages for project. On page load the filters will be defaulted to show only "Active" packages created 3 months ago or after by the logged in user. In the example below those filters are removed to show all packages.
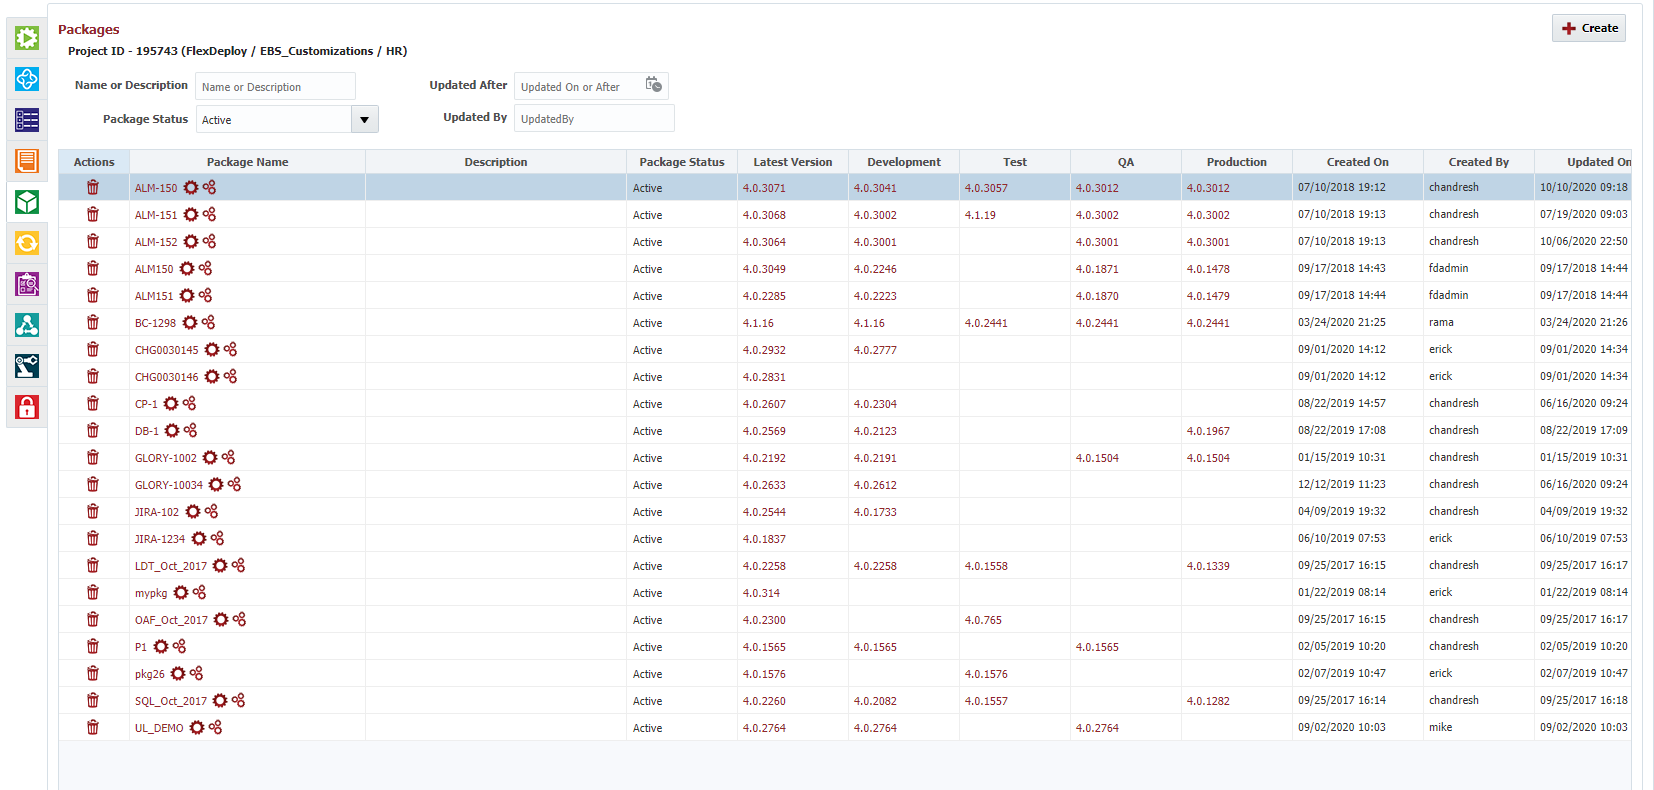
Notice the "Latest Version" will provide a link to the latest build version for the given package. On the other hand, the columns between "Latest Version" and "Created On" are dynamic columns representing the latest deployment version to each environment for that given package. Every environment associated to this projects deployment instance(s) will display a column with the environment display name as its column header. These dynamic columns are sorted by the sort order defined in Topology → Environment. Clicking on these links for latest version or deployment version will navigate to the corresponding project workflow execution details.
Note
Partial Deploy Projects of type 'Salesforce' have the following extra data columns for Salesforce DX packages and Unit Testing:
- Package Path
- Version Syntax
- Test Level
- Tests
Following actions are available for package list screen.
| Action | Notes |
|---|---|
| Create | Create new package. |
| Edit / View | Click on package name to edit or view package details. |
| Delete | Delete selected package. Executions for the package will not be deleted. If package is configured in Release, delete is not allowed. |
| Build | Submit build request for selected package. Package details (files) will be used to initialize build request form. |
| Deploy | Submit deploy request for selected package. Latest version for package will be selected by default. If package is not yet built, deploy button will be disabled. |
When user clicks on package name or Create button, package details screen shows up as show below.
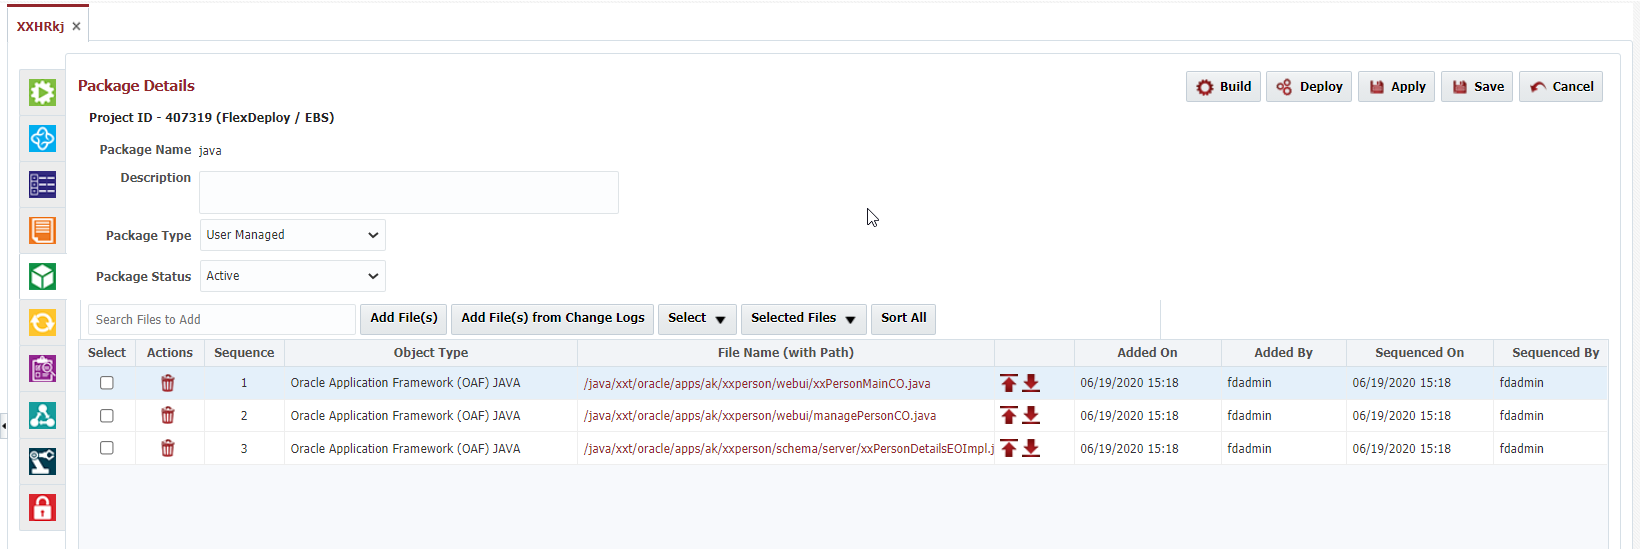
Package Type
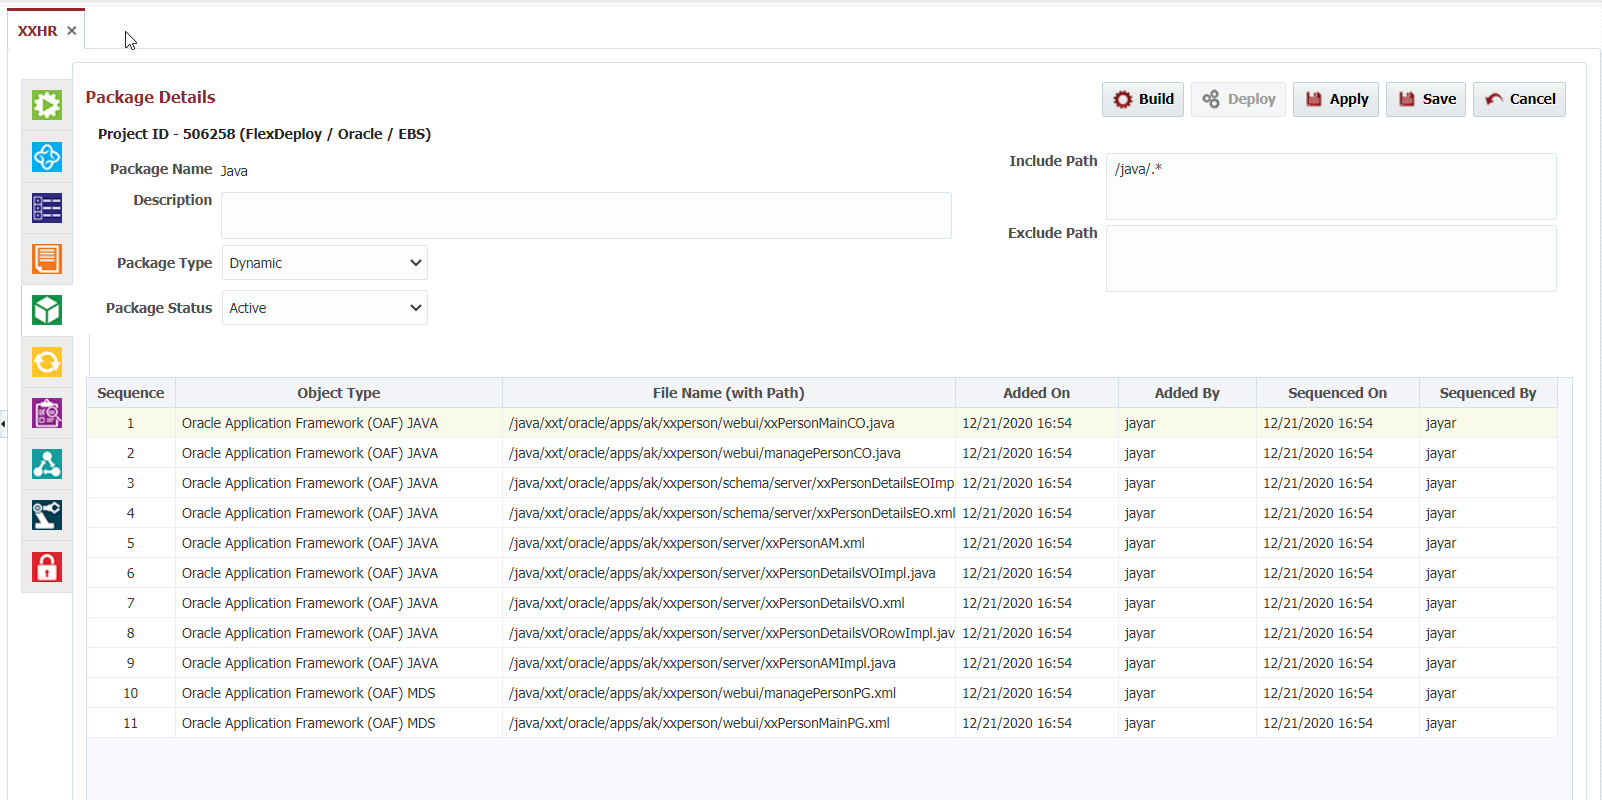
The package type can be defined as User Managed or Dynamic. User Managed packages refers to a packages where the user manages the content and the sort order. In contrast, for dynamic packages the content and sort order are managed dynamically base on an include path and/or exclude path. The include/exclude paths are regular expressions matching the project file path to determine which project files should be included or excluded from the package. More than one include or exclude path can be defined by adding that new path on the next line. Note that when new files are populated from Project Files tab all dynamic packages are updated accordingly. This can be a big productivity gain when the contents of the package can be derived according to some rules. By default, new packages are set to User Managed type, as well as for Salesforce DX packages created from the SFDX.json file.
Below is an example of a dynamic package that includes all files from within the "java" folder of the project.
Examples
| Include | Exclude | Description |
|---|---|---|
| /java/.*xml | Include all XML files within the java folder | |
| /forms/.*fmb | /forms/.*EXT.fmb | Include all fmb files except those whose filenames end with EXT |
The following actions are available for edit package screen.
| Action | Notes |
|---|---|
| Build | Submit build request for selected package. Package details (files) will be used to initialize build request form. |
| Deploy | Submit deploy request for selected package. Latest version for package will be selected by default. If package is not yet built, deploy button will be disabled. |
| Apply | Save changes and stay on package details screen. |
| Save | Save changes and go back to previous screen. |
| Back | Go back to previous screen without saving any changes. |
| Delete | Delete selected file from package. |
| File Name (with Path) | Users can search for specific revisions for this file. Inside File Revision History popup, users can find latest file content and commit file content links which redirects to the SCM webpage in a new tab. Link only supported for SCM based projects supporting file revision search. Additional link to latest file content and commit file content only supported for Github, Gitlab, and Microsoft Azure providers. |
| Add File(s)1 | User can either type in partial file path and click Add File(s) to add all matching files or click Add File without entering anything in Search Files to Add input, Add File(s) popup will show up where user can search, select and add files. Added files are appended to existing file list. |
| Add File(s) from Change Logs1 | User can add files from Change Logs by searching and clicking a revision. Each revision has a list of changed files which are appended to the existing files list. The list of revisions is populated from the configured SCM and selected stream. |
| Select - All1 | Select all files. |
| Select - None1 | Select no files. |
| Select - Invert1 | Select files that are currently selected and vice versa. |
| Selected Files - Copy to Package1 | Copy all selected files to another package in the project. |
| Selected Files - Move to Package1 | Move all selected files to another package in the project. Removes the selected files in the current package. |
| Selected Files - Remove1 | Remove selected files from package. |
| Sort All1 | Sort added files as per sequence definition done on Project Files screen. |
| File Drag and Drop1 | Drag and drop one file at a time. Dragged file is inserted before the file when it is dropped. |
| Top1 | Move selected file to top of list. |
| Bottom1 | Move selected file to bottom on list. |
1 - Applicable only for User Managed packages
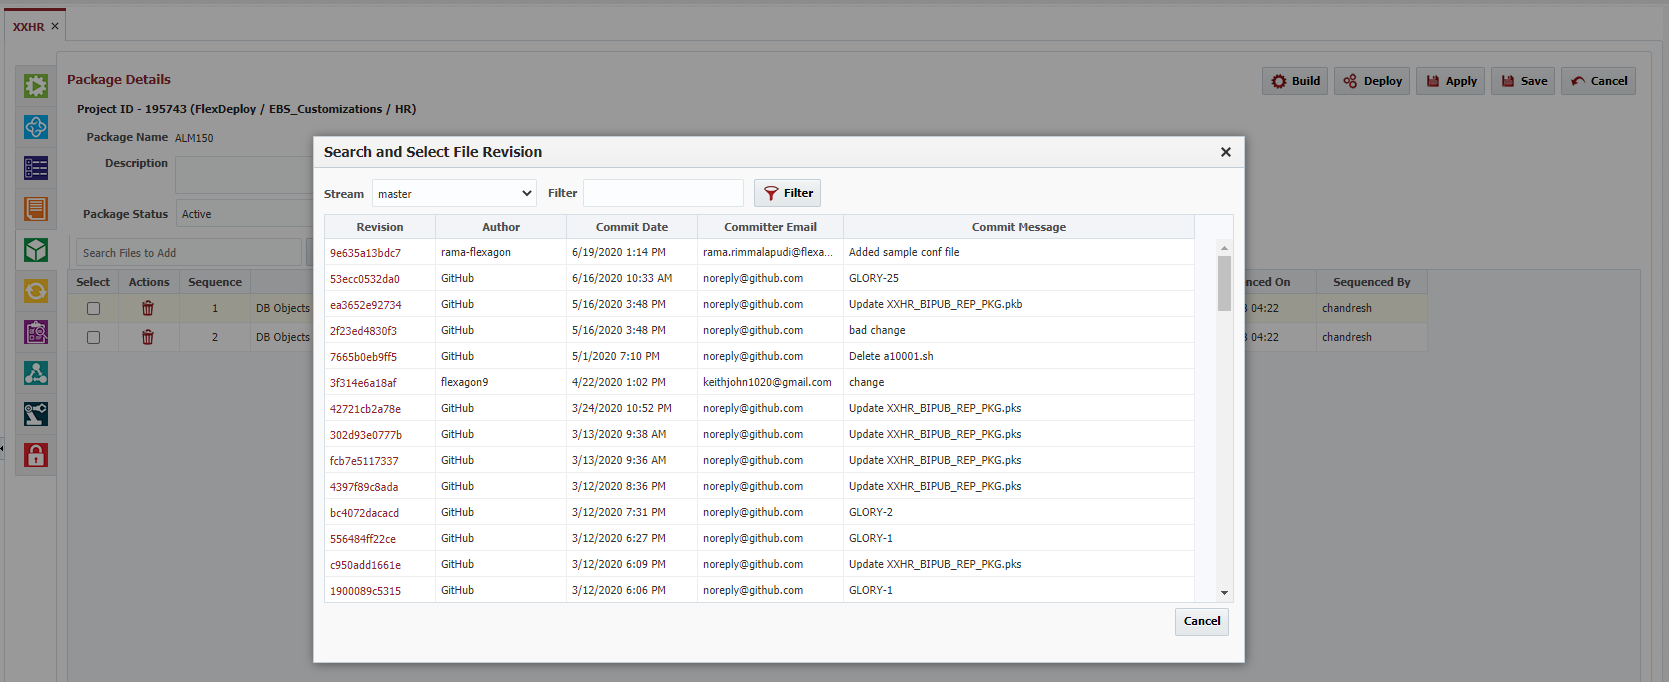
Add File(s) from Change Logs
When user clicks on Add File(s) from Change Logs button, the search and select file revision screen is displayed, as show below. Clicking a revision will add all files that were changed in that commit hash to this package.
View and Add Subcomponents
If the project's type supports subcomponents you will see an additional "View and Add Subcomponents" button on this edit package screen. When the user clicks on View and Add Subcomponents button, FlexDeploy will find all supported subcomponents for the selected files in the package. This allows users to build and deploy only certain parts of a specific file. To select these files you can either click the select check box or click on the row you would like to select.
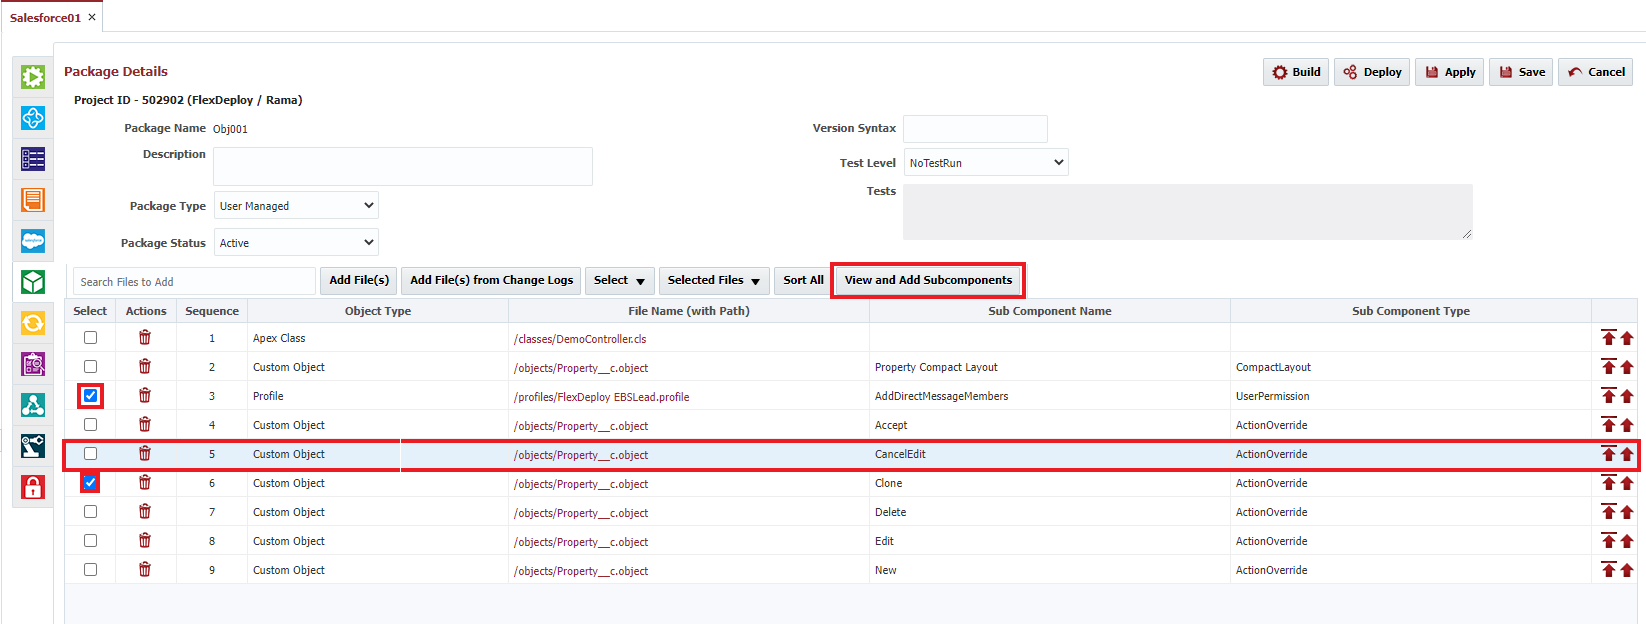
After selecting the files you can click the View and Add Subcomponents button to view the subcomponents for these files if the object type supports subcomponents. You are able to select the stream that the selected files are sourced from if the project uses an SCM, or the Salesforce Org account if the project type is Salesforce and SCM type is set to NONE. When selecting a Salesforce Org from the drop down, FlexDeploy will attempt to source the specified files from that Salesforce Org and break the files down into subcomponents based on the content of the file from the Salesforce Org.
When attempting to view a large amount of subcomponents the Subcomponent Content field may not be shown depending on the number of Subcomponents discovered.
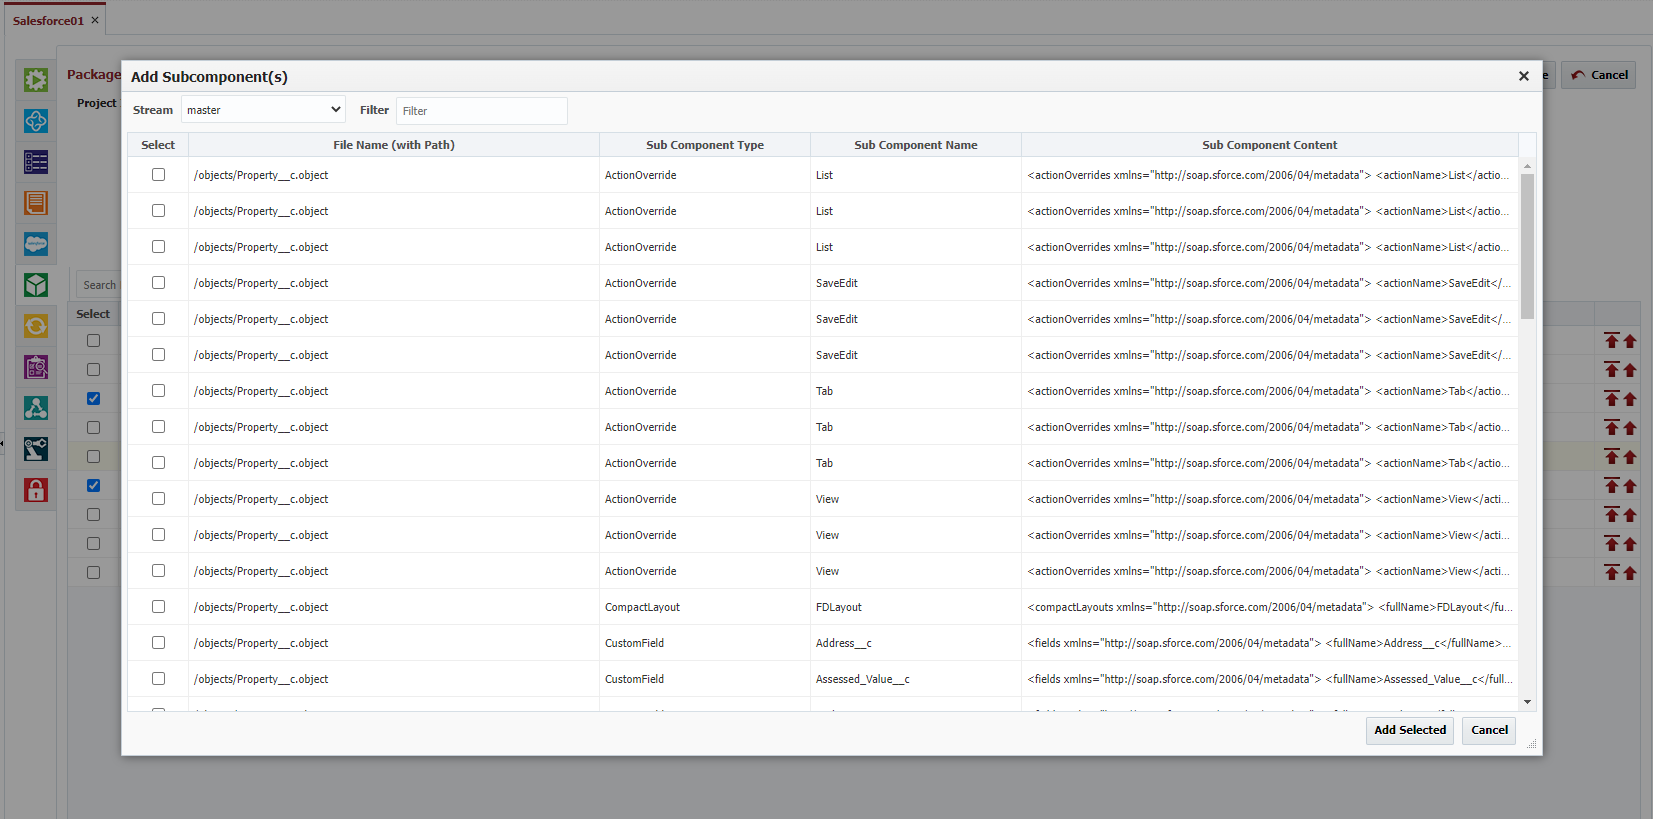
You can then select the subcomponents from the list to add to the package.
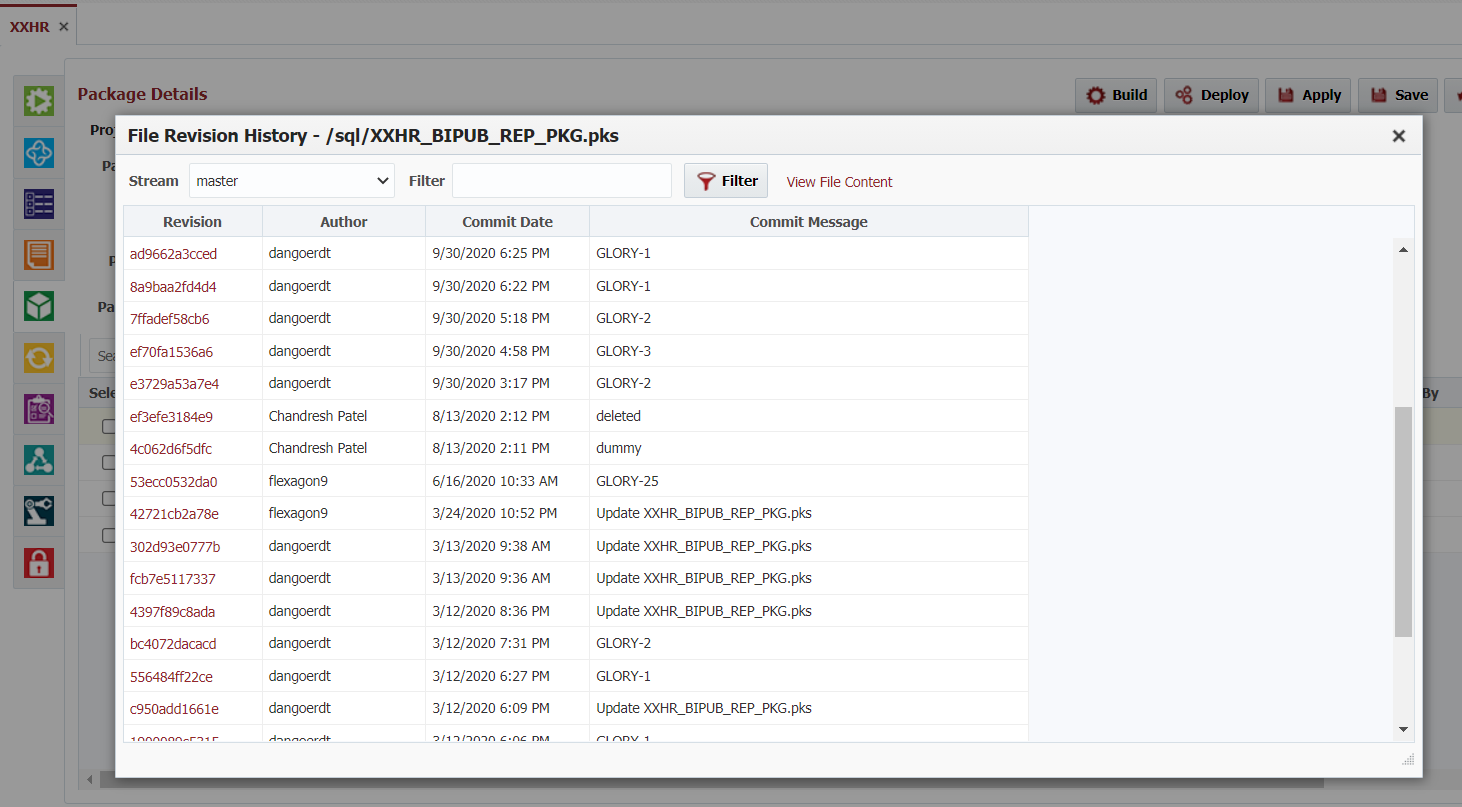
File Revision History
When user clicks on File Name (with Path) link, the File Revision History popup is displayed, as show below. View the latest content of a file with the View File Content link or view the file content at a specific revision by clicking on the revision hash.
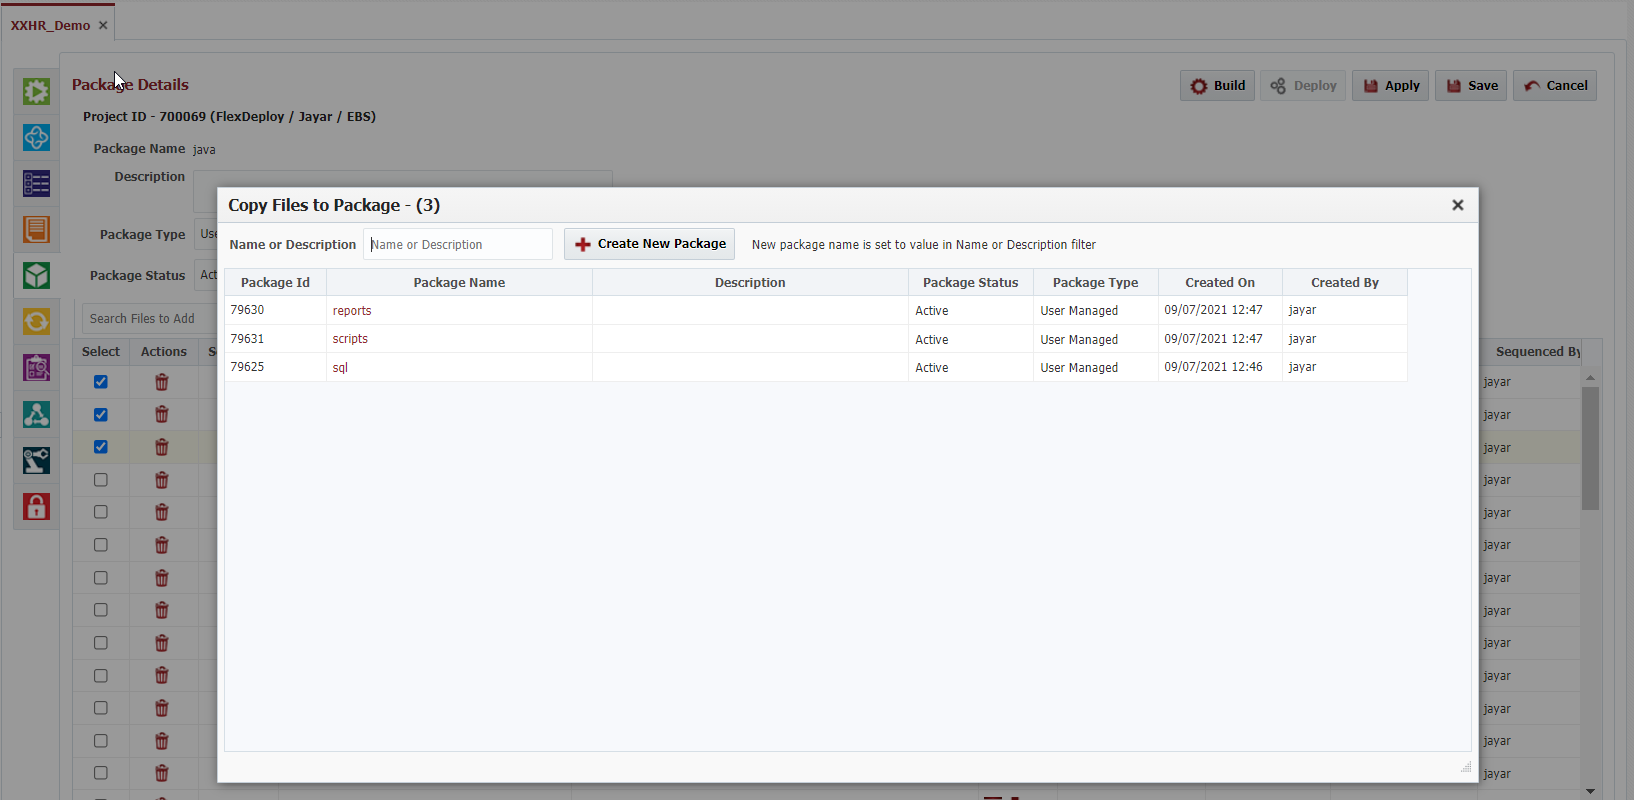
Copy to Package / Move to Package
When user clicks on Selected Files → Copy to Package, the Copy Files to Package popup is displayed, as show below. Search for existing packages in the project to copy files to or create a new package to copy files to. Creating a new package this way will name that package based on the value in the Name or Description search filter. After clicking on Create New Package button, the package will automatically appear in the table. Clicking the package name will trigger the copy action. Move to Package will have the same features as copy, but the selected files are removed from the current package aswell.
Package Editable
Packages with a status of "Completed" or "InActive" can not be built or deployed. Once a package becomes "Completed" then it can no longer be edited. Also packages that are a part of an active release can not be set to "Completed" or "InActive".
Related content
- style