- style
Defining Workflow Properties
Select Workflows from the menu.
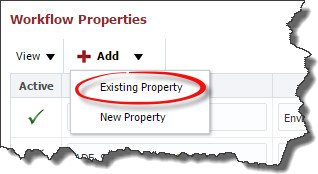
Navigate the workflow tree in the left pane, and click on the workflow to edit. Click the Add button under Workflow Properties to add a property.
From the Add drop down, choose an Existing Property or add a New Property.
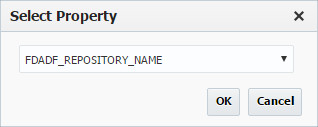
If you choose an Existing Property use the drop down in the Select Property window to add the property to the workflow.
Provide the required values for the property.
Field Name | Required | Description |
|---|---|---|
Active | Yes | Whether or not the property is active in the system. Defaults to "Yes". |
Key Name | Yes | The name of the workflow property. |
Property Scope | Yes | Whether the property is environment instance or property scoped. Defaults to "Environment Instance". |
Description | No | A description of the workflow property. |
Datatype | Yes | The data type of the property. Defaults to "String". |
Subtype | No | Reserved for future use. |
Required | Yes | Whether the property is required or not. Defaults to "Yes". |
Encrypted | Yes | Whether the property is encrypted or not. Defaults to "No". |
Created On | N/A | The date and time the property was created (read only). |
Created By | N/A | The user who created the property definition (read only). |
Updated On | N/A | The date and time the property was last updated (read only). |
Updated By | N/A | The user who last updated the property definition (read only). |
Click the Save button to save any changes.
Next, add the workflow (if it isn't already added) to the Instance by clicking Topology -> Instances. Then select the Instance to be modified and click Edit. Go to the Workflows step. Add the workflow which has the project property assigned to it. Click Save. Now the property will show up in the Project Properties section of the Project.
Note that adding properties to existing workflows will require you to provide values for any impacted project or environment instance (depending on the scope associated to the property that was changed).
- style


