- style
Endpoints
FlexDeploy utilizes an agentless architecture to connect to computers across private or public networks/clouds to execute build and deploy operations. This architecture provides a secured communication protocol (SSH) and eliminates the need for installing and managing software on every build and deployment target. In many cases no setup is required on an endpoint prior to configuring it within FlexDeploy. The following details the requirements for FlexDeploy endpoint systems.
- Requires a Unix or Microsoft Windows operating system.
- For Microsoft Windows, must have Cygwin installed, along with the openssh package. See the Cygwin Installation Guide for more information.
- Requires JDK 1.6 or higher to be installed.
- Requires a user account which FlexDeploy can connect with.
- Requires a directory which is writable by the user account that FlexDeploy connects with.
- The FlexDeploy server must be able to access the SSH port (default is port 22) on the Endpoint.
Viewing Endpoints
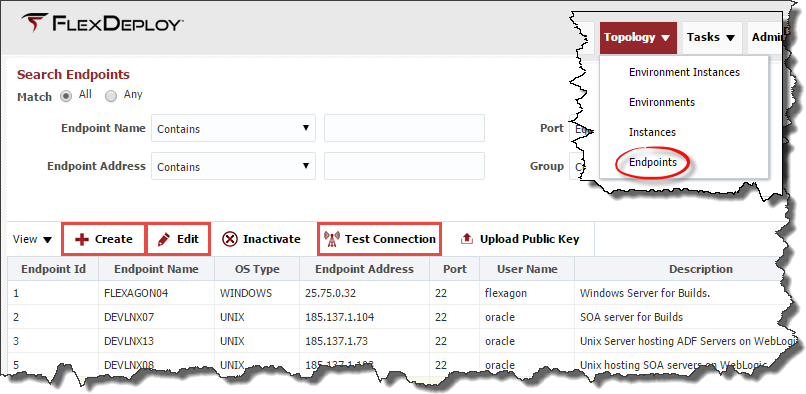
To view the configured Endpoints, select Topology -> Endpoints from the menu. Enter any optional search criteria and click the Search button.
Creating/Editing Endpoints
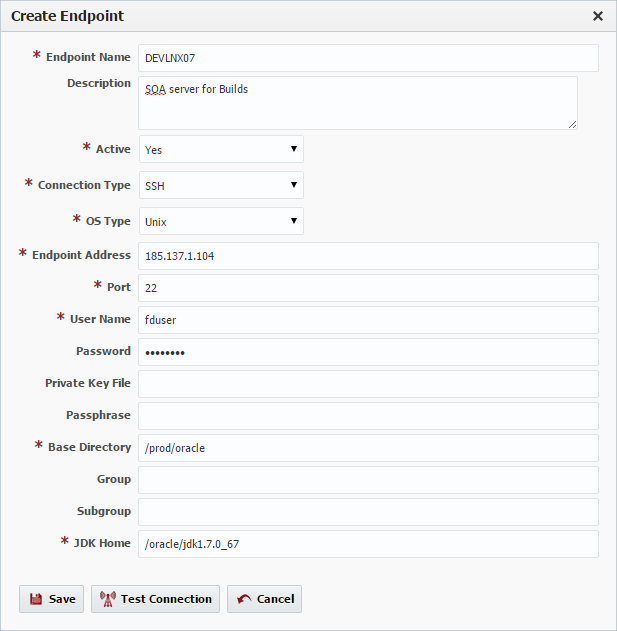
Click the Create button to create a new Endpoint, or select an existing Endpoint and click the Edit button to edit an existing endpoint. Enter the required fields as defined in the table below.
Field Name | Required | Description |
|---|---|---|
Endpoint Name | Yes | The name of the Endpoint. |
Description | No | An optional description for the Endpoint. |
Active | Yes | Whether or not the endpoint is active in the system. Defaults to "Yes". |
Connection Type | Yes | The connection type used for connection to the Endpoint. Currently only SSH is supported. |
OS Type | Yes | The operating system of the Endpoint. Unix and Windows are the supported types. |
Endpoint Address | Yes | The DNS name or IP address of the Endpoint. |
Port | Yes | The SSH port of the Endpoint (typically port 22). |
User Name | Yes | The user account on the Endpoint to connect with. |
Password | No | The password for the User Name. Either password or Private Key File is required. |
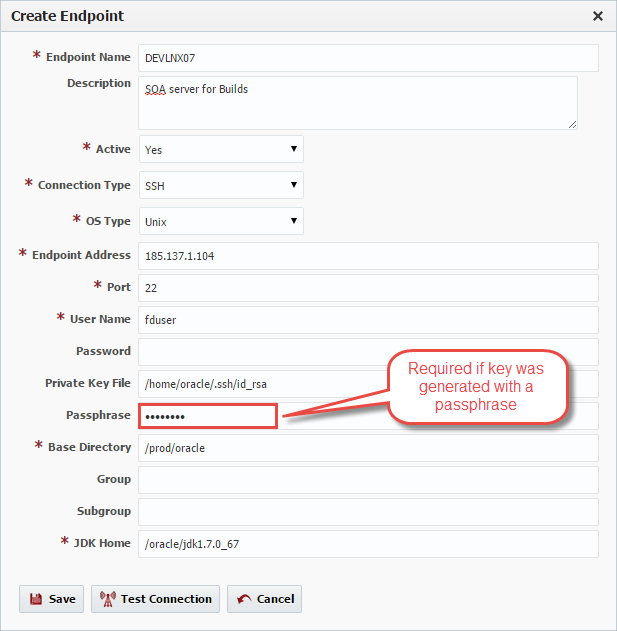
Private Key File | No | Fully-qualified path of the SSH private key file. Either Private Key File or Password is required. |
Passphrase | No | An optional passphrase used when the private key was generated. Only valid if a Private Key File is specified. |
Base Directory | Yes | A working directory on the Endpoint used by FlexDeploy. |
Group | No | An optional group identifier which can be useful when searching for Endpoints. |
Subgroup | No | An optional subgroup identifier which can be useful when searching for Endpoints. |
JDK Home | Yes | The JDK Home directory on the Endpoint. |
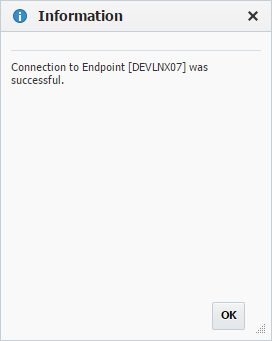
Optionally, click the Test Connection button to validate that the FlexDeploy server can connect to the configured Endpoint.
Click the Save button to save the changes to the Endpoint.
To inactivate an endpoint select an existing endpoint and click the Inactivate button. The endpoint will not be displayed if the criteria for Active is set to "No". To reactivate an endpoint, select the desired endpoint and click the Edit button. Then change the drop down menu for active to "Yes" and click Save. This endpoint is now active in the system again and ready for use.
SSH Authentication
FlexDeploy utilizes SSH to connect to it configured Endpoints. SSH uses public-key cryptography to authenticate the remote computer and allow it to authenticate the user. FlexDeploy supports two SSH authentication mechanisms as described below.
Password Authentication
The first mechanism is to use automatically generated public-private key pairs to simply encrypt a network connection, and then use password authentication to log on. In this case you must provide a User Name and Password to connect to the endpoint.
Public-Private Key Authentication
The second mechanism is to use a manually generated public-private key pair to perform the authentication, allowing the FlexDeploy server to connect to endpoints without having to specify a password. In this scenario, a public and private key pair are generated on the FlexDeploy server. The private key is kept secretly on the server by setting the permissions such that only the owner can read it (the userid which the FlexDeploy server is running as). The public key is copied to all endpoint computers which must allow access to the owner (user running FlexDeploy server) of the matching private key. While authentication is based on the private key, the key itself is never transferred through the network during authentication. SSH verifies whether the same person offering the public key also owns the matching private key. In this case you must provide the User Name, the path to the Private Key File on the server, and an optional Passphrase (an optional password assigned to the private key when it was generated).
Creating Public-Private Key Pair
If you do not already have SSH keys generated for the host where FlexDeploy is installed, login (or switch user) as the user which FlexDeploy runs as, and run the following OpenSSH command.
- ssh-keygen –t <rsa | dsa> ** where rsa or dsa is the encryption algorithm you wish to use.
Here is the sample output (with interactive prompts) using rsa encryption.
Generating public/private rsa key pair.
Enter file in which to save the key (/home/oracle/.ssh/id_rsa):
Enter passphrase (empty for no passphrase):
Enter same passphrase again:
Your identification has been saved in /home/oracle/.ssh/id_rsa.
Your public key has been saved in /home/oracle/.ssh/id_rsa.pub.
The key fingerprint is:
e4:dd:6d:88:e0:64:9c:3e:9d:f7:7d:6f:2e:56:dd:6b oracle@devlnx12
The key's randomart image is:
+--[ RSA 2048]----+
| |
| . . |
| B |
| B + + o |
| S = + o o|
| . . o .+|
| ..+|
| oE+|
| ..+o|
+-----------------+
It is typical to use the default file name and location to store the private key (which is in the .ssh subfolder of the user's home directory). You can optionally secure the private key file with a passphrase. It is an SSH requirement that the private key be readable only by its owner (e.g. oracle in the example above). So you must change the permissions accordingly (e.g. chmod 600 /home/oracle/.ssh/id_rsa). You will receive an error at connection time similar to the following if you omit this step.
Permissions 0777 for '/home/oracle/.ssh/id_rsa' are too open.
It is recommended that your private key files are NOT accessible by others.
This private key will be ignored.
The /home/oracle/.ssh folder on the endpoint must have drw------- permissions (eg. chmod 700 /home/oracle/.ssh)
Uploading the Public Key
We must now copy the contents of the public key to each endpoint host. This step can be performed manually by copying the contents of the public key file on the FlexDeploy server and appending it to the end of the following file on the endpoint:
- ~/.ssh/authorized_keys (Note that you will need to create this file if it does not already exist)
Sample contents of an authorized_keys file (containing two public keys):
ssh-rsa AAAAB3NzaC1yc2EANAADAQABAAABAQC9GvGjUyL1towJF5uxp3jqeFcwaBm0GhqXaPrhWH/iX1H1lalPmwR3N791lR7oTONl6TZShLX2sq64rGL+HYF+W1RxjZqydcWDEJsz2MD525NisTuXI2HjVMYablXobDtv5sc12iM8hdh6nJXAlTHQ1wA4izRX2via5nWWtZUqBTyicpR1odQb4pcoTjPOsEPrwS7/sU51kLqR+y1G5AM307VhLBLumS3gB/kj+pBoIZEk2LwwuMeaRhywe9N2+M+hO7c1TijseACmr0DHN9ZvZhoBBgl7xBUFqxxOrMktst7arpxEvQXz4aUh+58smWSA4iMHXvzMc/xSXUp9eIov comment1
ssh-rsa AAAAB3NzaC1yc2EAAAABIwAAAQEAwnP9Sahi0y1rypBq8i7MbV8QR21g+nC4AIrnSsoyh7T4DyjeScJS6SWzBLSNrv7bX+Lm7pUqMEOKwR68kk8SLcNOStPsyBoZJNeiE6R11rXOufN4aebc3aT4JW/qcb1nQwGnP9ubfGVAMEf3rvU0OBt18CAvNux2Gr8t1kpubZQyXtK9mvjcYPUgvUEQIwL+kShgRMQiqw6FOyUuE22jIqxnr0avALH32fB7B4p7DsfEC3M1+Yb9PptaUQpSkk0OyU3bQh3gCNojqOVMNZ+IJREyhh9TnlHf3/FVED29aC6DxB3bEERymXRSVFlV2dedlXjeTjsVdqurgD4CHF382Q== comment2
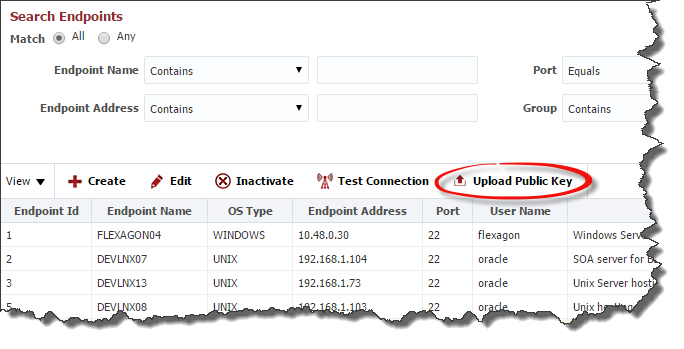
The public key can also be copied to the endpoint's authorized_keys file using the Upload Public Key button.
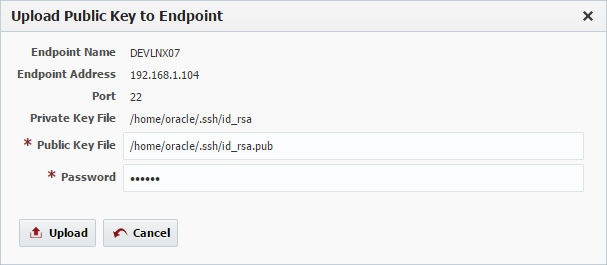
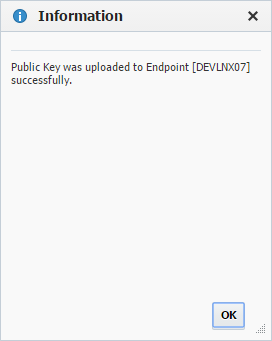
Validate that the derived name and location of the public key is correct, and enter the password for the Endpoint connection user (if not already provided on the Endpoint definition). Click the Upload button to upload the public key to the Endpoint.
Special Note for Oracle Java Cloud Service
The SSH connectivity for the Java Cloud Service is no different than when running on-premise. However, by default you will not know the password for the oracle user. You have two options for configuring endpoints on Java Cloud Service instances.
- Using PuTTy, connect to the Java Cloud Service instance VM using the opc user and the private key you generated when you created that instance. Sudo to root and change the oracle password. You can now use this password to configure the endpoint to connect using the oracle user.
- Manually copy the public key into the authorized_keys file within the .ssh folder of the oracle home (/u01/app/oracle/tools/paas/state/homes/oracle/.ssh/authorized_keys). You can also use the upload public key feature of FlexDeploy if you know the oracle password (e.g. by following the instructions in #1 above). Once the keys are in place you can configure the endpoint to reference the private key instead of the password.
Endpoint Directory Structure
The structure of the configured base directory on an endpoint is as follows:
plugins
The plugins directory holds each version of a plugin that has been utilized on the endpoint. There can be several different plugins loaded and many versions of a given plugin.
security
The security directory holds information related to the SSH connection between the FlexDeploy server and the endpoint server and is used for secure communications.
work
The work directory contains every invocation of a plugin operation that has occurred on the endpoint. There is additional file structure under the work directory based on the execution project id and the current execution id of the given project.
<projectId>/<executionId>/temp
Directory for plugin execution to checkout and manipulate data or files until moved to the artifacts directory for storage.
<projectId>/<executionId>/artifacts
Directory where artifacts are stored so they can be transferred back to the FlexDeploy server and stored permanently in the artifact repository.
<projectId>/<executionId>/internal
Directory where all internal FlexDeploy scripts are stored to execute the plugin step.
<projectId>/<executionId>/reports
Not currently utilized.
<projectId>/<executionId>/test-results
Directory for test plugins like Junit to place the test result to be processed.
- style
