Defining Workflow Properties
- Copy Page Tree
- Ben Hoffman
- Chandresh Patel
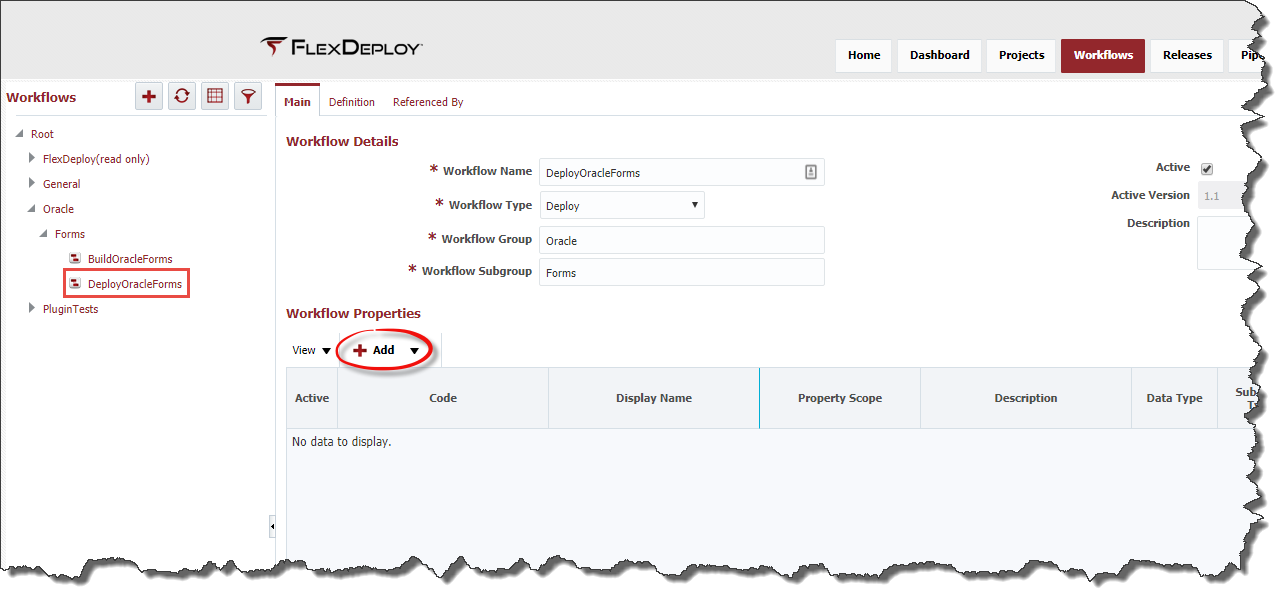
Select Workflows from the menu.
Navigate the workflow tree in the left pane, and click on the workflow to edit. Click the Add button under Workflow Properties to add a property. You can add (reuse) an existing property or create a new property.
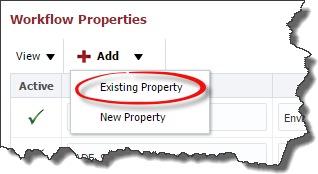
From the Add drop down, choose an Existing Property or add a New Property.
If you choose an Existing Property use the drop down in the Select Property window to add the property to the workflow.
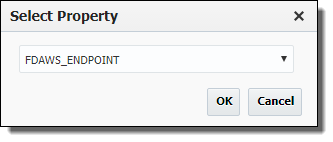
Clicking OK will add that property to the workflow as read-only.

Choosing New Property will add a new row to the properties table with empty fields that need to be populated.

Provide the required values for the property.
Field | Required | Description |
|---|---|---|
Active | N/A | Property is always active, whether it is part of Workflow property list or not is what matters. |
Code | Yes | User-defined code that identifies this property, which is used in the workflow and/or plugin execution. |
| Display Name | No | Display name, which is used on the property pages, etc. |
Property Scope | Yes | Whether the property scope is Environment Instance or Project. Default is Environment Instance. |
Description | No | A description for the property. |
Data Type | Yes | The property's data type. Default is String. |
Sub Data Type | No | Allows the user to get additional validation for Directories, JDBC URLs, and URLs. |
Encrypted | No | Whether the property is encrypted or not. Encrypted property values will not display on the screen or be readable in any of the logs. Default is No. |
| Display Details | ||
Rows | No | Display attribute that defines the number of rows in the input field on the Property page. |
Columns | No | Display attribute that defines the number of columns in the input field on the Property page. |
List Data CSV | No | Allows the user to define a comma-separated list of values that will be displayed in the Workflow Request page. If given, a Drop-down component will be displayed on the Property page. |
Multi Select | No | Determines if multiple of the List Data CSV values can be selected. |
| Validation Details | ||
Required | No | Whether the Property is required or not. Defaults to No. |
Length | No | For String data type, this controls length of value being entered. |
Min Value | No | User can control the minimum value for data types such as Integer, Float, Double and Long. |
Max Value | No | User can control the maximum value for data types such as Integer, Float, Double and Long. |
Default Value | No | Default value can be entered as Groovy script or literal. When using Groovy script, following Groovy variables are available:
|
Validation Groovy Script | No | Enter Groovy script to define validation for property value. The script should return true or false to indicate validation success or failure.
|
Updated By | N/A | The user who last updated the property (read-only). |
Updated On | N/A | The date/time in which the property was last updated (read-only). |
| Actions | N/A | Contains the icon to remove the property. |
Click the Save button to save any changes.
Next, add the workflow (if it isn't already added) to the Instance by clicking Topology -> Instances. Then select the Instance to be modified and click Edit. Go to the Workflows step. Add the workflow which has the project property assigned to it. Click Save. Now the property will show up in the Project Properties section of the Project and Environment Instance properties page.
Note that adding properties to existing workflows will require you to provide values for any impacted project or environment instance (depending on the scope associated to the property that was changed).
- style