Creating/Editing a Pipeline Stage
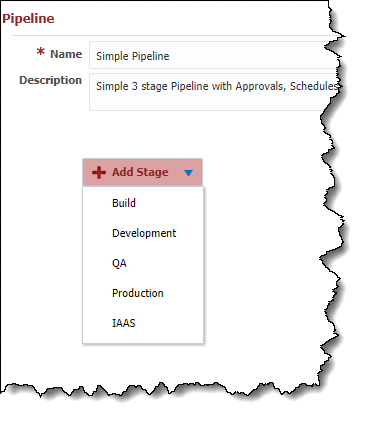
While creating or editing a pipeline version, click the Add Stage drop-down button and select the stage/environment.
The stage is now added to the pipeline version without any gates or steps. To add steps and gates to the stage, click on the Maximize button.
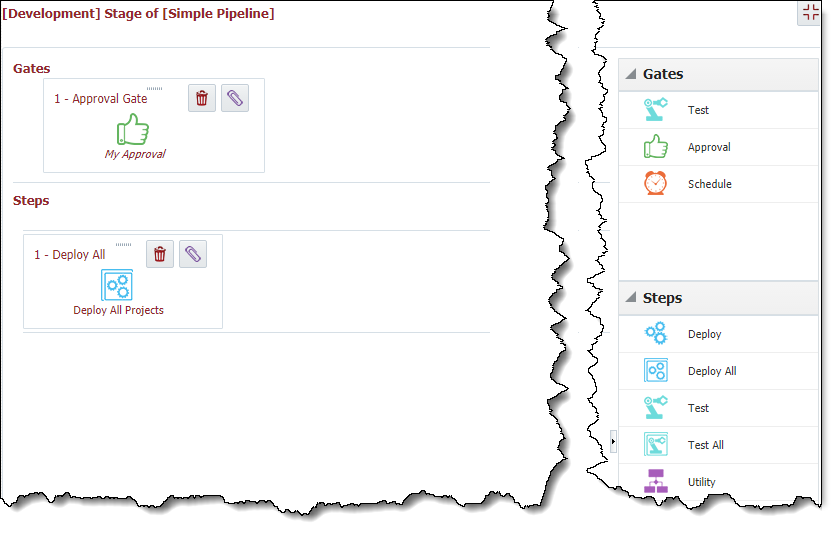
The Pipeline Stage editor is a drag and drop interface which allows adding, removing, and configuring gates and steps. To add a gate, drag the desired gate from the pallet on the right, and drop it into a drop zone of the gate area within the pipeline stage canvas. All gates are executed in sequential order according to the order they are placed from left to right. You can re-order gates by dragging and dropping them in the desired sequence.
To add a step, drag the desired step from the pallet an the right, and drop it into a drop zone of the step area within the pipeline stage canvas. All steps may be executed either sequentially or in parallel. Steps in the same row are executed in parallel, whereas, steps in different rows are executed sequentially after the step above it has completed. You can re-order gates by dragging and dropping them in the desired sequence. Note that the order of parallel steps in inconsequential.
Click on the Delete button on the gate or step to delete it.
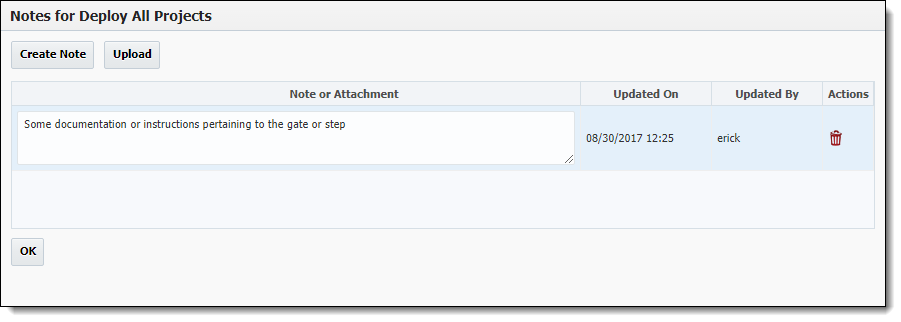
Click on the Paperclip button on the gate or step to upload notes or attachments as documentation or instructions. These notes are available on executions within the release dashboard, and can be used as instructions or reference material.
After completing any changes, click on the Minimize button in the upper right-hand corner to return to the pipeline version screen to add/edit additional stages or save or activate the pipeline version.
Gate & Step Types
Approval Gate
Deploy All Step
Deploy Step
Execute All Step
Execute All Utility Step
External Approval Gate
Group Step
Manual Step
Notification Step
Schedule Gate
Schedule Step
Test All Step
Test Gate
Test Step
Utility Step
Wait Step
Pipeline Groovy Variables and Methods
Related content
- style


