Redmine Setup
- Muthu Sankaralingam
- Chandresh Patel
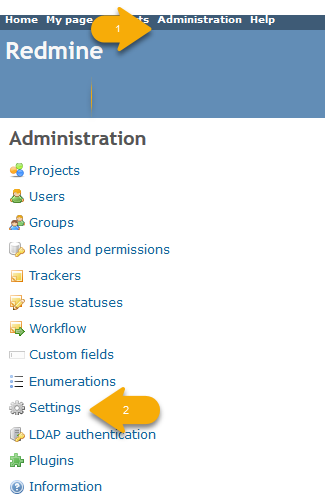
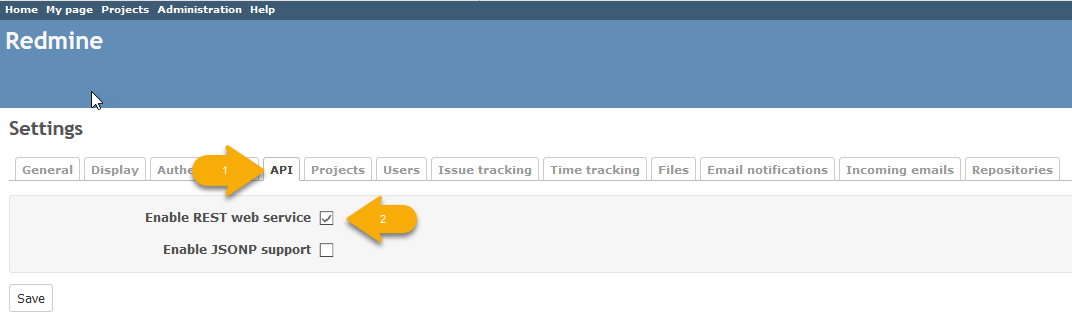
FlexDeploy uses REST API to integrate with Redmine. To setup, login to Redmine with administrator privilege, go to Administration → Settings → REST API and select the "Enable REST web service" checkbox
Add Status
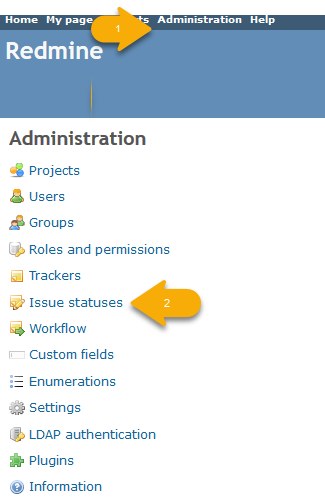
To create new status, go to Administration → Issue Statuses
Using the New status button, you can create new statuses. Here are some example statuses created in Redmine

The status once created will have an id, generally they start with 1 and are sequential in the same order as listed above. To get the ids, you can use Redmine's Issue Statuses REST API to verify status ids.
Workflow
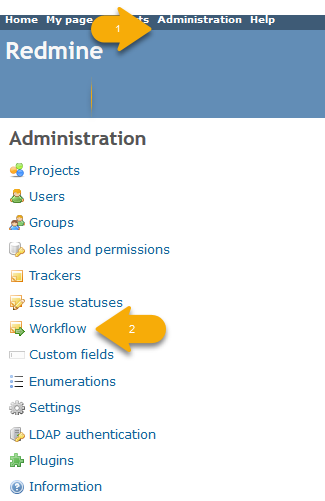
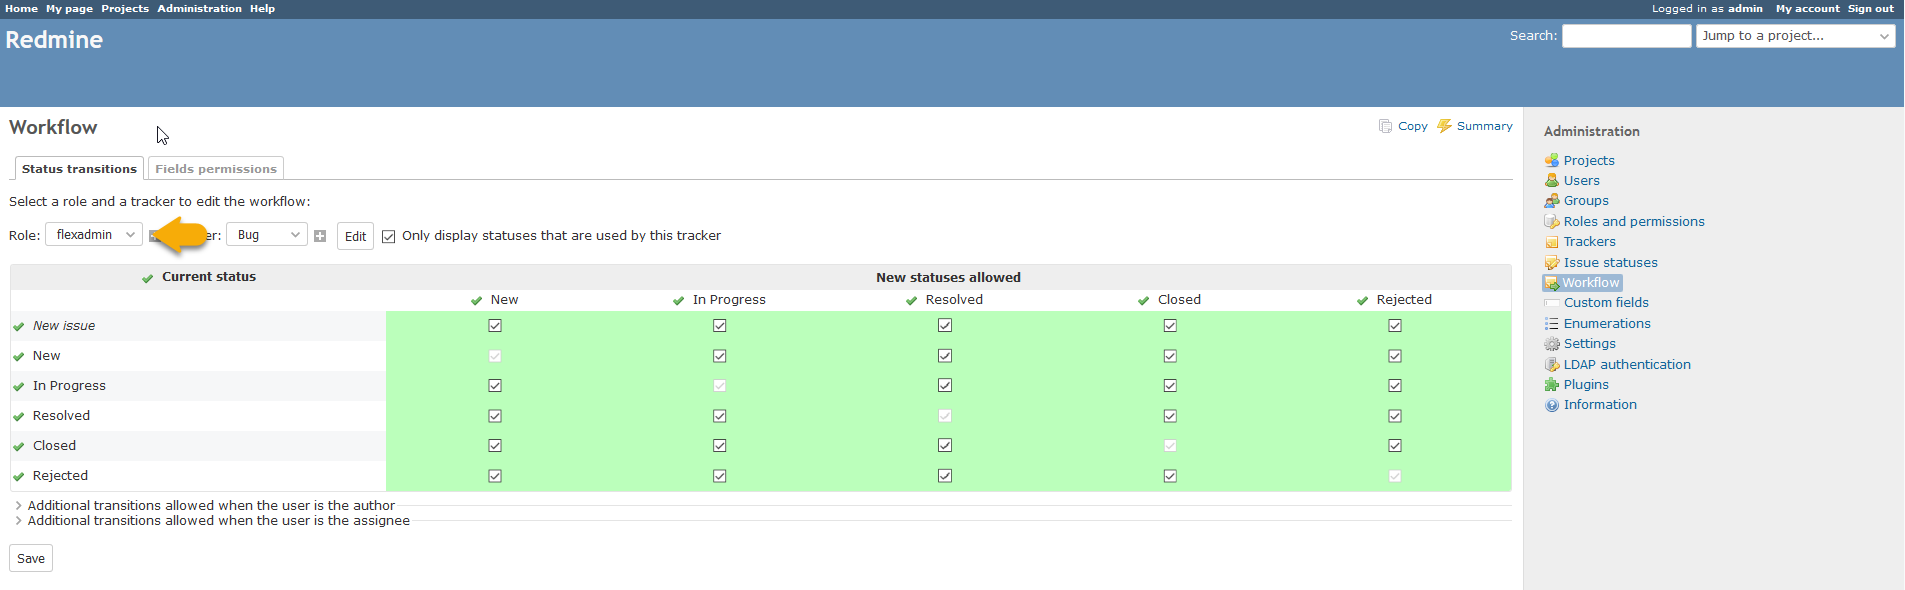
FlexDeploy allows to update Redmine issue status during build and deploy. The status updates through REST API requires to allow status transitions for the role of the FlexDeploy user id. To set the status transition, please follow the below step, Administration → Workflow
Go to the Workflow and setup the status transitions. Here is a sample setup for flexadmin role. Please follow this Issue statuses for more details.
User and Projects
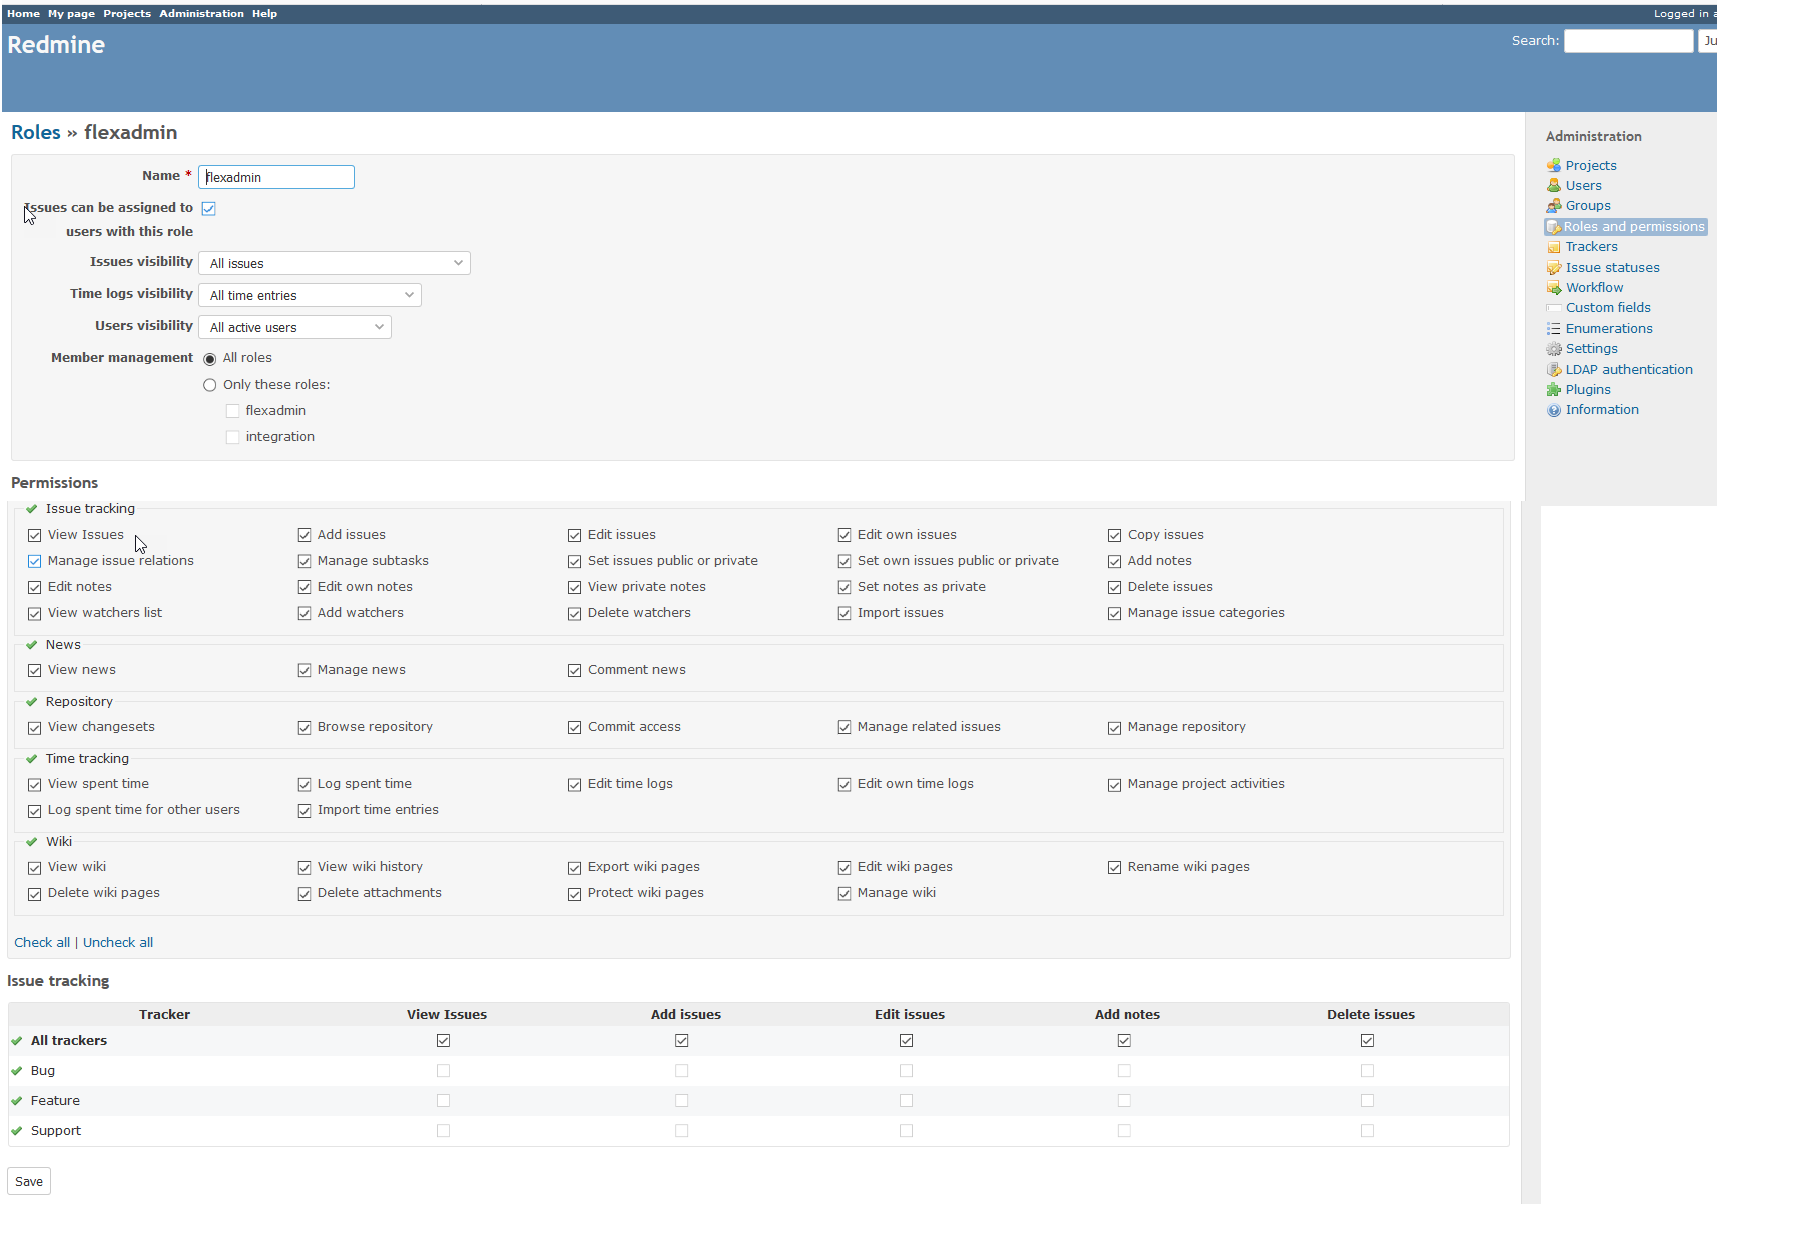
FlexDeploy user id role should have the necessary access to edit Features/Support/Bugs types. Please make sure to give the Roles and permissions accordingly for the role.
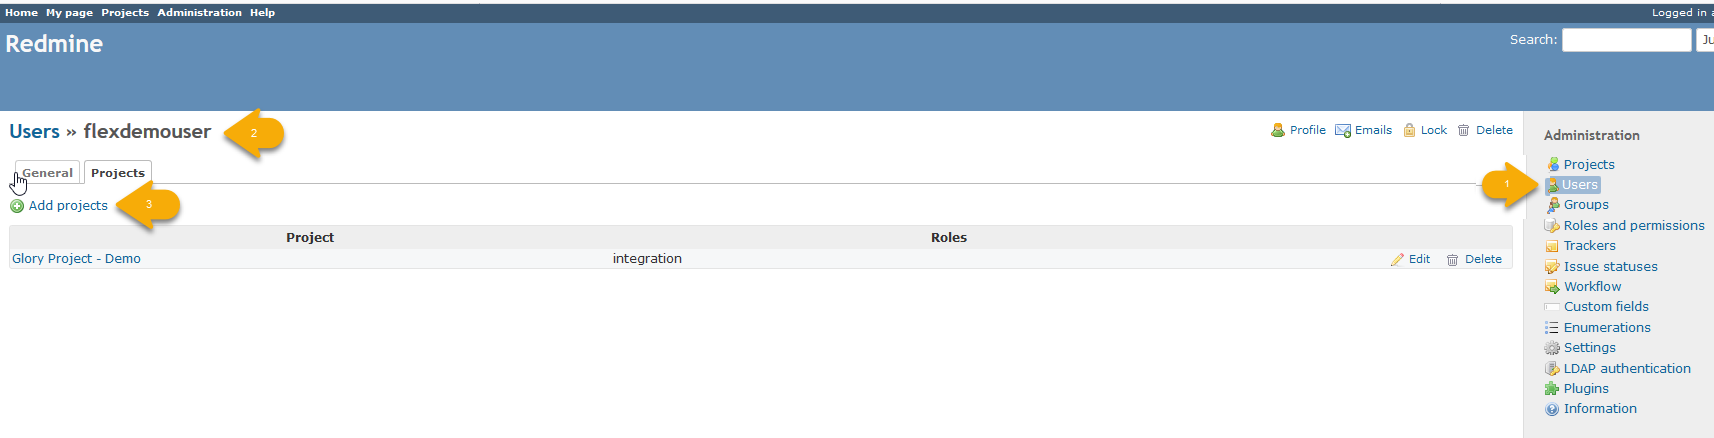
Once the permissions are set, click Users link from the Administration menu, select the user and add the projects. If you have multiple projects then you need to select all the projects that need the issues to be updated from FlexDeploy. The same can be done from the Projects under the Administration menu and then go the Members tab and add the FlexDeploy user id for relevant projects.
Related content
- style