Environment Creation (Weblogic Resources)
- Copy Page Tree
At the completion of this section, you will:
- Understand the use of environments in the deployment process
- Be able to create/modify an environment
Now we need to create an environment in FlexDeploy that mimics the structure of the customer's actual environments. Environments are a logical grouping of servers, technologies and applications that form an independent solution for development, testing and production. Deployment of a configuration to different environments allows developers to simply develop new features in Dev, without interfering with the QA group testing services. We will create three environments in order to show the deployment of a composite across multiple environments.
Viewing the current list of Environments is accomplished by selecting Topology from the menu and then selecting Environments from the left menu.
![]()
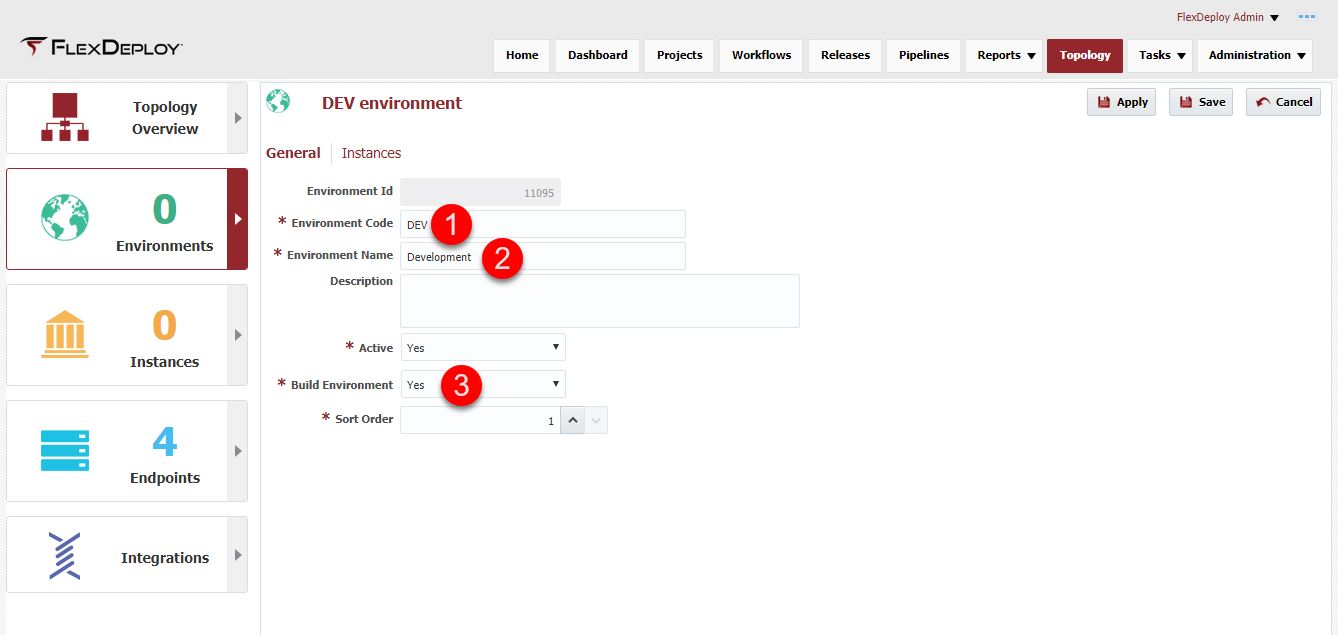
Click on the + in the upper right corner to create and configure a new Environment. Configure the following:
- Environment code
- Environment name
- Build environment, this indicates whether this environment will appear in the drop down during the build execution.
For the configuration build, we do not actually need to compile any code, so a separate build environment would not be useful. Instead, we will just use DEV as our build server, where FlexDeploy will initially check out the configurations.
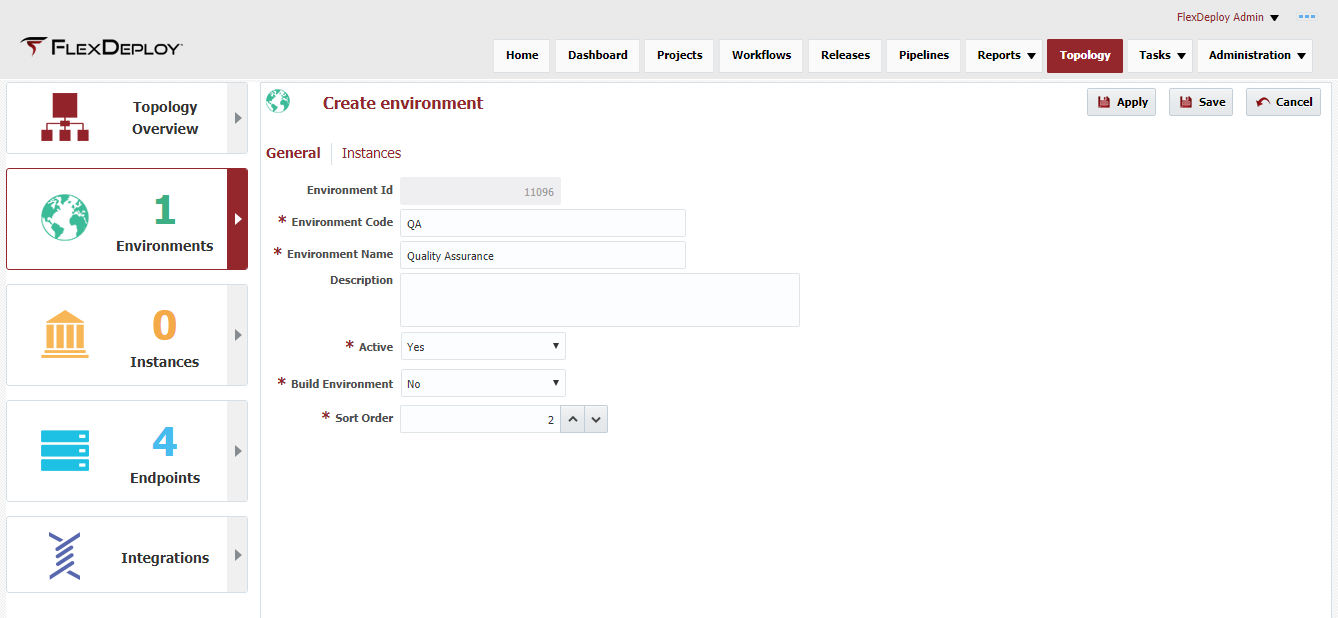
We will create two additional Environments for QA and PROD so we can deploy to multiple environments. The Build Environment drop down should be No for these Environments, otherwise these Environments will appear in the drop down during build execution.

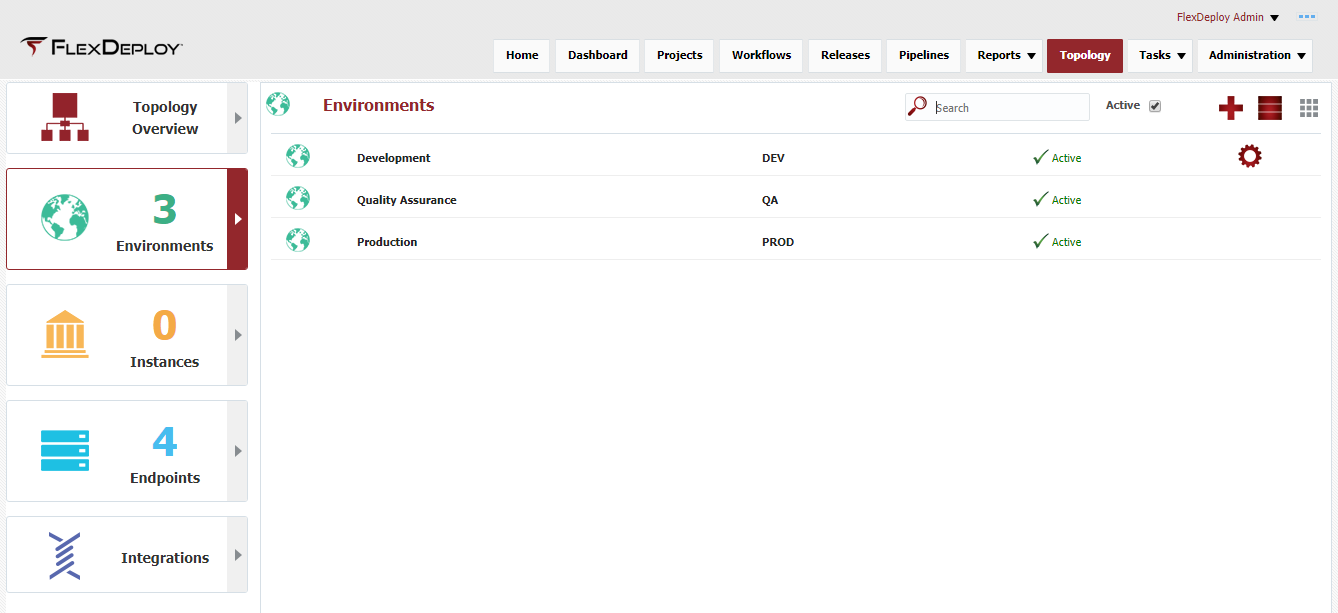
After creating these, the Environment screen should look like this.
| Completed 4 of 10 Sections | Continue to SOA Instance Creation | Back to Endpoint Creation |
|---|
- style