Creating/Editing an External Approval
Select Projects from the menu.
Double-click on an existing folder or application and click on the Configure tab.
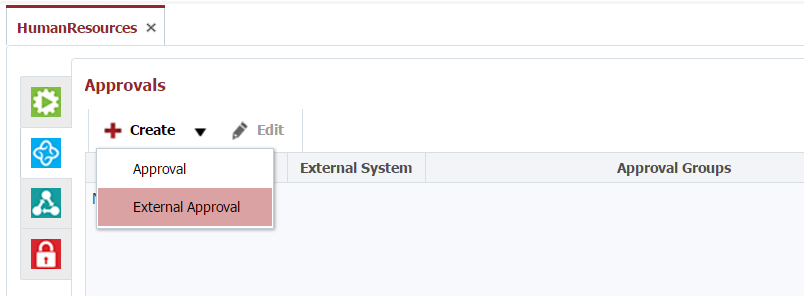
Click the Create->External Approval button to create a new approval, or to edit an existing approval, select the approval and click the Edit button.
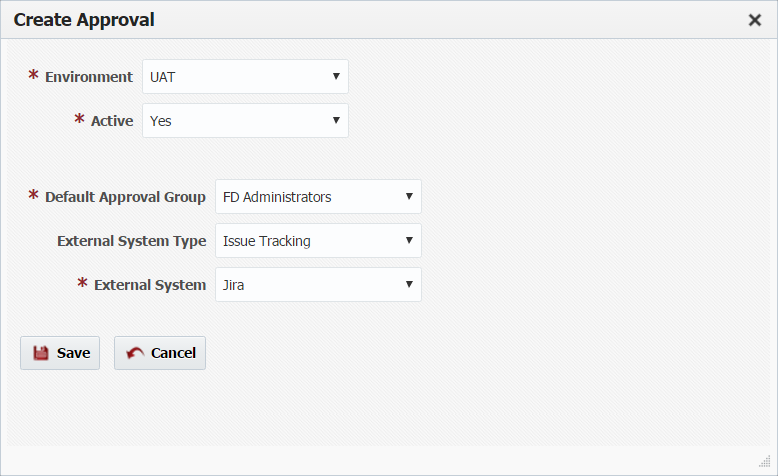
Select the environment, and a default approval group who can approve this request in FlexDeploy should the external system be unavailable. Next, select the external system type of Issue Tracking or Change Management. Based on the type of external system type, select the external system which will manage the approval (available options are JIRA for issue tracking, and ServiceNow for change management.
Click the Save button to save the changes.
For issue tracking systems, the approval is created based on ticket(s) referenced on the build request. This is either through ticket number references in SCM commit messages, or references on the build request (either through the FlexDeploy application UI, or via the REST API). When the build (project version) is submitted for deployment, the associated ticket is used to link to the approval. When the ticket is approved in the external system, the FlexDeploy approval task is automatically approved.
For change management systems, the approval is created based on the ticket(s) associated to the deployment request. This association is either through a reference on the deployment request (either through the FlexDeploy application UI, or via the REST API), or due to auto-creation configured at either the global, folder, application, or project level. When the ticket is approved in the external system, the FlexDeploy approval task is automatically approved.
- style

