Full Deployment
- Copy Page Tree
- Jack Reynebeau
- Karl Henselin
Builds and Deployments are initiated for Full Deployment projects from within the light-green  execution tab.
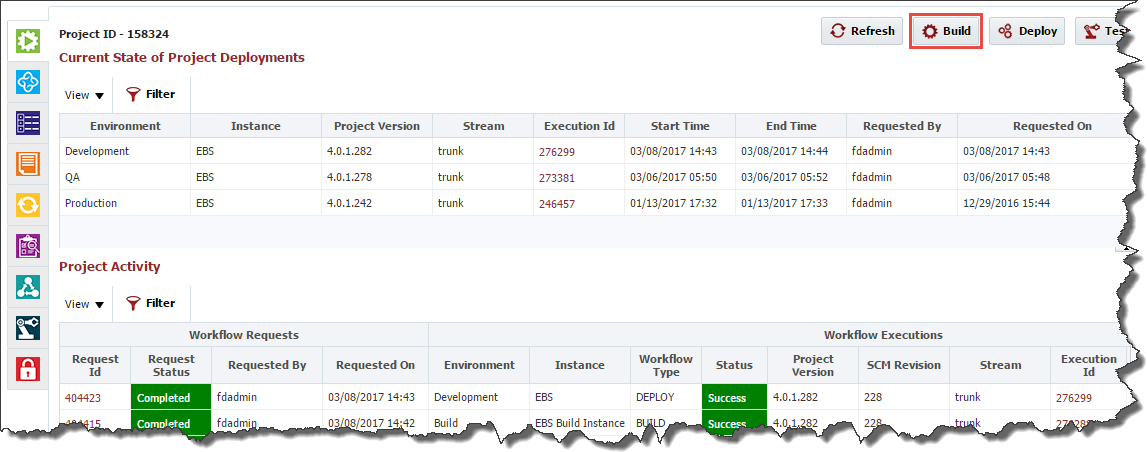
Click on the Build button to launch the build request form.
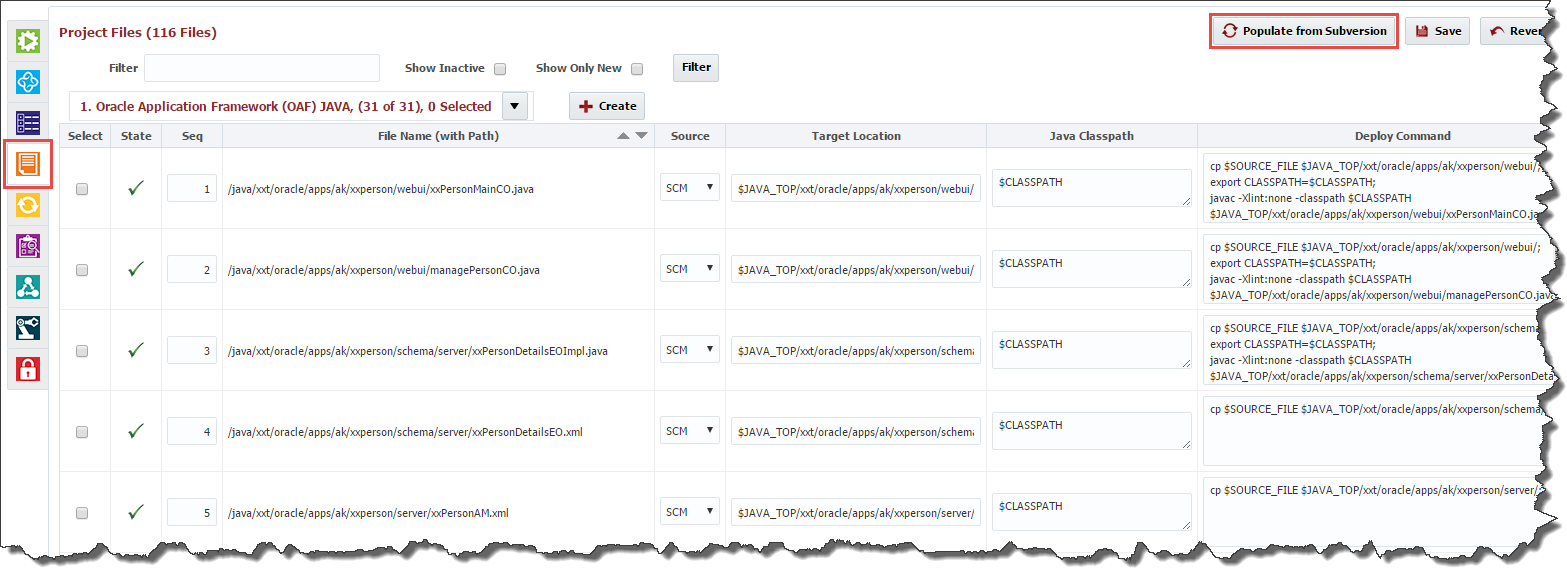
If there are files that you need to customize attributes for, you can use the Project Files tab to do so. This screen is similar to the Project Files tab of partial deployment. First, populate your files, then edit attributes as needed. Finally, click Save to store your changes so they can be used in the next build and deploy.
In Full Deployment mode, all files will be deployed, even if they are not populated on the Project Files screen. The Project Files screen is used to edit attributes, not select files in Full Deployment Mode.
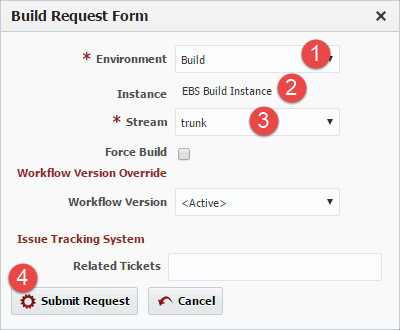
Select the target Environment, Instance, and Stream, and then click the Submit Request button to initiate the build.
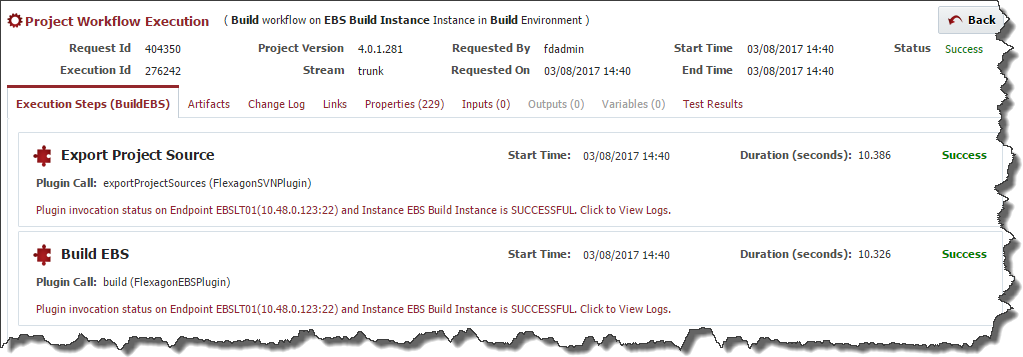
Click on the Execution Id to drill into the step details of the workflow or view the logs, which is critical in the case of failures.
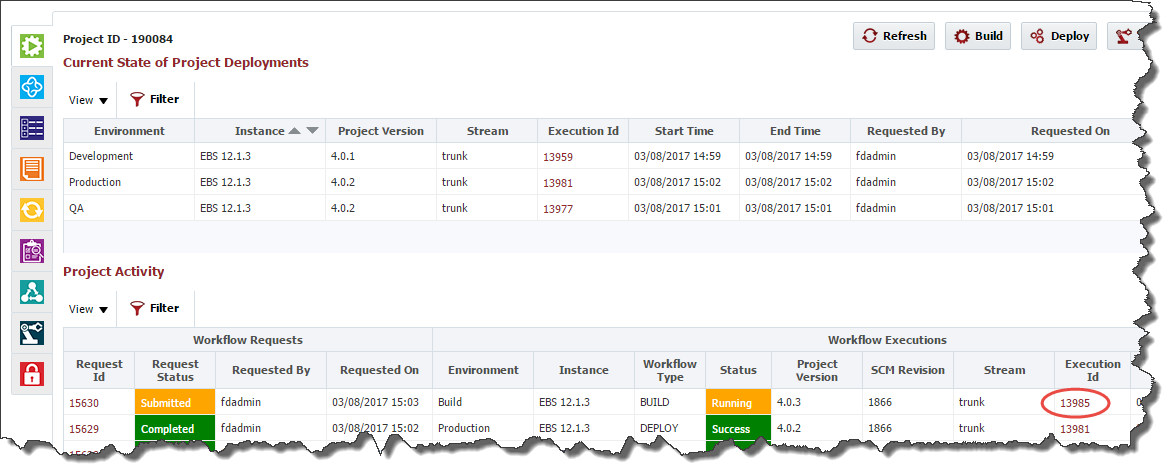
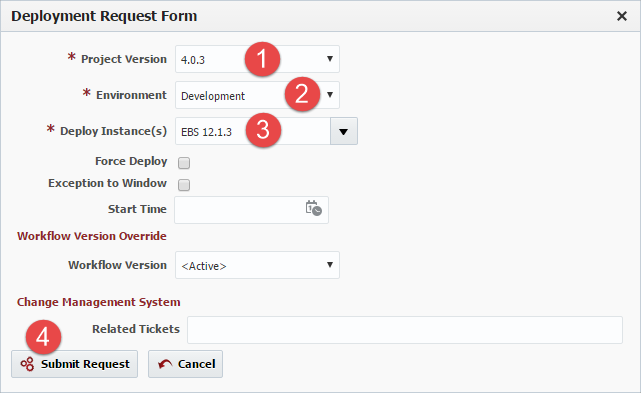
Click the Back button to return the execution screen, and initiate a deployment request by clicking on the Deploy button. In the deployment request form, select the Project Version to deploy (defaults to last build version), the target Environment and Instance, and click Submit Request.
Similarly to the build request, click the Execution Id of the deployment request to view the step detail or view the execution logs.
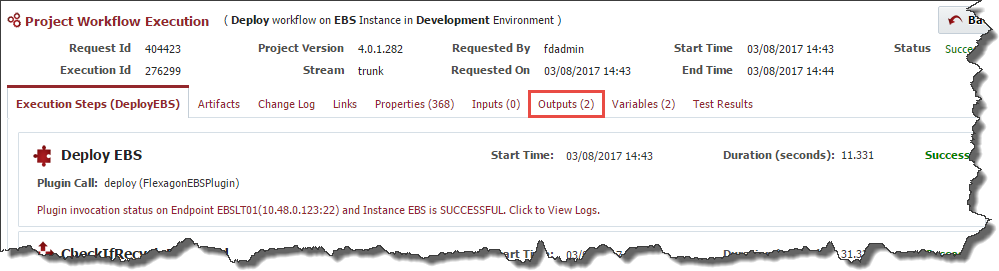
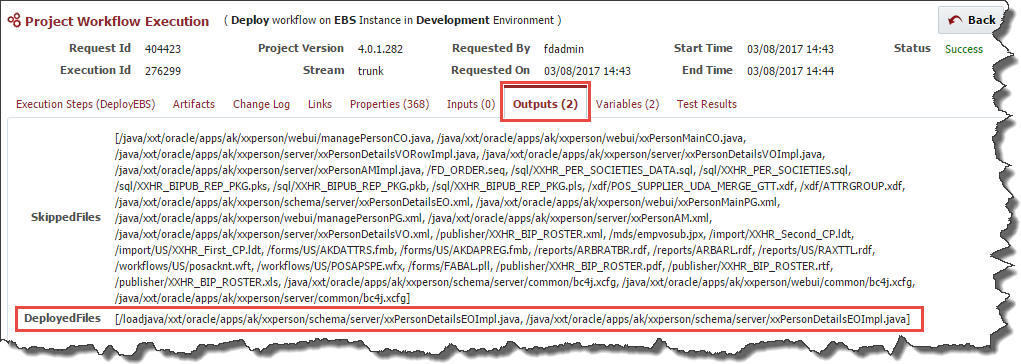
With the Full Deployment model, only objects which have changed since the last deployment are actually deployed. Click on the Outputs tab to review which files were actually deployed, and which files were skipped because they did not change.
- style