Creating/Editing an SCM Instance
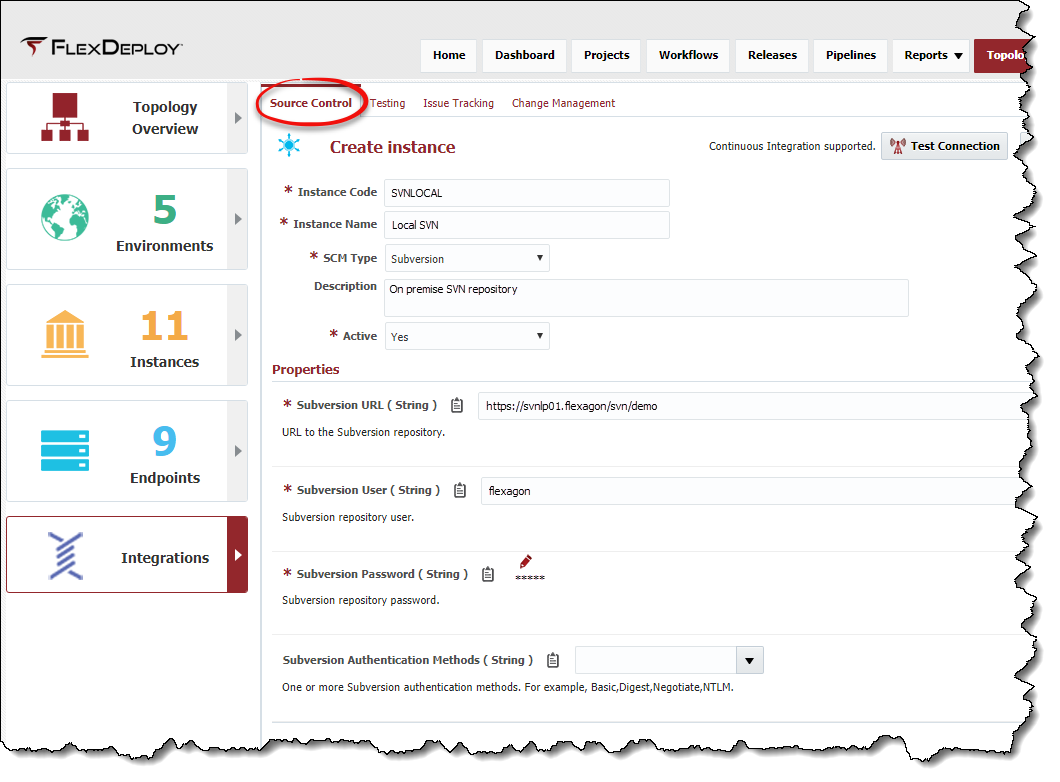
To create an SCM Instance, select the Source Control tab, and click thebutton. To edit an existing Instance, click on an Instance row from the list.
Enter values for the fields as described in figure below.
Selection of the SCM type dynamically prompts for properties required for that SCM. Clicking the Test Connection button will use the values you entered to connect to the SCM Instance.
Field Name | Required | Description |
|---|---|---|
Instance Code | Yes | Short name for the Instance. |
Instance Name | Yes | Long display name for the Instance. |
SCM Type | Yes | Subversion, GIT, Microsoft TFS, CVS, PVCS and ClearCase are the supported SCM Instance Types. Once the SCM Instance is saved, this cannot be modified. |
Description | Yes | A description of the Instance. |
Active | Yes | Whether or not the Instance is active in the system. Defaults to "Yes". |
URL | Depends | URL to the repository (SubVersion,Git, TFS, CVS or PVCS) If using SVN, For example, if the path to your project is: https://subversion.flexagon.com/svn/trunk/BRANCH-4.0-fixpack1/FlexDeploy The the SVN instance should be set to https://subversion.flexagon.com/svn/ and the trunk path script should be set to "/trunk/BRANCH-4.0-fixpack1/FlexDeploy" (Note this is in quotes as it is a groovy script input.) If using PVCS, This will be the Project Database client name configured on the FileServer. e.g. /opt/pdb/pdbname |
User | Depends | User name to login to the repository. |
Password | Depends | Password to login to the repository. |
Click the Save button to save the changes. Optionally click the Apply button to save the changes, but remain on the current screen until the Cancel button is clicked.
Related content
- style

