...
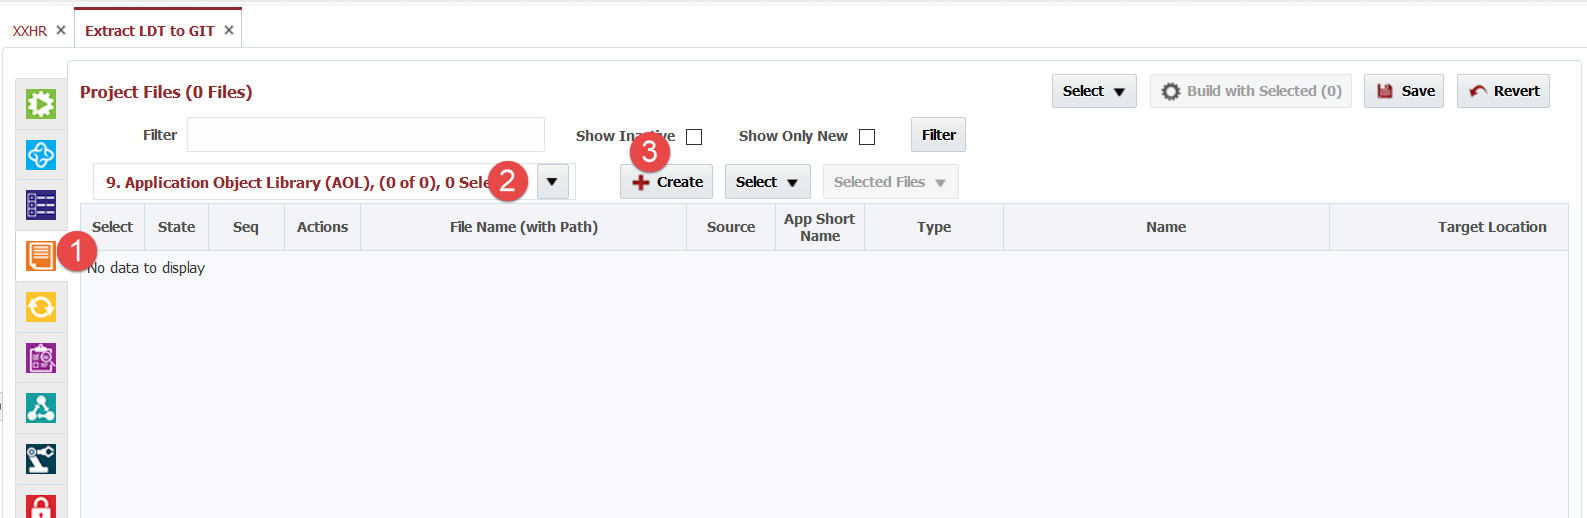
- Select 9. Application Object Library.
- Click Create.
- Enter path for output file name for extracted LDT. This path should match with location in Git repository. Otherwise you need to adjust copy in Extract LDT workflow accordingly. Path name will generally end with .ldt.
- Click Evaluate.
- Change Type and Name as appropriate.
- Change any other attributes if necessary.
- Click Evaluate.
- Click Save.

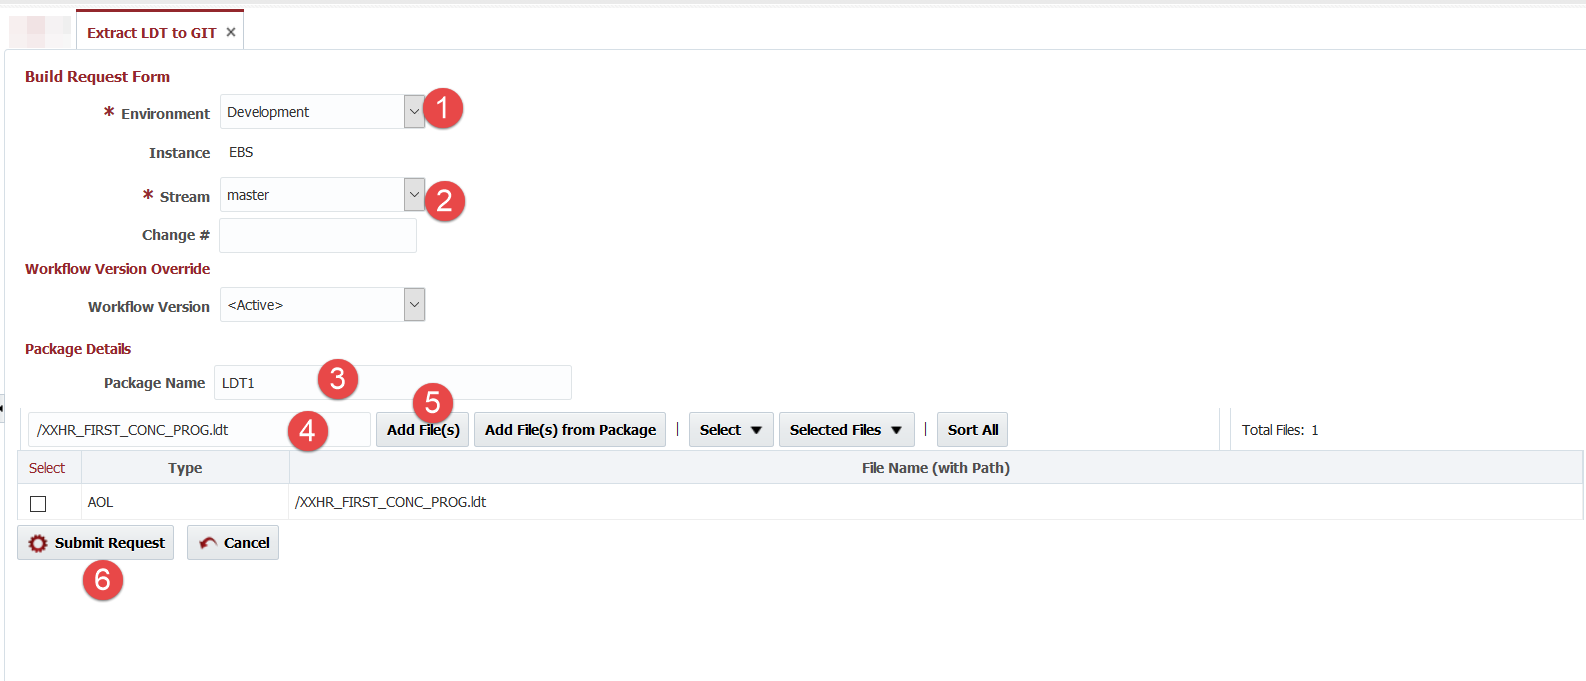
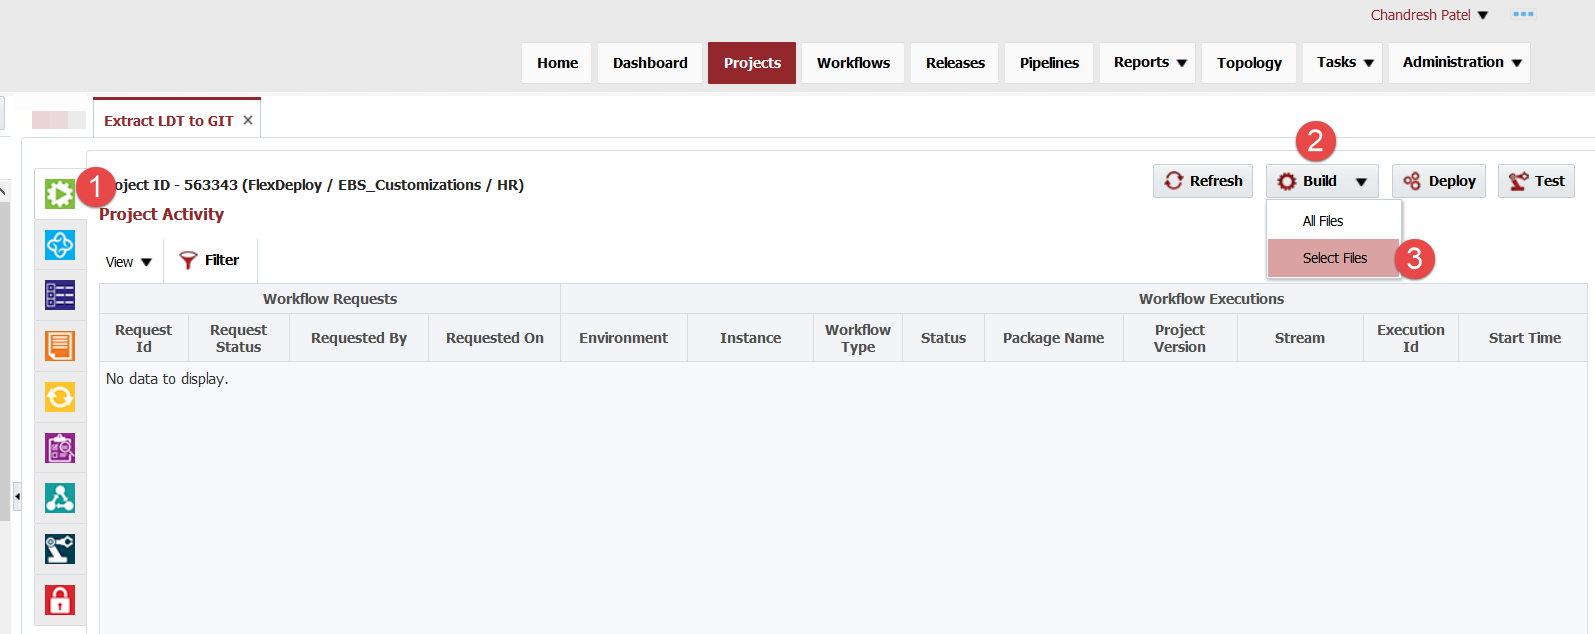
You can add more files later if necessary. Now let's execute Build for this project. In this example, I am showing only one file extract but you can run All Files or selectively run for one or more files. Let's start by Clicking Build - Select Files. (Build Request Form can be launched from Files tab as well).
Now, select environment where you want to Extract files from.