...
- Ensure Java 7 or Java 8 is installed on the server.
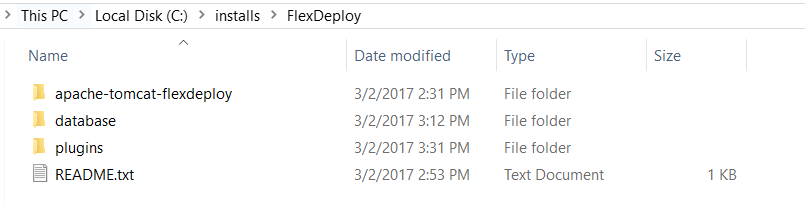
- Extract the zip file in the desired location (referred to as "FlexDeploy Home"). See example below, where zip was extracted in C:/installs/FlexDeploy folder.
Setup the database for FlexDeploy, if you have not already done so.
Modify the following Tomcat configuration files as follows:
<FlexDeploy Home>/apache-tomcat-flexdeploy/conf/context.xml
Replace **CONNECT_STRING** with JDBC connect string of your database containing the FlexDeploy schemas
Replace **FD_ADMIN_PASSWORD** with the password of the FD_ADMIN database user. You would have supplied password when you ran Database installation scripts.
For example, a localhost XE connection will look like this. jdbc:oracle:thin@localhost:1521:XE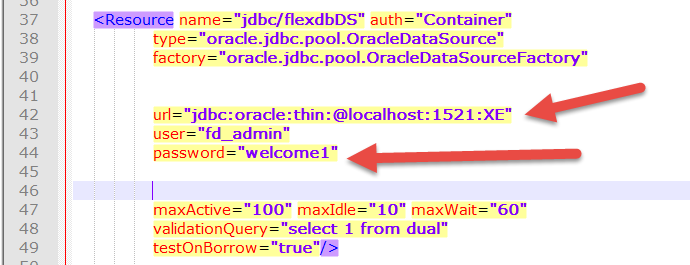
<FlexDeploy Home>/apache-tomcat-flexdeploy/conf/server.xml
By default, the Tomcat server is configured to run on port 8000. If this port is in use, change to some other unused port. Search for <Connector port="8000" protocol="HTTP/1.1" if you want to change it
<FlexDeploy Home>/apache-tomcat-flexdeploy/bin/setenv.sh (setenv.bat on windows)
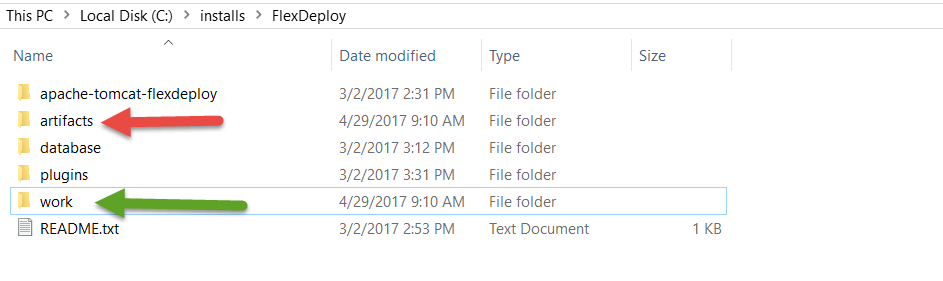
Replace **FLEXDEPLOY_WORKING_DIR** with directory to use as the FlexDeploy working directory (See Create Folders for FlexDeploy Server - FlexDeploy Working Directory)
Replace **FLEXDEPLOY_ARTIFACT_DIR** with the directory to host the FlexDeploy artifact repository (See Create Folders for FlexDeploy Server - FlexDeploy Artifact Repository)Tip If JAVA_HOME isn't already set in your environment, it would be a good idea to set it in this file as well. Otherwise, it can be set manually before starting the server.
For example below, we created artifacts and work directories under C:/installs/FlexDeploy
For this example (Windows) we modified setenv.bat as shown below.
If you were also setting JAVA_HOME, this file would look like this.
- Download the Oracle JDBC driver and place in <FlexDeploy Home>/apache-tomcat-flexdeploy/lib
- Oracle 11g drivers (ojdbc6.jar)
- Oracle 12c drivers (ojdbc7.jar)
- If using IBM ClearCase, you will need to copy some jar files from your ClearCase server or ClearTeam Explorer installation to the FlexDeploy installation
- Copy all of the jar files found in the com.ibm.rational.teamapi_8.0.1.vxxx folder of your ClearCase server or ClearTeam Explorer installation to <FlexDeploy Home>/apache-tomcat-flexdeploy/lib. (commons-codec-1.3.jar, commons-lang-2.3.jar, icu4j-4_8.jar, remote_core.jar, stpclientws.jar, stpcq.jar, teamapiextensions.jar, unicodetypemgr.jar, commons-httpclient-3.0.jar, commons-logging-1.0.4.jar, icu4j-charset-4_8.jar, stpcc.jar, stpcmmn.jar, stpwvcm.jar, ucleardiffmerge.jar)
- Copy all of the jar files found in the com.ibm.rational.teamapi_8.0.1.vxxx folder of your ClearCase server or ClearTeam Explorer installation to <FlexDeploy Home>/apache-tomcat-flexdeploy/lib. (commons-codec-1.3.jar, commons-lang-2.3.jar, icu4j-4_8.jar, remote_core.jar, stpclientws.jar, stpcq.jar, teamapiextensions.jar, unicodetypemgr.jar, commons-httpclient-3.0.jar, commons-logging-1.0.4.jar, icu4j-charset-4_8.jar, stpcc.jar, stpcmmn.jar, stpwvcm.jar, ucleardiffmerge.jar)
- Linux only - set the shell scripts executable with this command: chmod +x <FlexDeploy Home>/apache-tomcat-flexdeploy/bin/*.sh
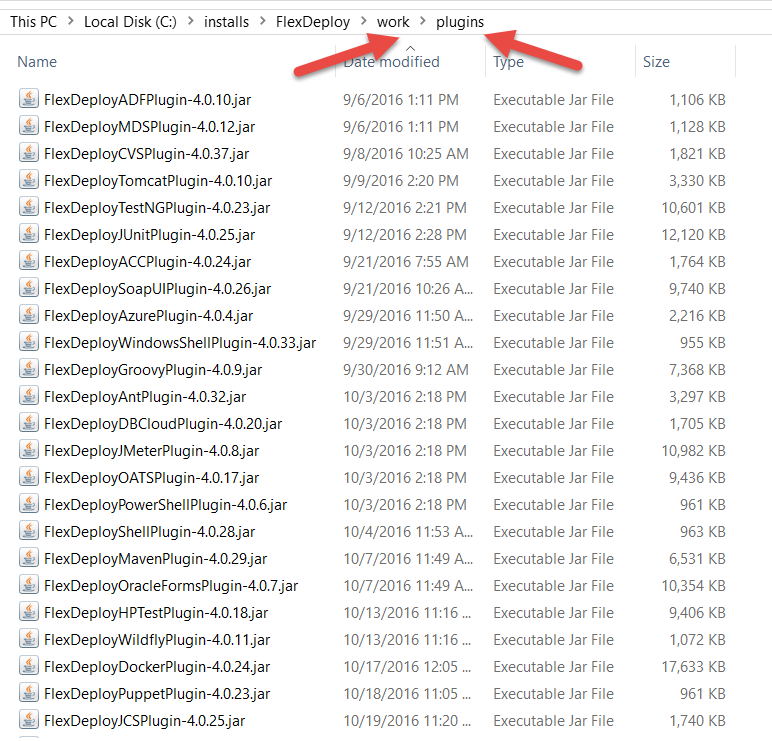
- At startup, FlexDeploy will load all the plugins. As per details provided in Loading FlexDeploy Plugins, create a folder called plugins inside your FlexDeploy working directory. Move or copy all the jar files from <FlexDeploy Home>/plugins to FLEXDEPLOY_WORKING_DIR/plugins. See the example below.
- Start tomcat by running the following script. Make sure to set JAVA_HOME to JDK 7 or JDK 8 if not already set in your environment.
- <FlexDeploy Home>/apache-tomcat-flexdeploy/bin/startup.sh (startup.bat on Windows)
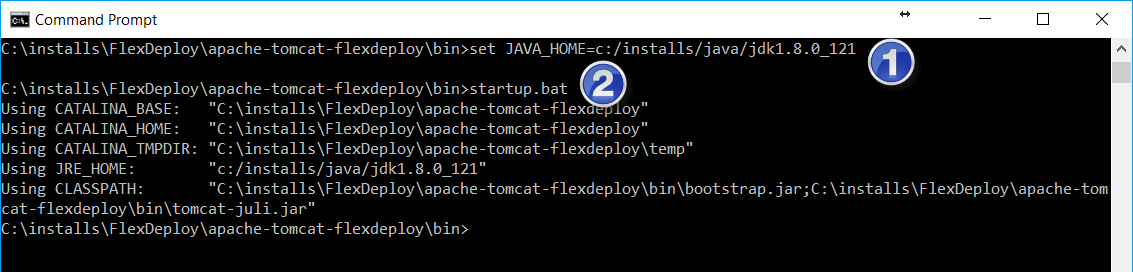
- <FlexDeploy Home>/apache-tomcat-flexdeploy/bin/startup.sh (startup.bat on Windows)
- Launch FlexDeploy in your browser
- http://<hostname>:<port>/flexdeploy
- default credentials are fdadmin/welcome1