This walkthrough will cover every step needed to get your docker image built and deployed through FlexDeploy. In this example we will be deploying the image to a Kubernetes Cluster on Oracle Cloud Infrastructure via Helm.
If you don’t have your own docker application you can follow along using the Natours repository used in this example.
Contents
Prerequisites
Docker CLI - An available docker cli for building the image
Kubernetes Cluster - For deployment
This guide will be using OKE, but any cluster will suffice.
Kubectl/Helm - Install kubectl and helm on the FlexDeploy server.
Be sure the appropriate context is configured for your K8s Cluster.
FlexDeploy Knowledge
We won’t be covering some of the more basic steps like creating SCM Instances and other Topology configuration.
Building and Pushing the Image
The first goal is to build our image. In the case of the Natours repository, we don’t need any additional compile steps. All we need to do is run docker build with the appropriate commands
Creating a Registry Account
The first thing we need to do is create a Registry Account in FlexDeploy. This account contains the necessary information for pushing our image. Navigate to Topology->Integrations->Containers and click the Plus button.
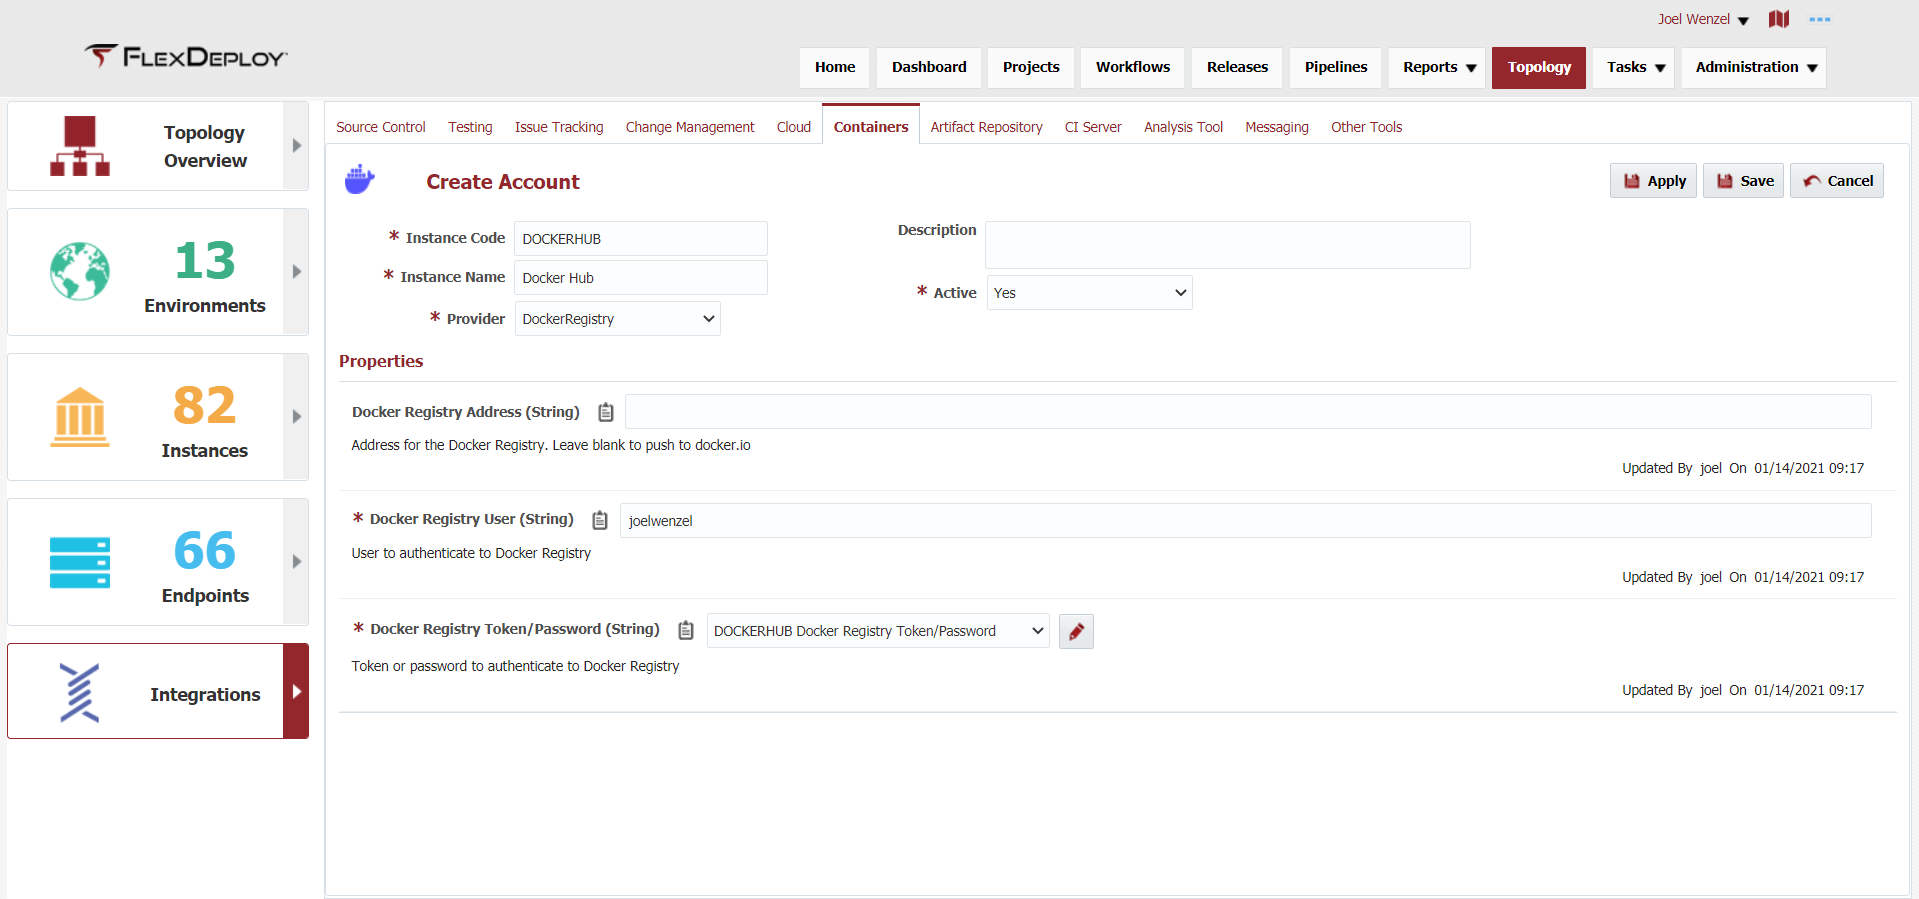
Be sure to select the Provider as DockerRegistry and populate the information as necessary. In the above account it is configured to push to the joelwenzel account on dockerhub.com
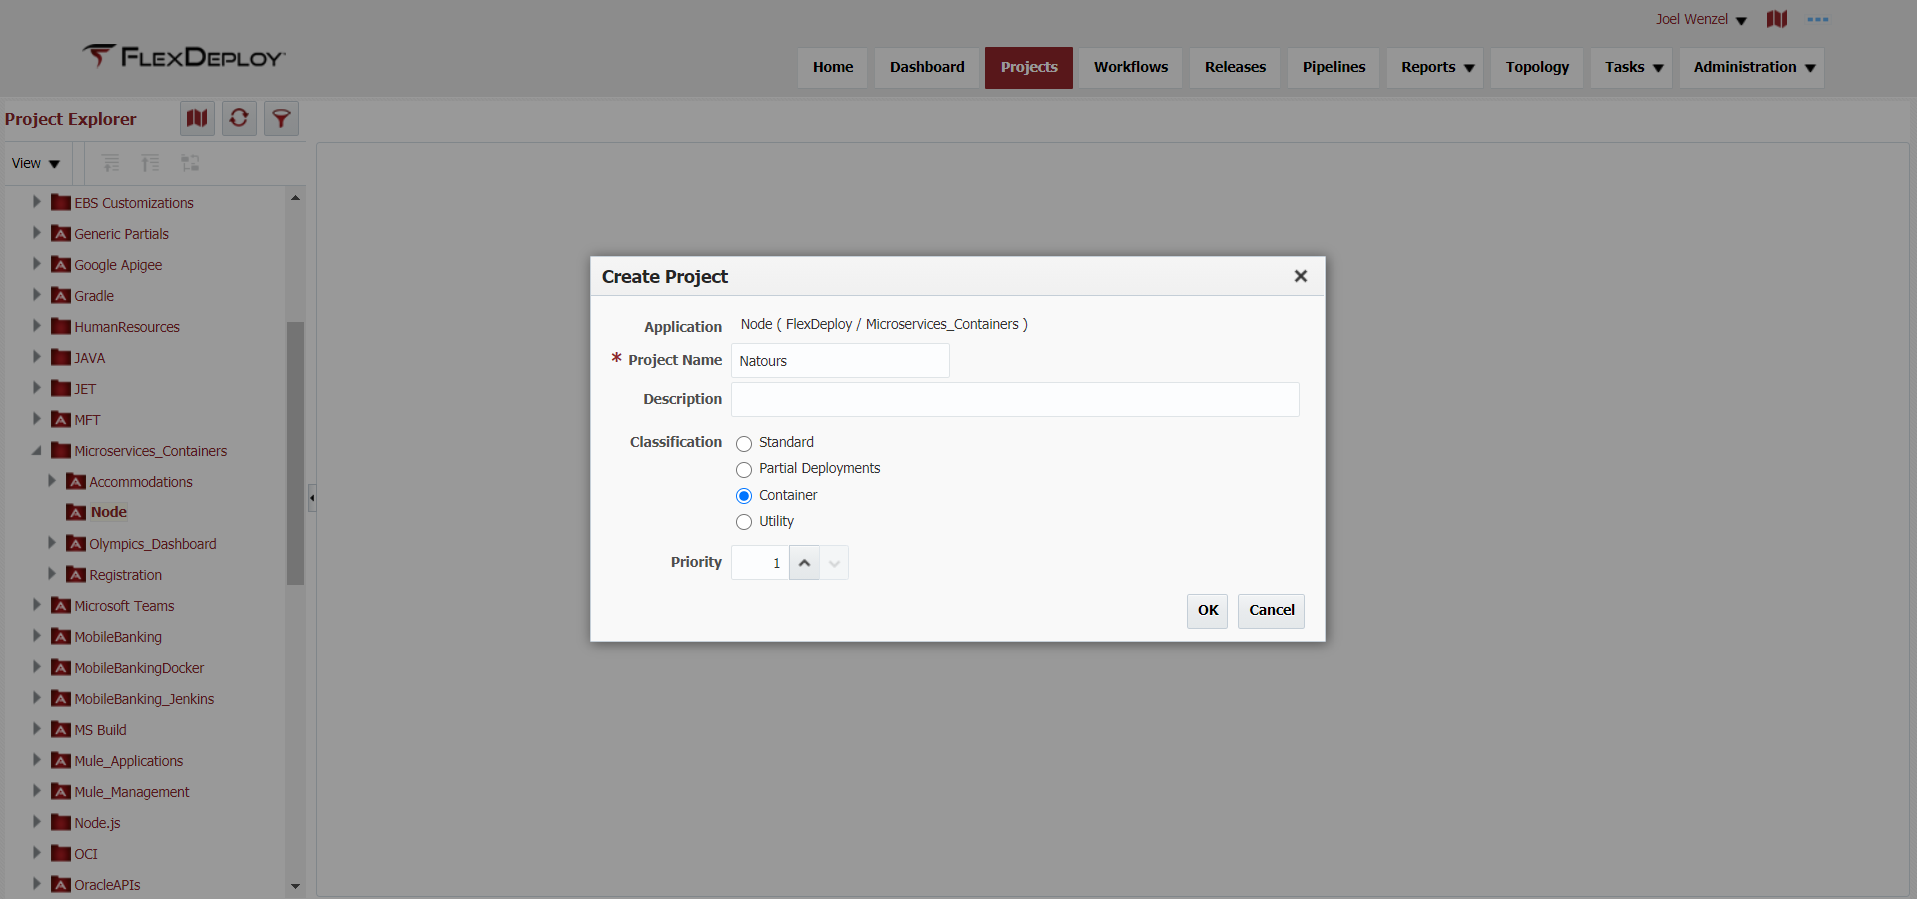
Setting up the Project
Next, create a new Project in FlexDeploy. Give it a name that closely resembles your Git repository name and select Container as the Classification.
Done Offscreen
Create your SCM Instance and configure your Project to use it
After creating the Project, click on the Container Configuration tab. It is here where we specify the image tag information and build behavior.
Add the following configuration:
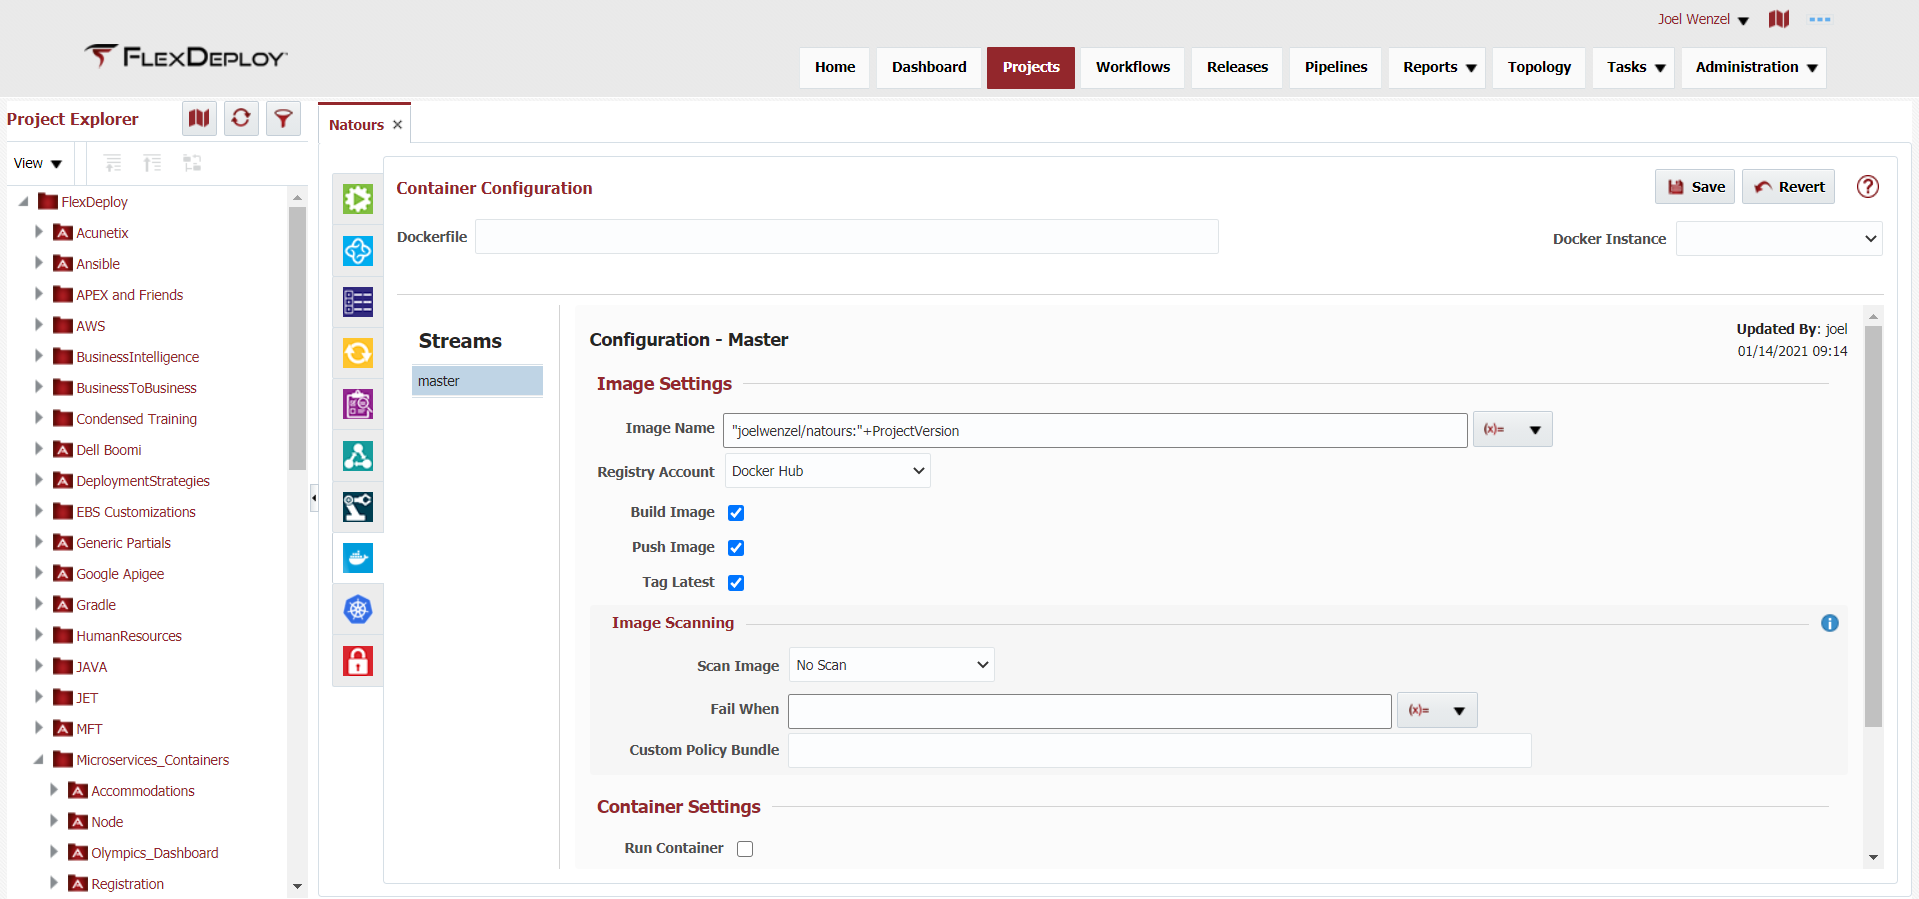
Naturally your image name and account could be different compared to what’s shown above. With this configuration, FlexDeploy will build an image with an incrementing Project Version every time we run a build. In addition to tagging the image with the ProjectVersion it will tag with latest and push the image to the Docker Hub registry that was set up earlier.
We will come back to image scanning, but for now lets continue on.
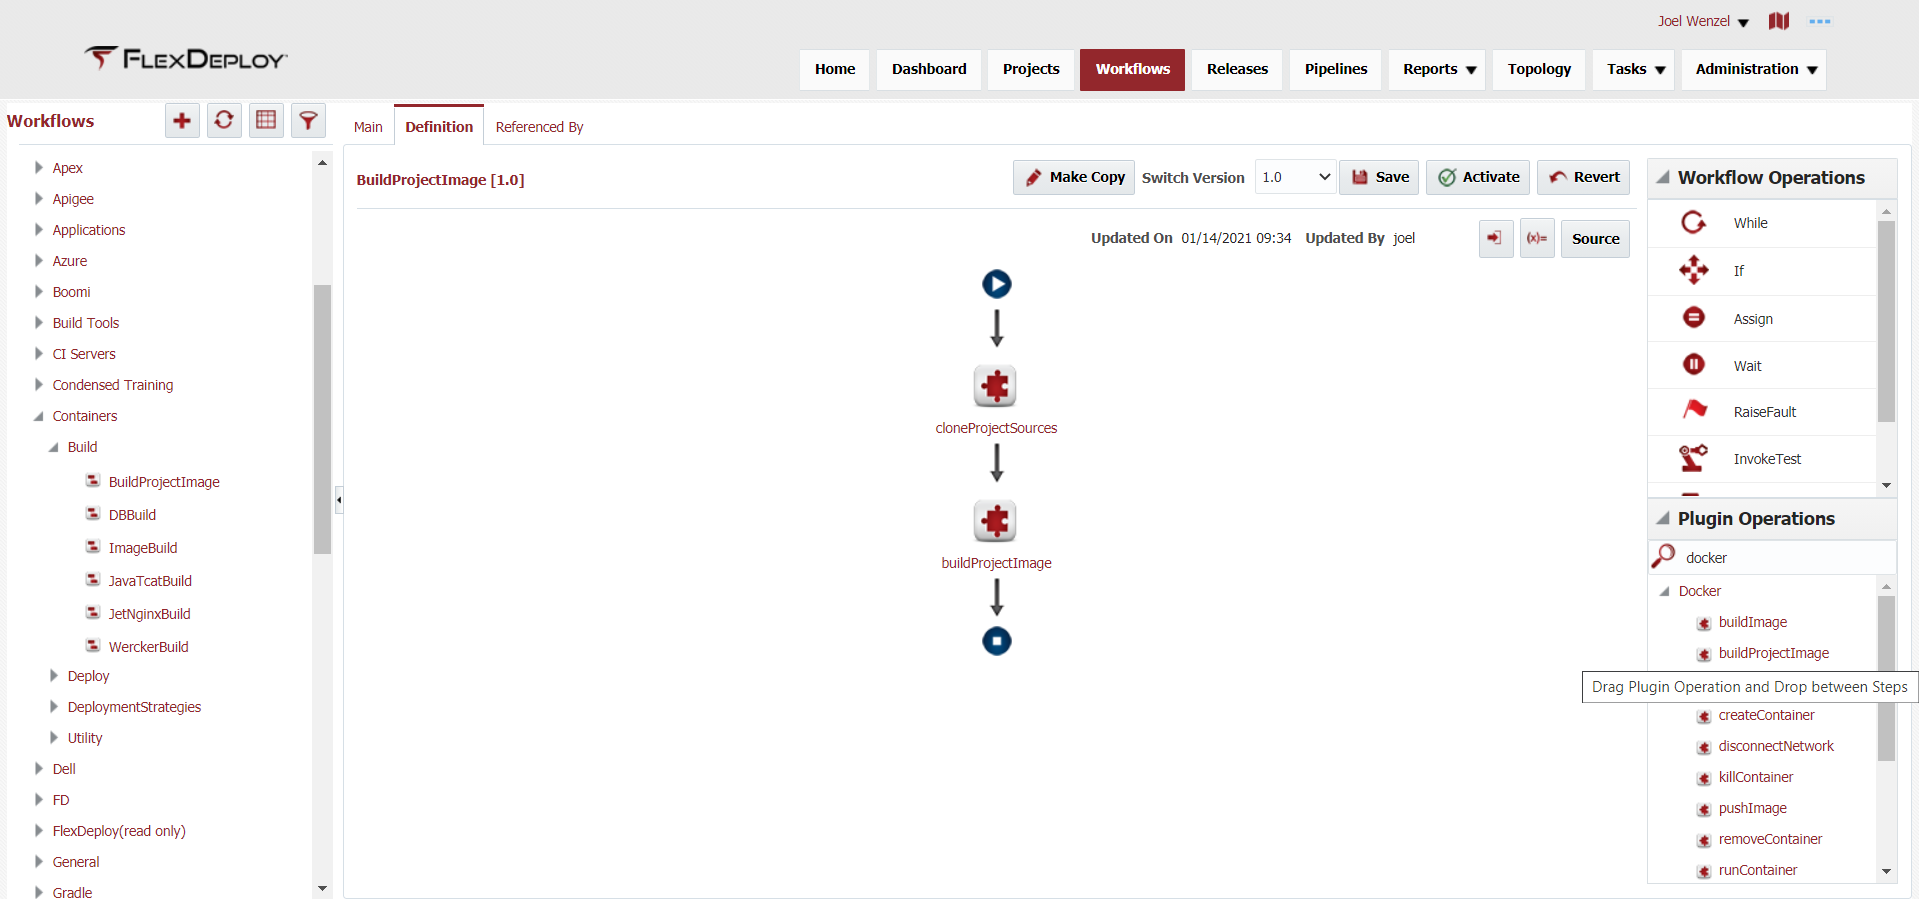
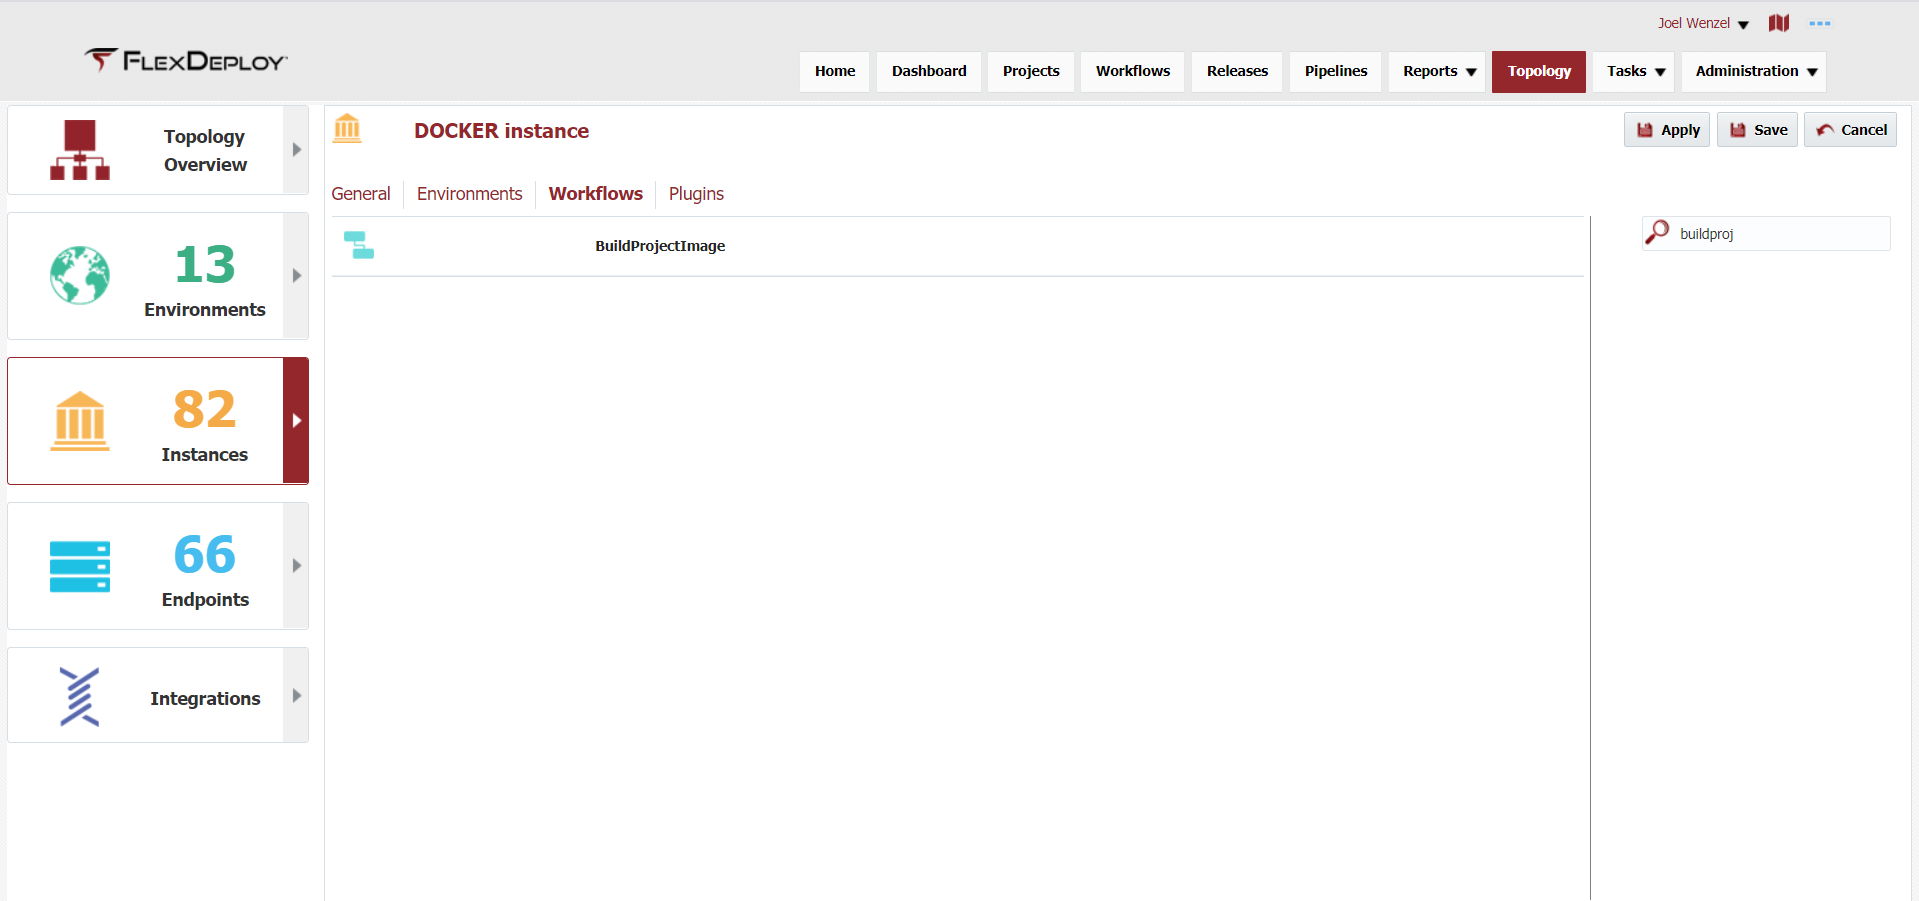
Creating the Build Workflow
Now that the Project is setup to handle the building and pushing of the image, all we need our workflow to do is clone the source code and build the image. The default configuration is is fine for both steps, simply drag and drop.
Creating the Build Topology
Lastly, we need to create the topology for the build process.
Done Offscreen
Create an endpoint where Docker is installed
If docker is installed on the FlexDeploy server, the localhost endpoint can be used.
Create a Docker instance
Add the Build Environment to the Instance
Ensure that the Docker Instance has the workflow created above added. This is how FlexDeploy knows what properties to show on certain screens.
Docker on Windows or Docker-Desktop
If you are using docker on windows, you will need to perform these additional steps.
Done Offscreen
Add the Docker Endpoint to your Docker-Build EnvInst in Topology Overview
Update the Build Workflow and Build Instance on the Project Configuration tab of the Project.
Run a build
Now the Project is ready to start creating images. Click the Build button on the Project Activity screen and if everything goes well we should have a new version of the natours image.
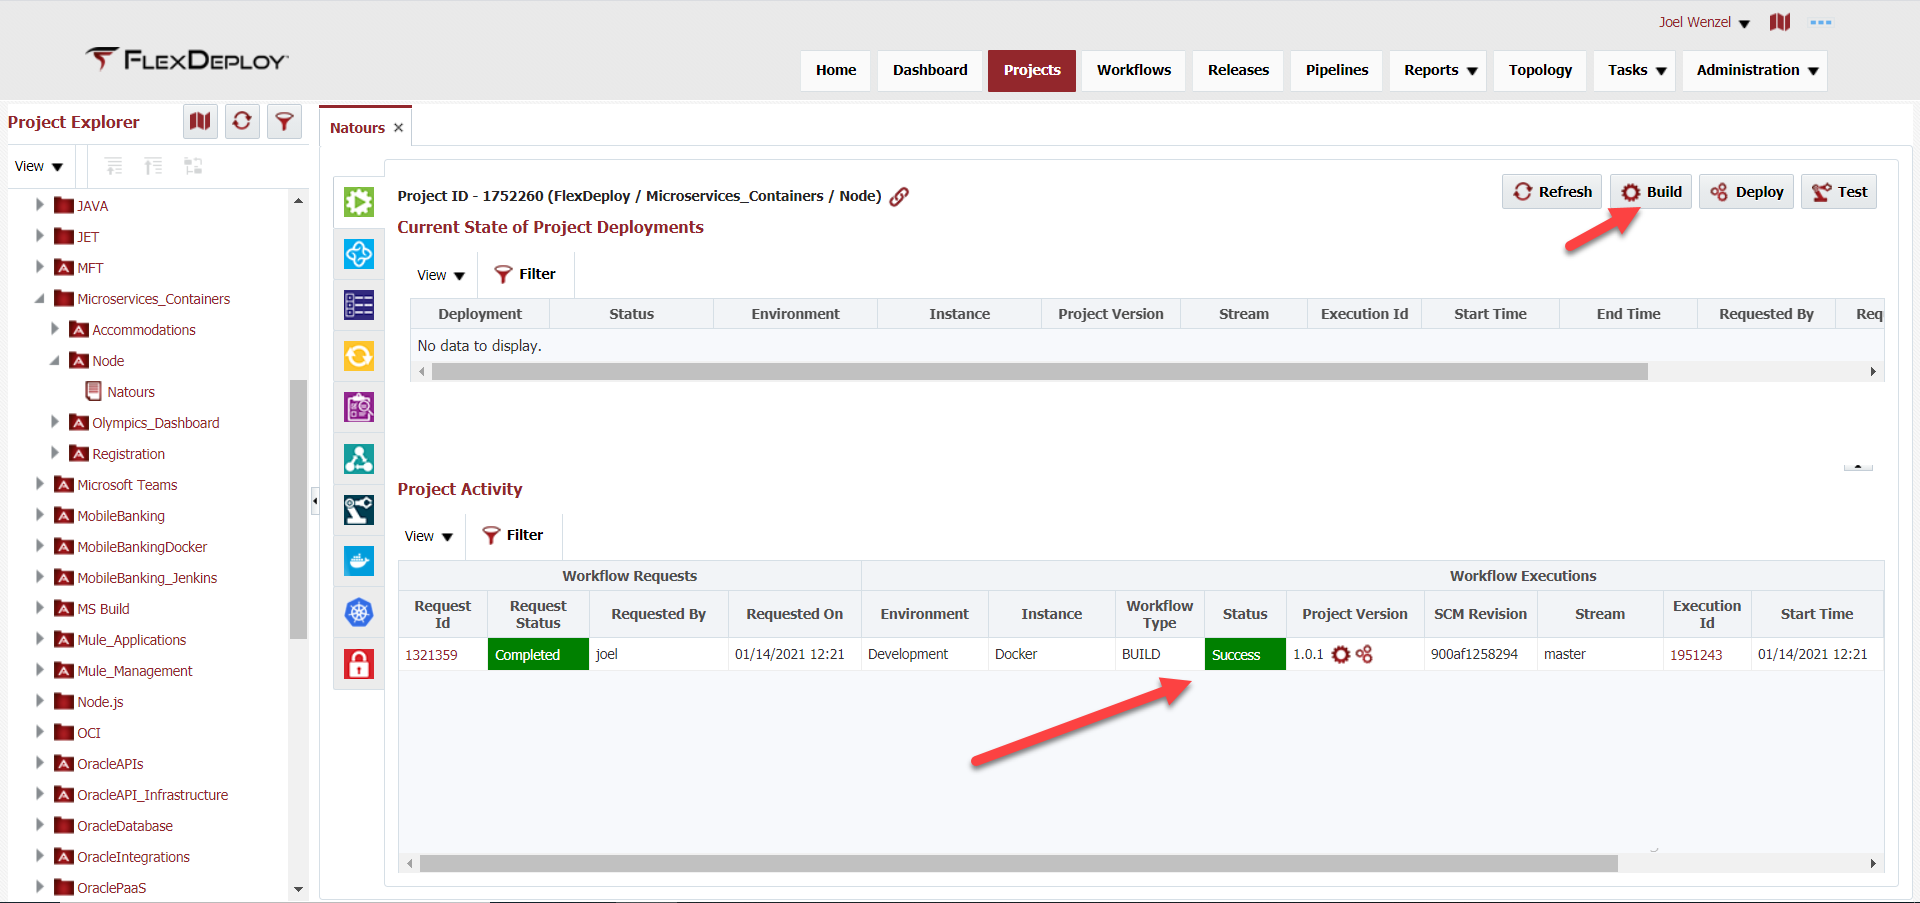
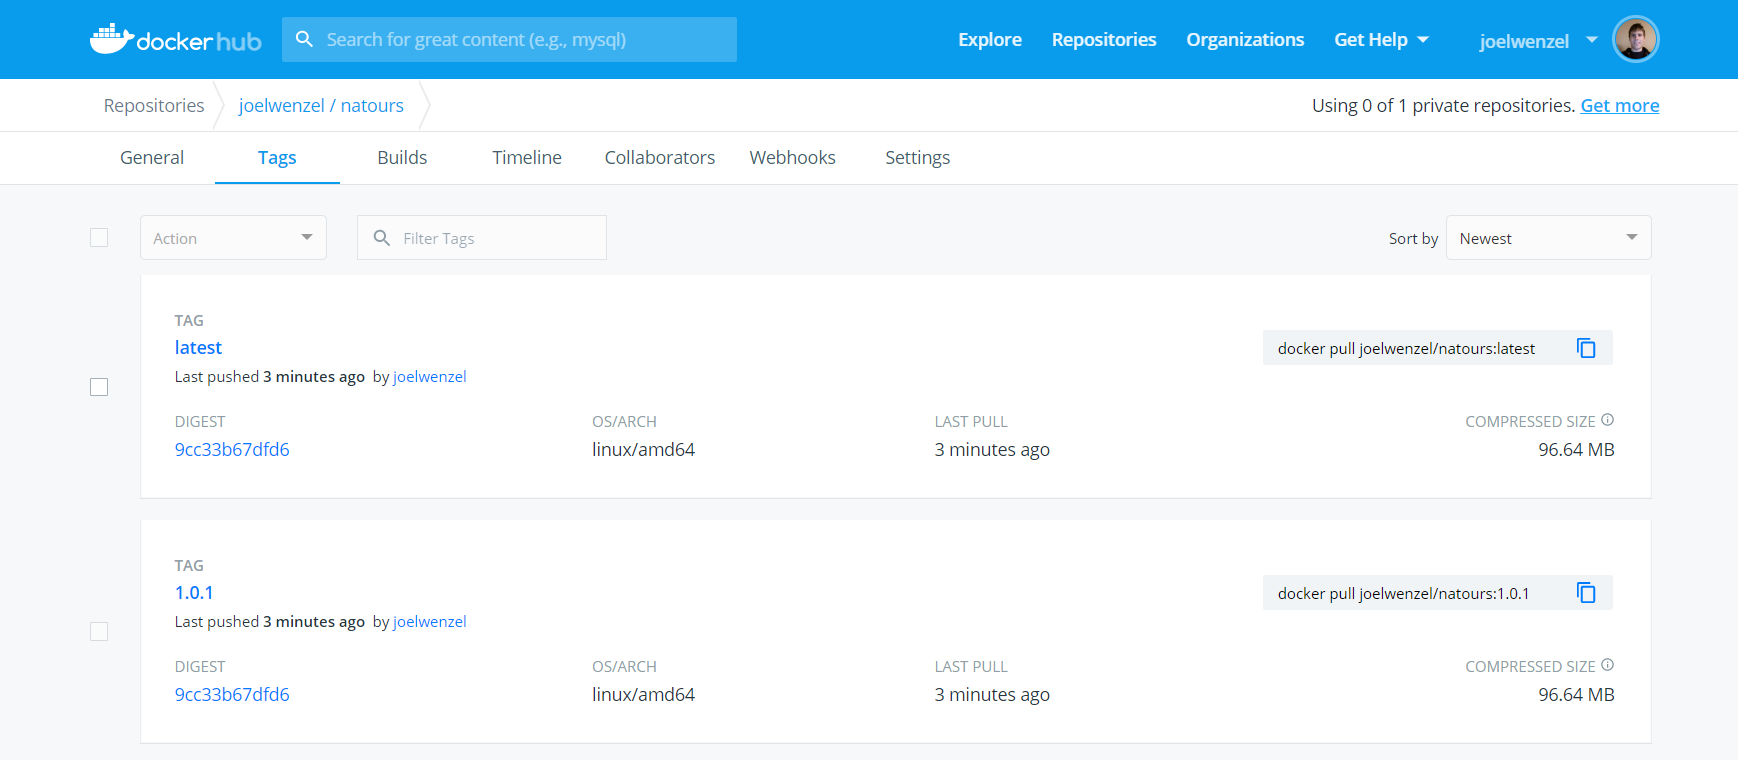
Notice that both version 1.0.1 and the latest tag were both pushed to the registry.
Deploying the Containerized App
A reminder that before deployment, you should have kubectl and helm installed on the local FlexDeploy server and have a valid context configured. Similar to the build process, we will first configure the project.
Project Helm Configuration
Navigate to the Project’s Kubernetes Configuration tab.