Endpoint Creation (Weblogic Resources)
- Copy Page Tree
- Emily Simon
At the completion of this section, you will:
- Understand the use of endpoints in the deployment process
- Be able to create/modify an endpoint
Now that we have created the workflows to orchestrate the steps of the deployment process, we have to be able to communicate with the actual machine that is running the WebLogic server to execute each step. The component that provides this functionality is an Endpoint and it will contain connection and host information. FlexDeploy has an agentless architecture so there are no permanent processes that need to be running on the Endpoint.
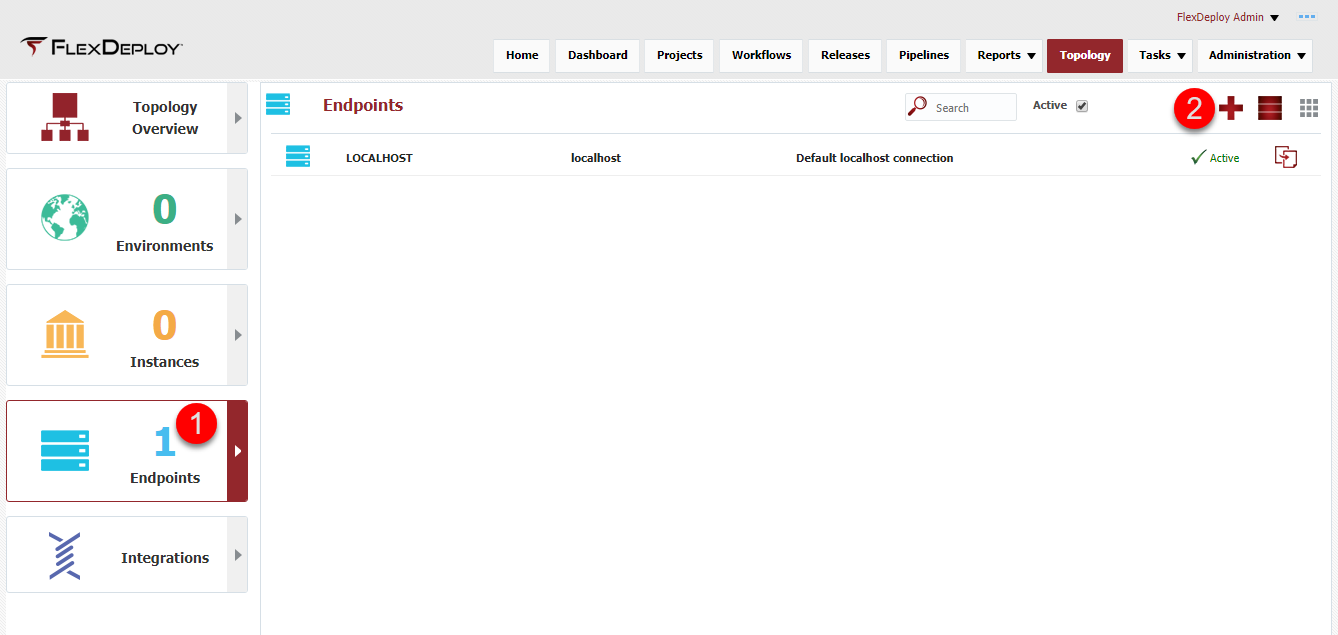
Viewing the current list of Endpoints is accomplished by selecting Topology from the menu and then selecting Endpoints from the left menu. Click on the + in the upper right corner to create and configure a new Endpoint.
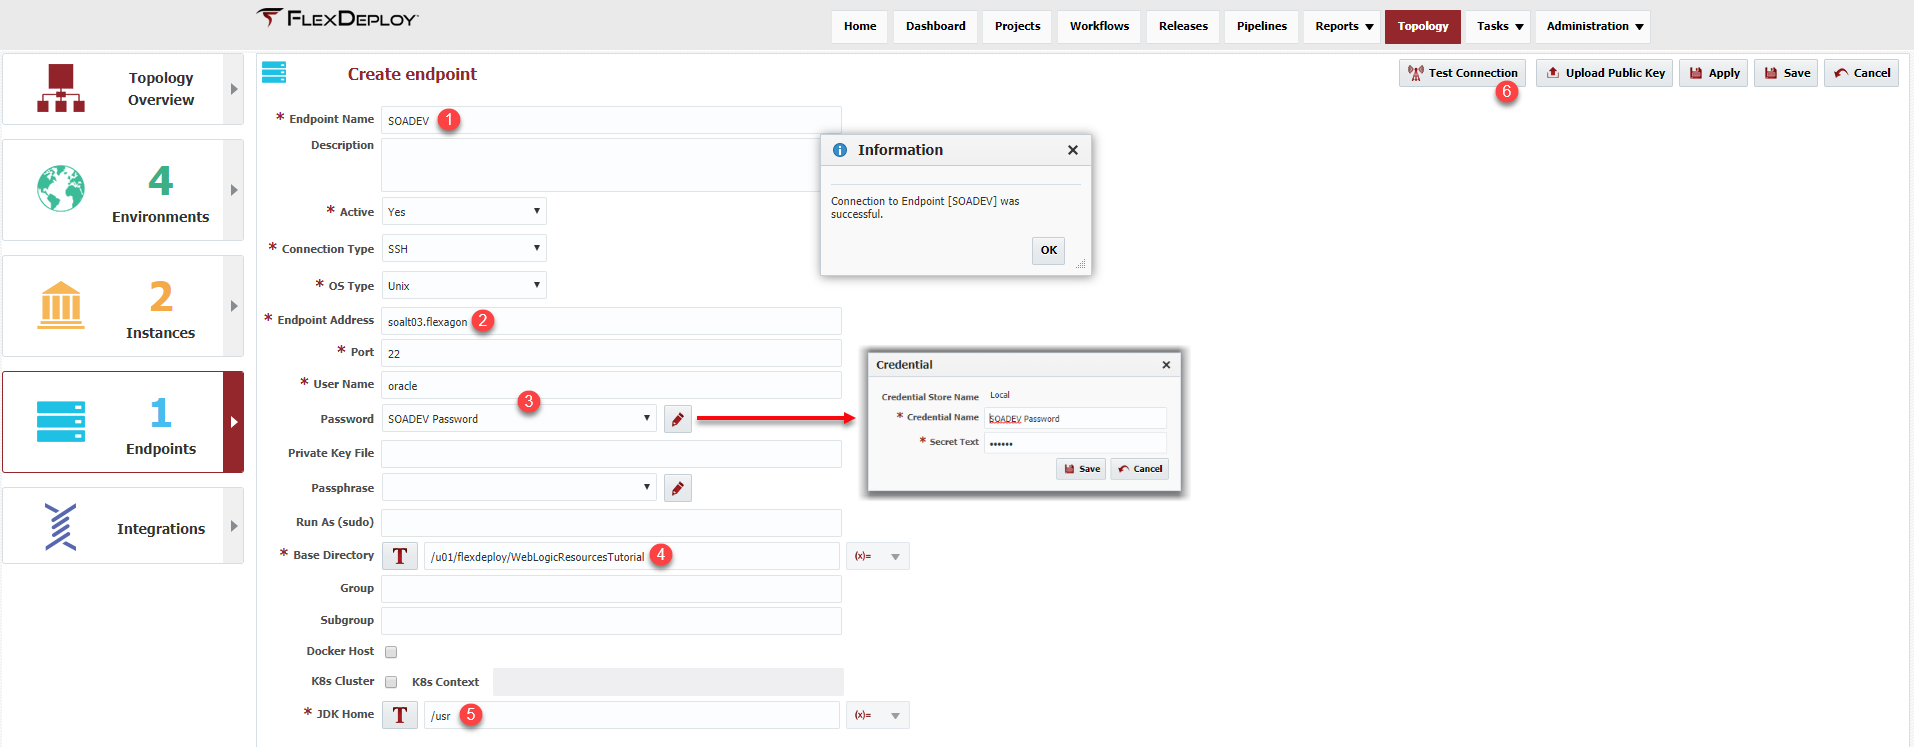
We need to configure the endpoint with the appropriate connection information.
- Endpoint Name - provide a meaningful name to make it easier to locate
- Endpoint Address - provide the IP address or DNS name for the physical machine
- User Name/Password - provide a user name that has access to the software on the machine. Select the
 new icon next to the Password field and enter the password in the Secret Text field to create a new credential in the Local Credential Store.
 - Base Directory is a file system on the Endpoint where FlexDeploy will:
- download the latest activated plugin code based on the operations in the executing workflow
- create an Endpoint Directory Structure that will hold execution files, such as the composite SAR file
- start a JVM
- JDK Home - provide path to the installed JDK on the machine, which will be used to start a JVM to execute the workflows just created
Once the configuration is complete, click on the Test Connection button to test:
- The User Name/Password are correct and a connection can be made to the server
- The Base Directory can be created
- That Java can be executed with the path provided
Save the Endpoint when the Test Connection passes.
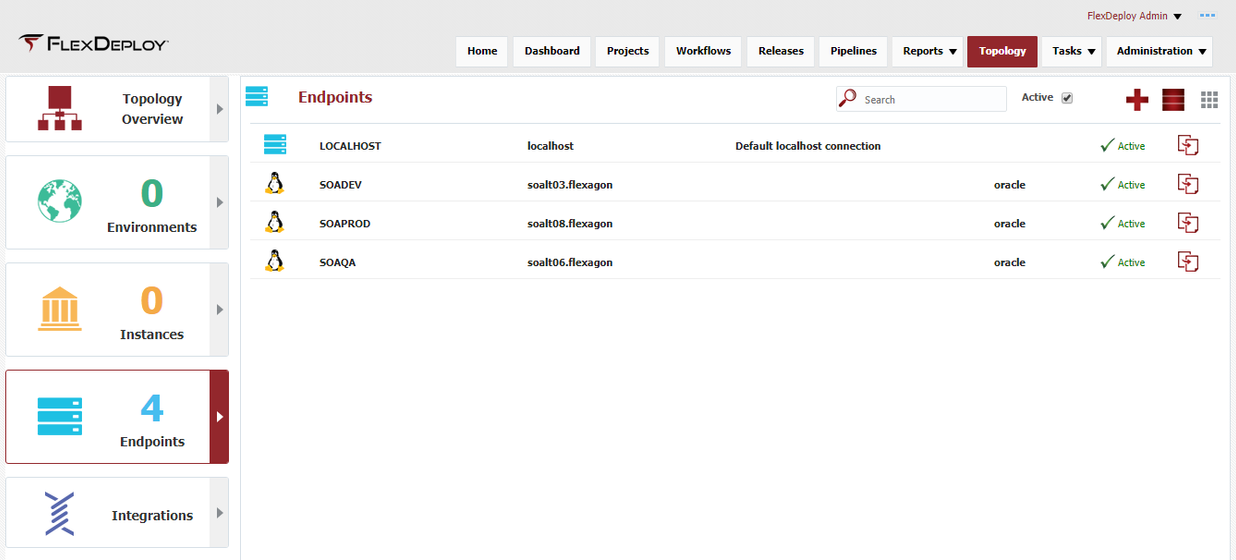
We will repeat these steps and create two additional Endpoints for SOAQA and SOAPROD, as each will be a different machine and FlexDeploy will need to communicate to each.
After creating the three endpoints, the Endpoint screen should look like this.
| Completed 3 of 10 Sections | Continue to Environment Creation | Back to Workflow Creation |
|---|
- style