Installing/Upgrading Plugins
You can either upload and activate plugin through UI or just place it in specific folder on Server. Either options works fine.
Upload and Activate Plugins using UI
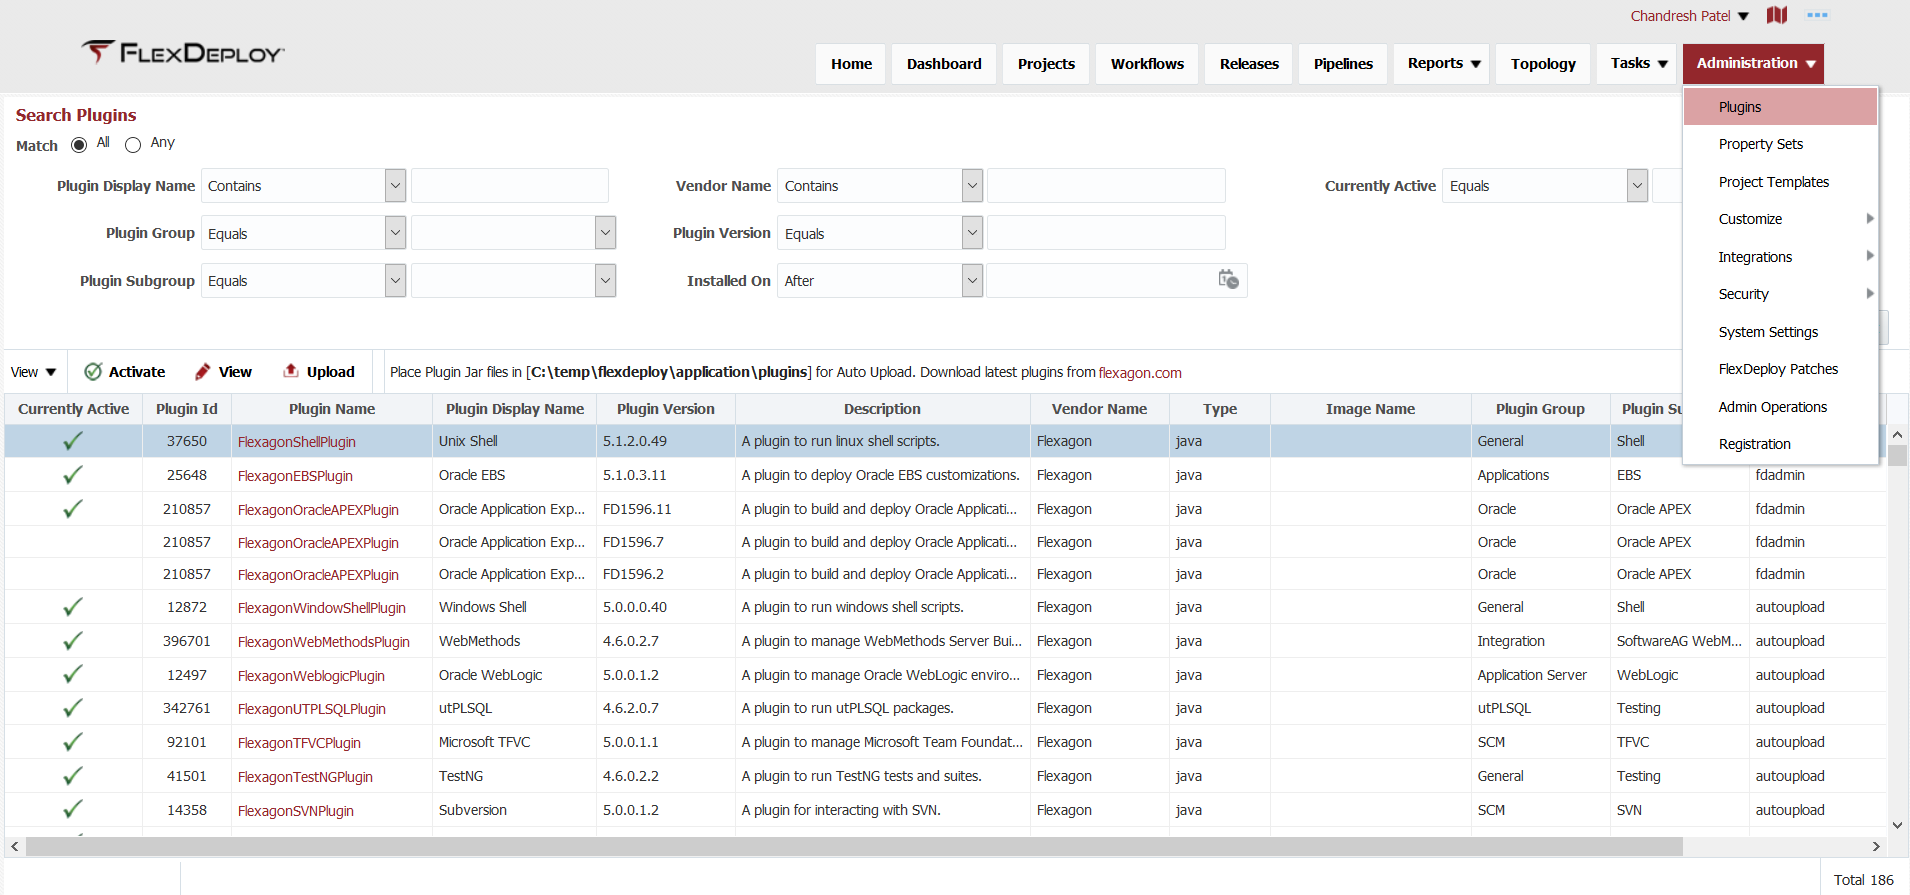
The FlexDeploy installation comes with plugins which are automatically loaded on startup. To install additional plugins or plugin versions, select Administration -> Plugins from the menu.
You can download new plugin versions from http://support.flexagon.com or download link provided on Plugins page (available since 4.6.0.2), see screen shot below for example.
To upload new plugin or new version of existing plugin, click the Upload button.
On upload plugin popup, click Choose File button to find plugin jar file on your local drive. Select plugin jar file and click OK. Then click OK on upload plugin popup.
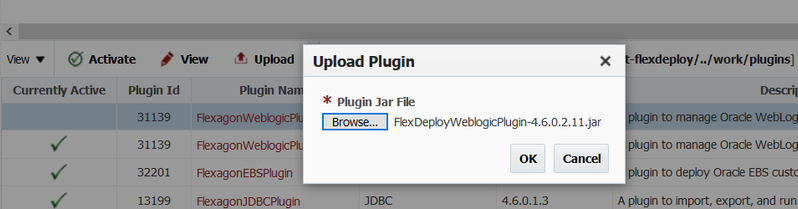
If upload of plugin completes successfully, you will see new row in plugins table.
The plugin is now installed in the FlexDeploy server, but is not yet ready for use. To make it available for use you must select the plugin version you uploaded and click the Activate button. Only one version of a particular plugin can be active at one time. To revert to an older version, simply select that version and activate it. Select newly uploaded plugin version and click Activate button. See screen shots below for example.
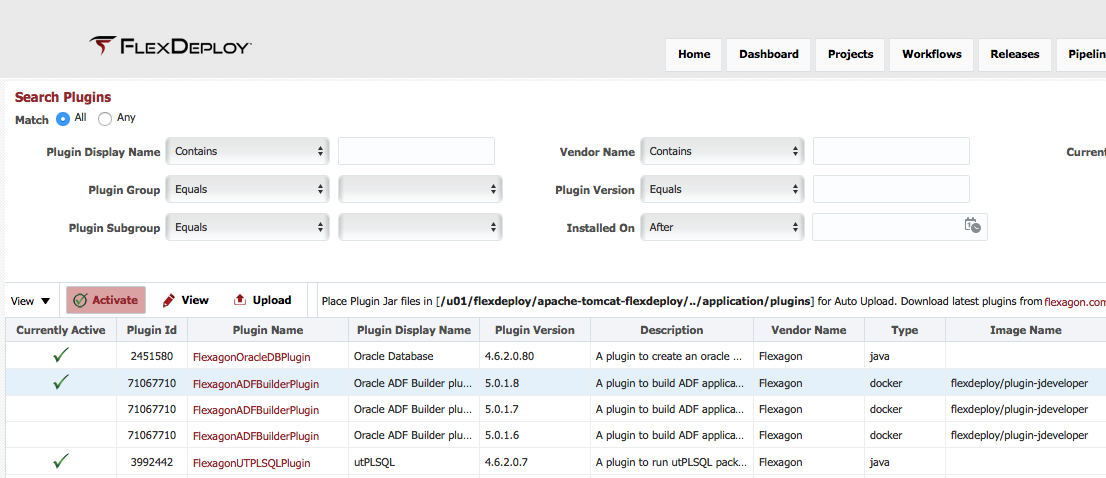
One version of each plugin is active for use in FlexDeploy at a time. This process does not require any restart.
If you are installing a new plugin for the first time you must now associate one or more of its operations to one or more instances. See the Instances section of the Topology chapter for details.
Flexagon may from time to time provide new plugins, or provide updates to existing plugins, and make them available independent of a FlexDeploy upgrade. This approach allows faster plugin delivery which is not tied to product release timelines.
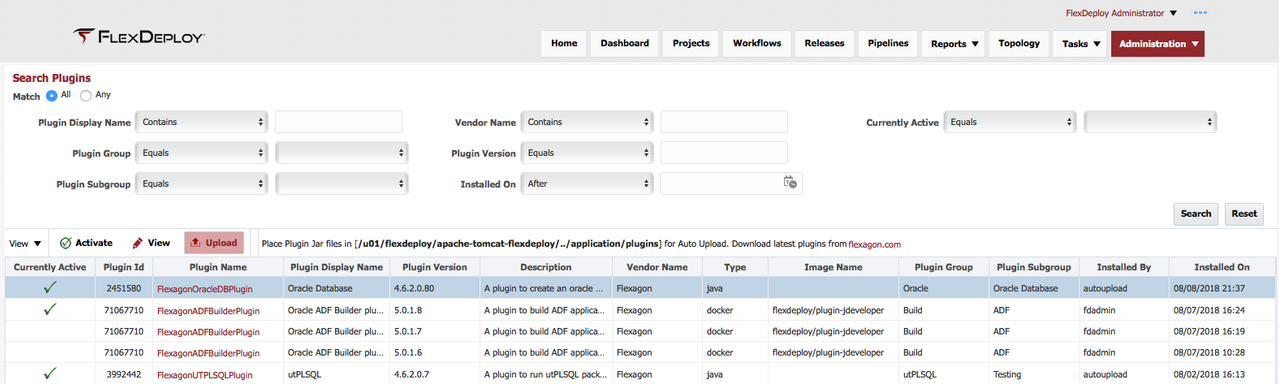
Auto Upload Plugins
This is useful when you are upgrading FlexDeploy, as there may be many new plugins or versions available as part of new FlexDeploy release. This option can also be used for one single plugin version upload as well.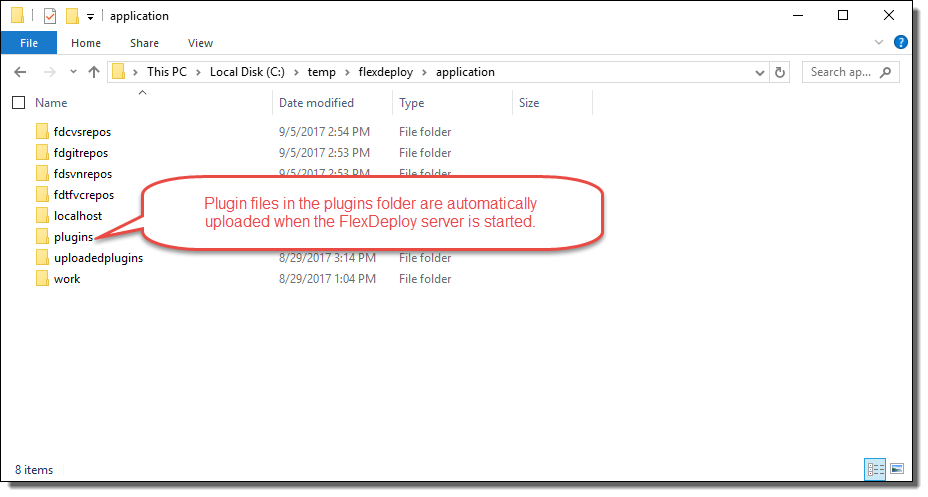
- style