Installation
Chrome
Open the FlexDeploy Actions page in the Chrome Web Store. Click Add to Chrome. The extension will then show up in the extension list in your Chrome window next to the URL bar. It will be updated automatically as new versions are available.
By default, site access for the extension is across all sites. You can modify this with a match pattern, or only allow on click.
Firefox
Open the FlexDeploy Actions page in Firefox Add-Ons. Click Add to Firefox. The extension will then show up in the extension list in your Firefox window next to the URL bar. It can be set to automatically update as new versions are available, or they can be managed manually.
Extension Initial Setup
| Tip |
|---|
The extension popup can be opened and closed with Ctrl+Shift+E, (or Cmd+Shift+E for Mac) regardless of whether the extension is pinned. |
Creating an Action
The first time the extension is opened, it will open to the My Actions tab. From here, you can create and configure your own actions. Each action will be linked to some webhook URL defined by you, so you could have different actions for each webhook function you want to run in FlexDeploy.
...
- Enter a name to identify the action.
- Optionally, choose a base action. A base action will add some read-only properties for you automatically in the context of that technology. Currently, the FlexDeploy extension offers base actions for Oracle Application Express, Oracle RESTful Data Services, Oracle Business Intelligence, and Oracle Integration Cloud.
- Enter the full webhook URL to send to FlexDeploy. This will be in the format <FlexDeploy base URL>/flexdeploy/webhooks/v1/<webhook function URI>.
- Optionally, use a regular expression to determine for which URL patterns the extension should select this action initially when the popup is opened. Example: https:\/\/apexServer.* for any URLs starting with http://apexServer
- Define any additional properties to send in the JSON payload. The extension supports single item properties or list data and sends as type string. You can also set a default value for your property with literal text, a CSS selector, or general Javascript.
Receiving the Webhook in FlexDeploy
You will need to complete some one-time setup in FlexDeploy for processing your webhooks and triggering the desired actions.
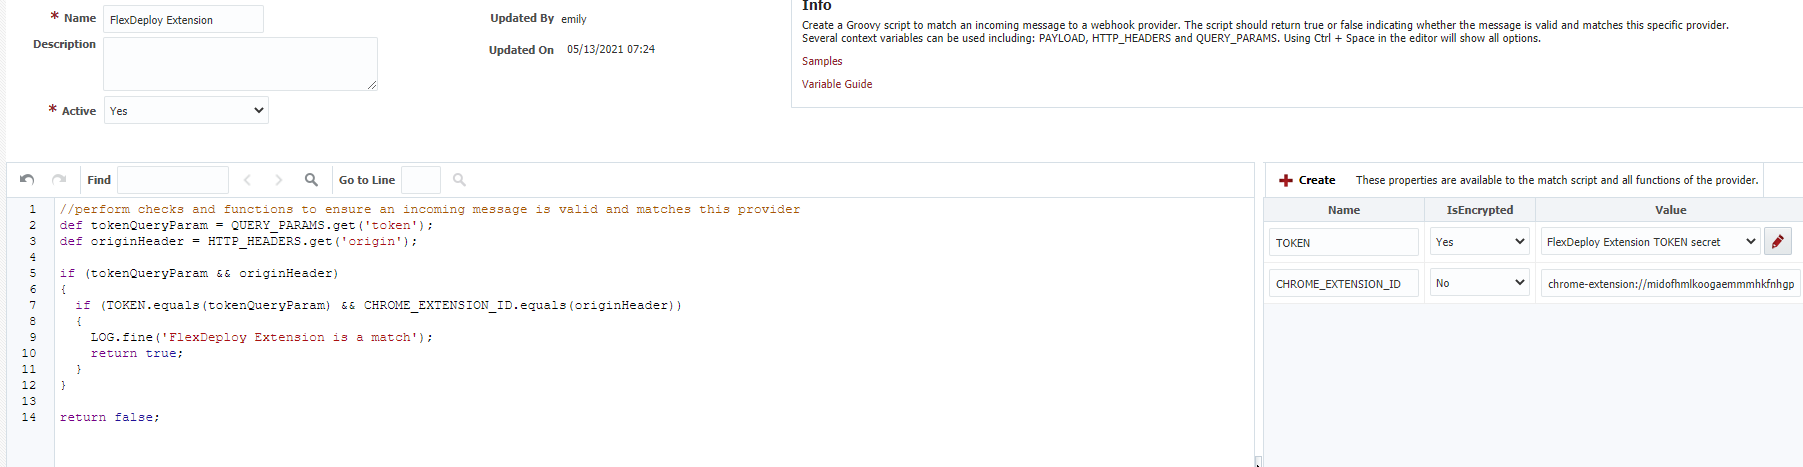
Creating a Webhook Provider
The extension will require a new incoming webhook provider. We can create one by following the directions in the incoming webhooks guide. Below is a webhook provider match script verifying the extension id and query parameters match what we expect.
| Expand | |||||||||
|---|---|---|---|---|---|---|---|---|---|
| |||||||||
|
Creating a Webhook Function
Now, we can create a function to take our webhook payload and use its content to trigger some action in FlexDeploy. This is explained further in the incoming webhooks documentation.
...
| Code Block | ||
|---|---|---|
| ||
{
  "actionName": "Name of action sent",
  "fromURL": "URL of the active window the sender was on when the webhook was sent",
  "properties": [
    {
      "Property A Name": "Property A Value"
    },
    {
      "Property B Name": "Property B Value"
    },
    {
      "List Property C Name": ["Property C Value1", "Property C Value2", "Property C Value3"]
    }
  ]
} |
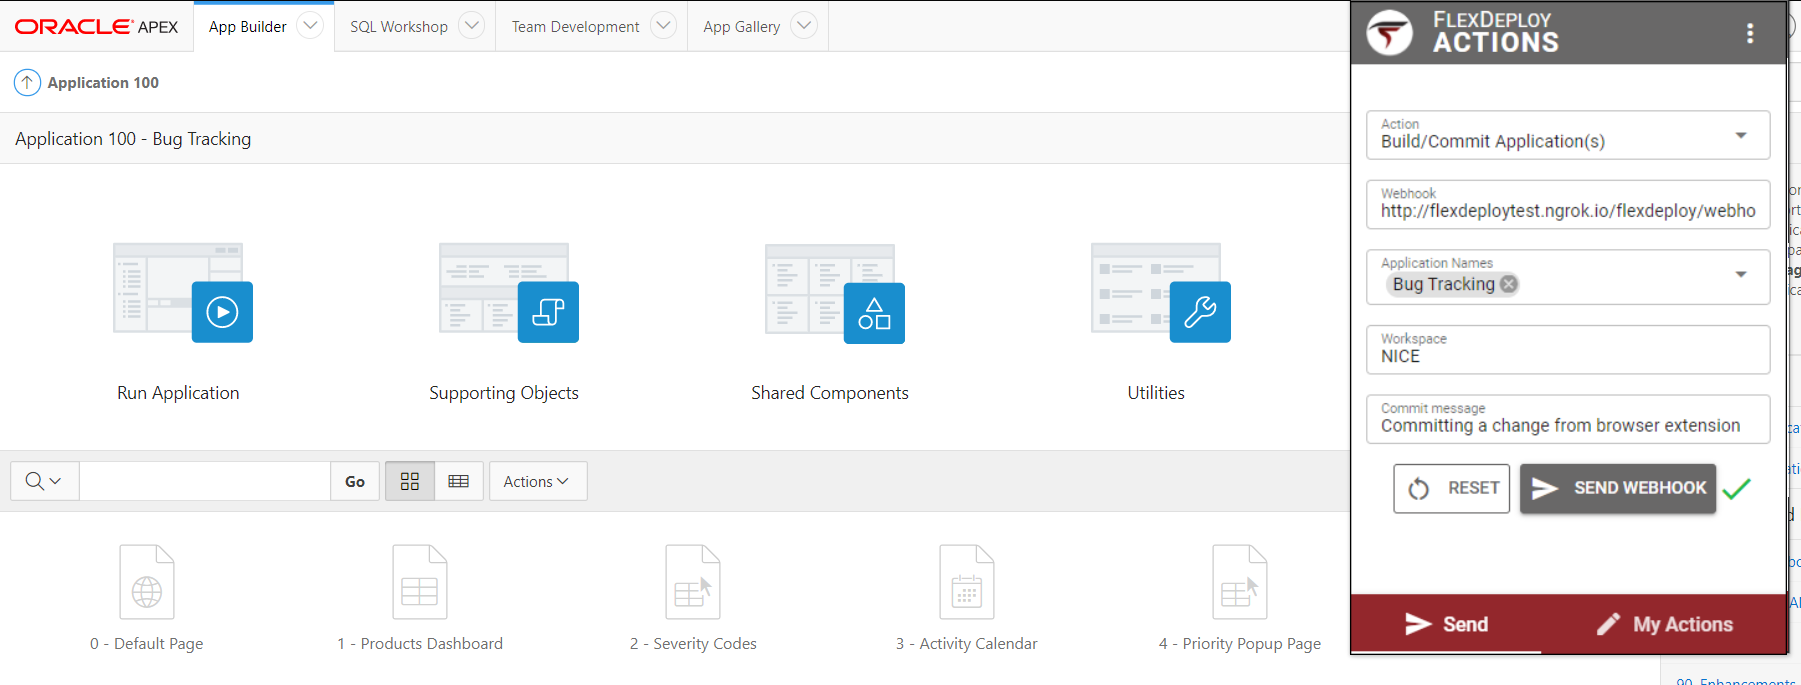
Sending a Webhook
The extension will automatically open to the Send tab once you have an action created. From here, you can choose an action, customize property values as needed, and send a webhook to FlexDeploy.