FlexDeploy now supports use of OAuth authentication for Oracle Integration Cloud. You can follow the below steps for configuring OAuth for OIC.
| Info |
|---|
Currently FlexDeploy only supports OAuth for Resource Owner grants. Others may be supported in the future. |
Create a Confidential Application in Oracle Identity Console
Copy your Oracle Identity Url to notepad for later use
...
The following OAuth methods are currently supported:
Resource Owner
JWT User Assertion (@5.5.0.2)
JWT User Assertion
JWT User Assertion requires an ssl certificate to be uploaded to Oracle Cloud Infrastructure and referenced in FlexDeploy. The key can be self signed or from a more trusted chain.
Generate certificate
Create Oracle Identity Application with the JWT Assertion grant type
Add public key to Oracle Identity Console
Create FlexDeploy Cloud Account
1. Generate certificate
If you already have a public/private key and their keystore location feel free to skip this step.
| Info |
|---|
The first 3 steps to this process are nicely outlined by Oracle in this blog: https://www.ateam-oracle.com/authentication-and-user-propagation-for-api-calls |
For this section, see the heading: Create a Signing Key Pair. Be sure this is done on the FlexDeploy server or the server when your OIC workflows will run.
2. Create Oracle Identity Application with the JWT Assertion grant type
| Info |
|---|
The first 3 steps to this process are nicely outlined by Oracle in this blog: https://www.ateam-oracle.com/authentication-and-user-propagation-for-api-calls |
For this section, see step 1 under the heading: Configuring IDCS. This process is also outlined below for Resource Owner, however you need to be sure to select the correct grants and upload your certificate.
3. Add public key to Oracle Identity Console
| Info |
|---|
The first 3 steps to this process are nicely outlined by Oracle in this blog: https://www.ateam-oracle.com/authentication-and-user-propagation-for-api-calls |
For this section, see step 2 under the heading: Configuring IDCS.
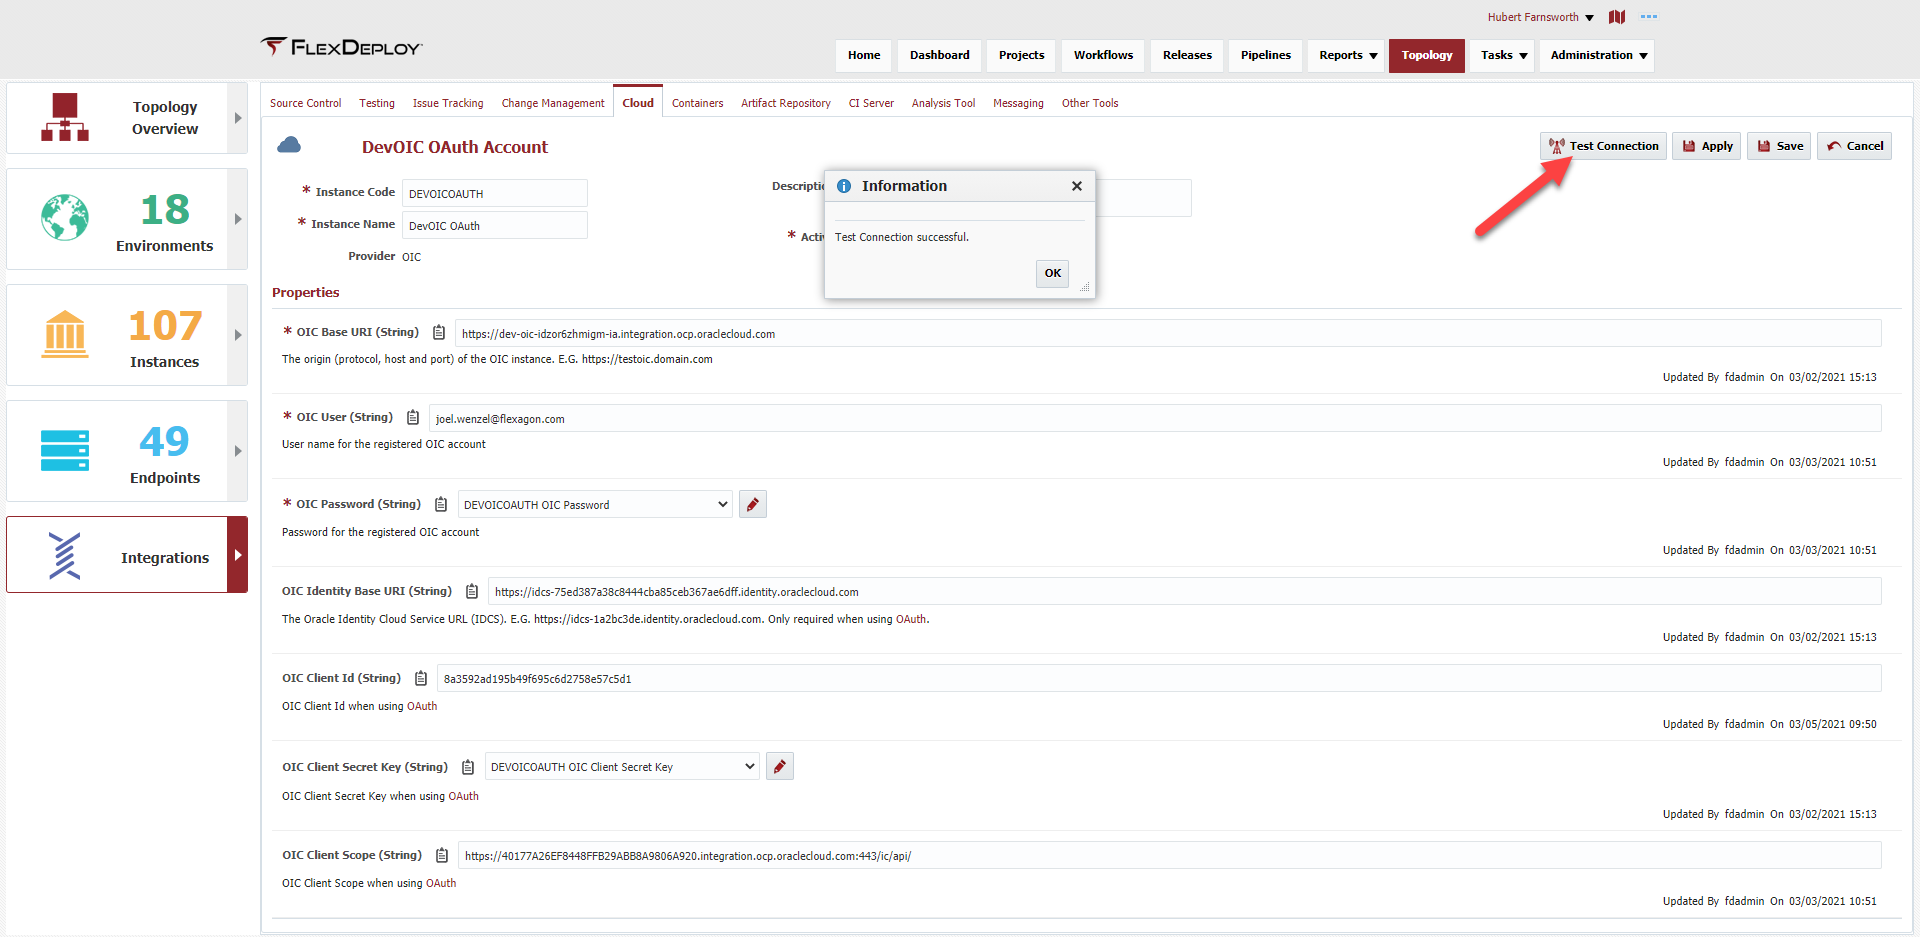
4. Create FlexDeploy Cloud Account
Lastly you need to create a cloud account in FlexDeploy specifying your client application information as well as the certificate information.
...
Resource Owner
Create a Confidential Application in Identity Console
Create FlexDeploy Cloud Account
1. Create a Confidential Application in Oracle Identity Console
...
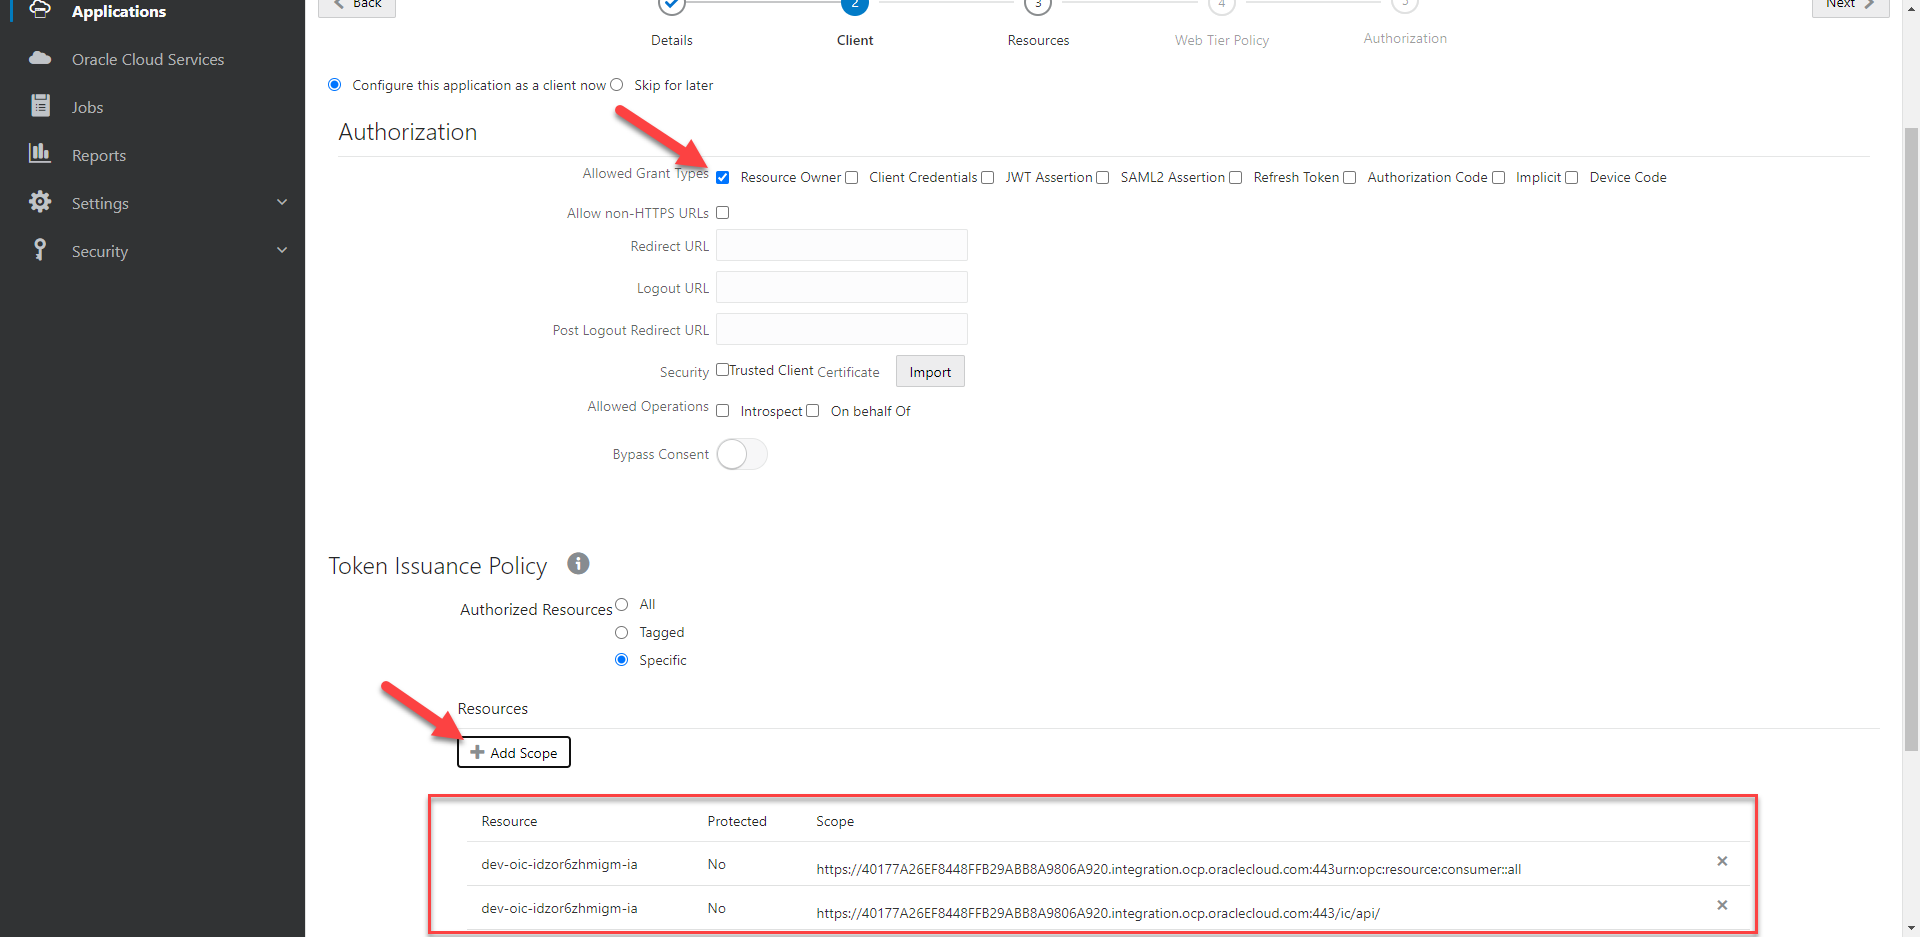
Give it a meaningful name such as ‘FlexDeploy OAuth App’‘FlexDeploy OAuth App’. On the client configuration select Configure this application as a client now. Be sure to select the grant type of Resource Owner and add scopes for the your OIC Instances where you want to use this application.
Copy the scope that ends in /ic/api to notepad
...
You can accept the default values throughout the rest of the configuration.
Copy the client id and secret that show up after completing the application (you can access this from the configuration tab as well)
Activate your application
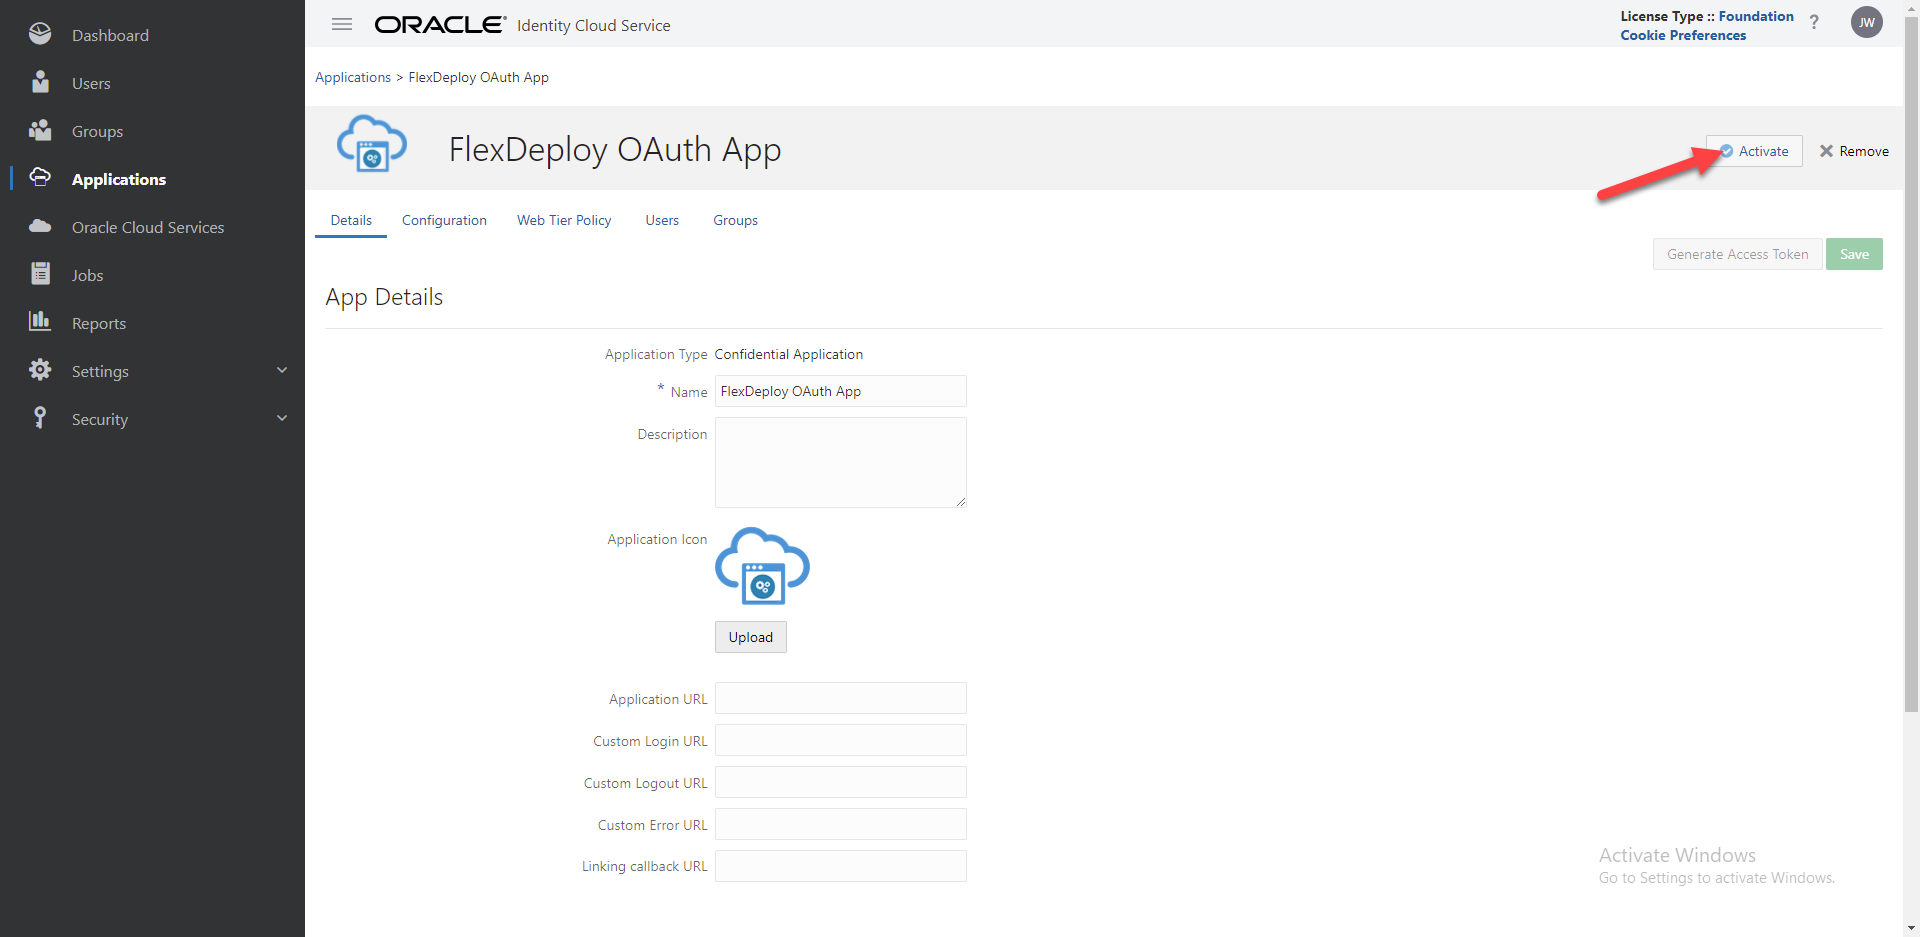
Finally you can add all of this information to the cloud account in FlexDeploy and you will be all set for using OAuth authentication for OIC!
...
2. Create the Cloud Account in FlexDeploy
...