At the completion of this section, you will:
...
In addition, we will associate an Endpoint to each Environment Instance to setup the base communication to the machine that is running the SOA server.
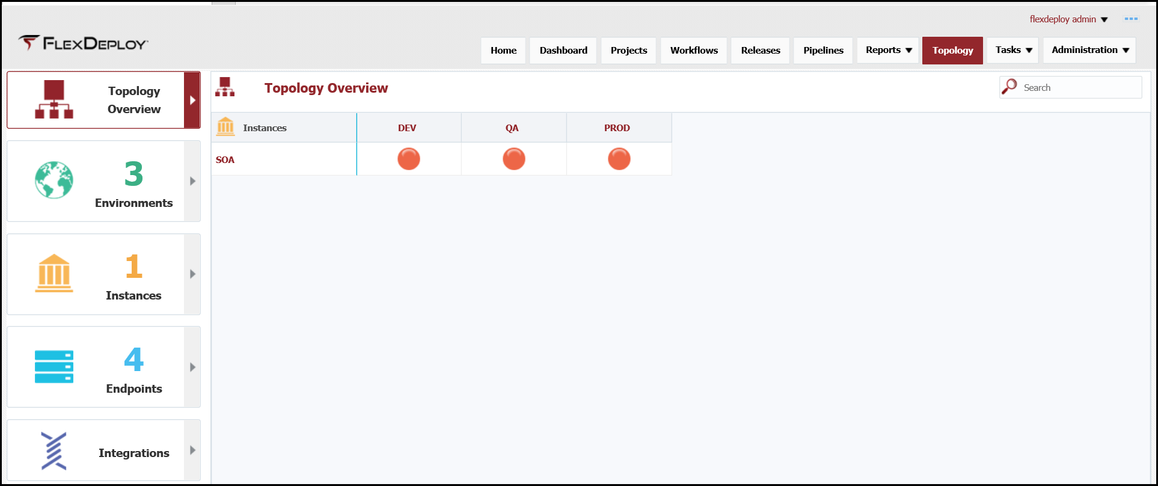
Viewing the current list of Environment Instance is accomplished by selecting Topology from the menu and then selecting Topology Overview from the left menu. You will see a table that has Instances as the rows and Environments as the columns with colored circles representing the Environment Instance. Color coding represents:
- RED - no required properties are set and/or the Endpoint is not configured
- YELLOW - some of the required properties are set and/or the Endpoint is not configured
- GREEN - all required properties are set and the Endpoint is configured
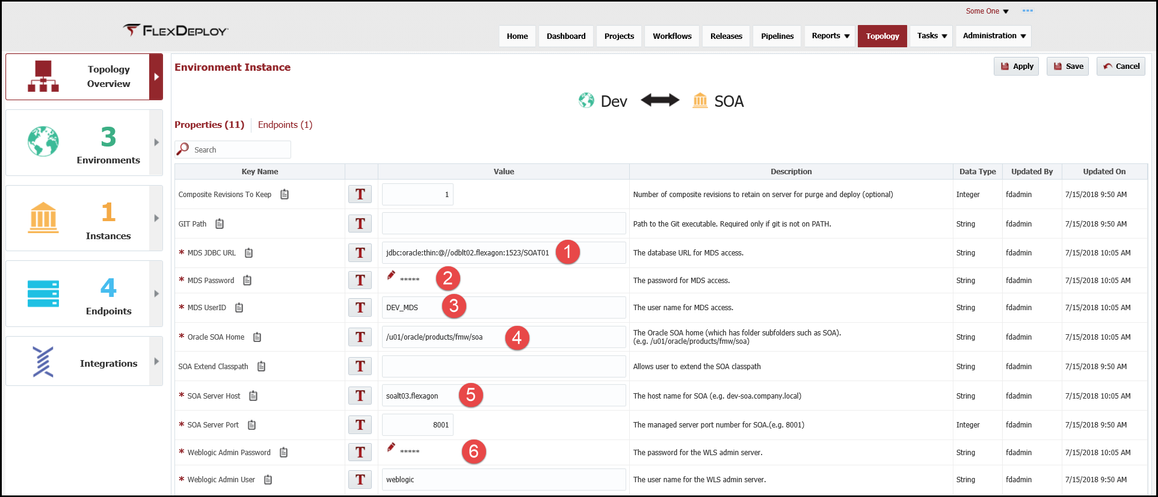
Selecting the RED circle for DEV will display the configurable properties/Endpoint and allows for the configuration of the properties. Select Save.
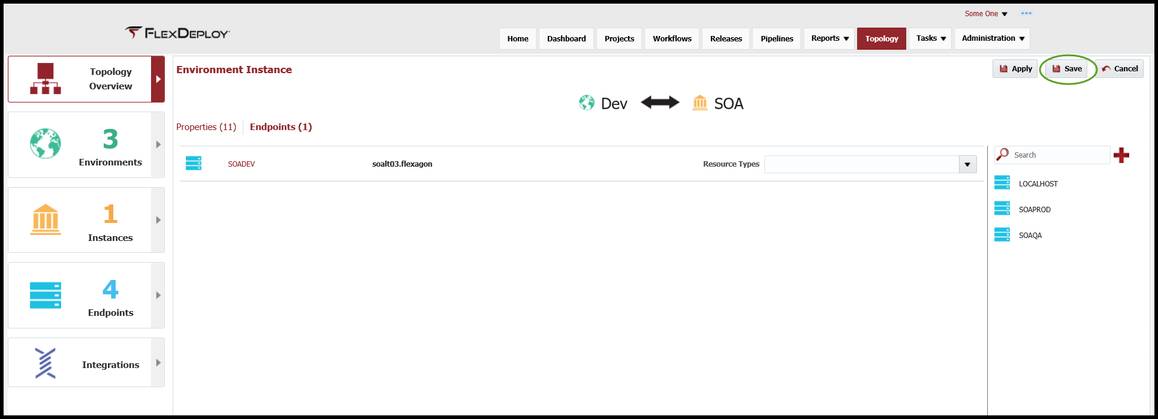
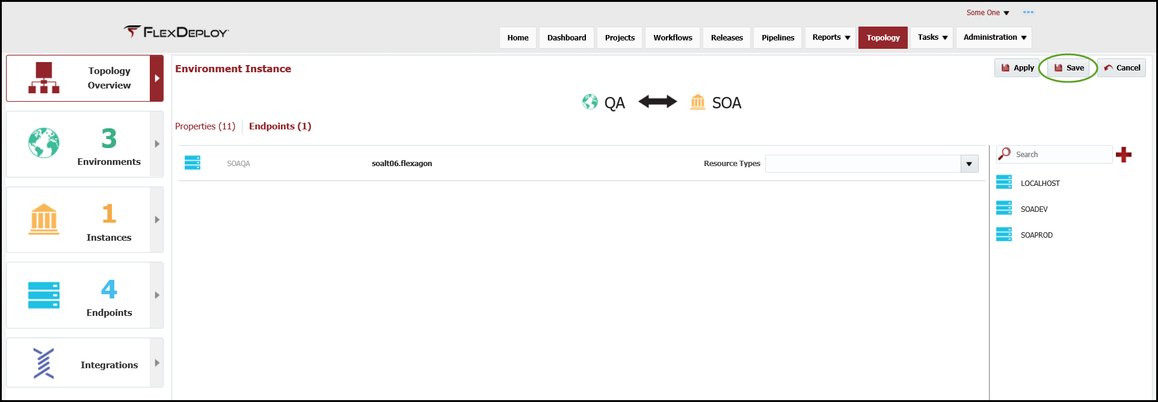
Select the Endpoints tab and drag the appropriate Endpoint for this Environment Instance into the center pane. Select Save.
At the completion of the DEV Environment Instance, the circle will be green.
Select the Endpoints tab and drag the appropriate Endpoint for this Environment Instance into the center pane. Select Save.
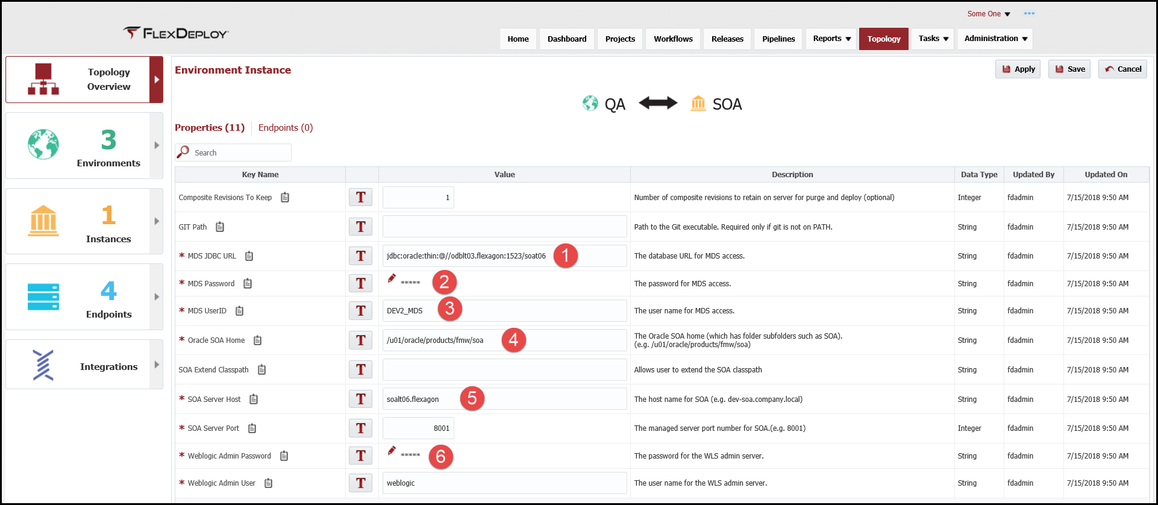
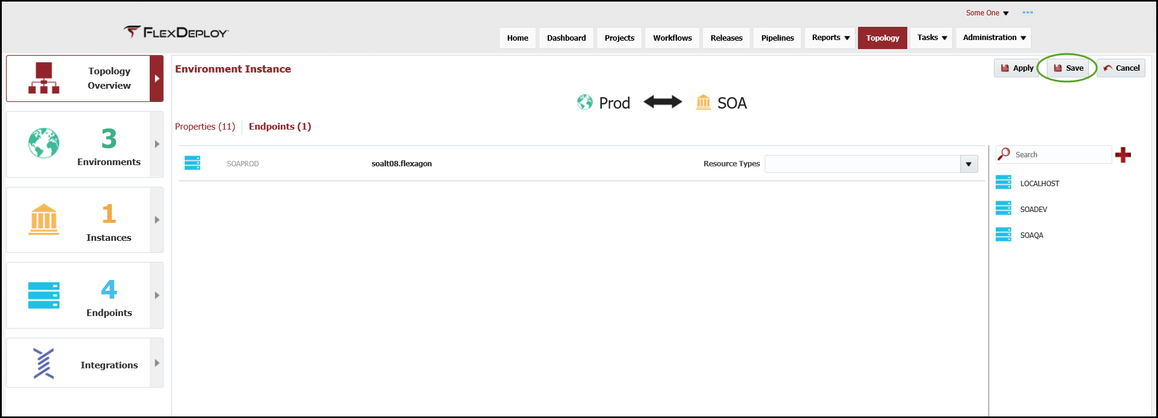
Configure PROD Environment Instance with the same steps as DEV.

Select the Endpoints tab and drag the appropriate Endpoint for this Environment Instance into the center pane. Select Save.
The Topology Overview should look like this at the completion of this section.

| Completed 6 of 10 Sections | Continue to GIT Instance Creation | Back to SOA Instance Creation |
|---|