To create a new release, navigate to the Search Releases screen using the Releases menu.
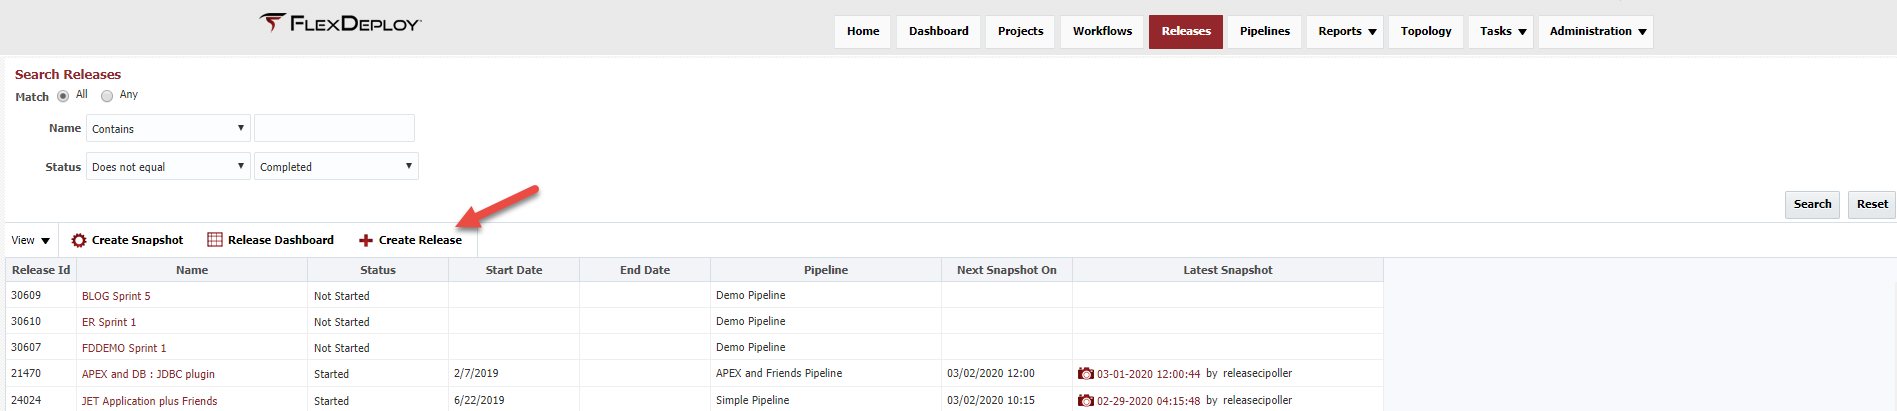
Click on the  button to create a release. To edit a release, click on the release name link in the Name column.
Field | Description | |||||
|---|---|---|---|---|---|---|
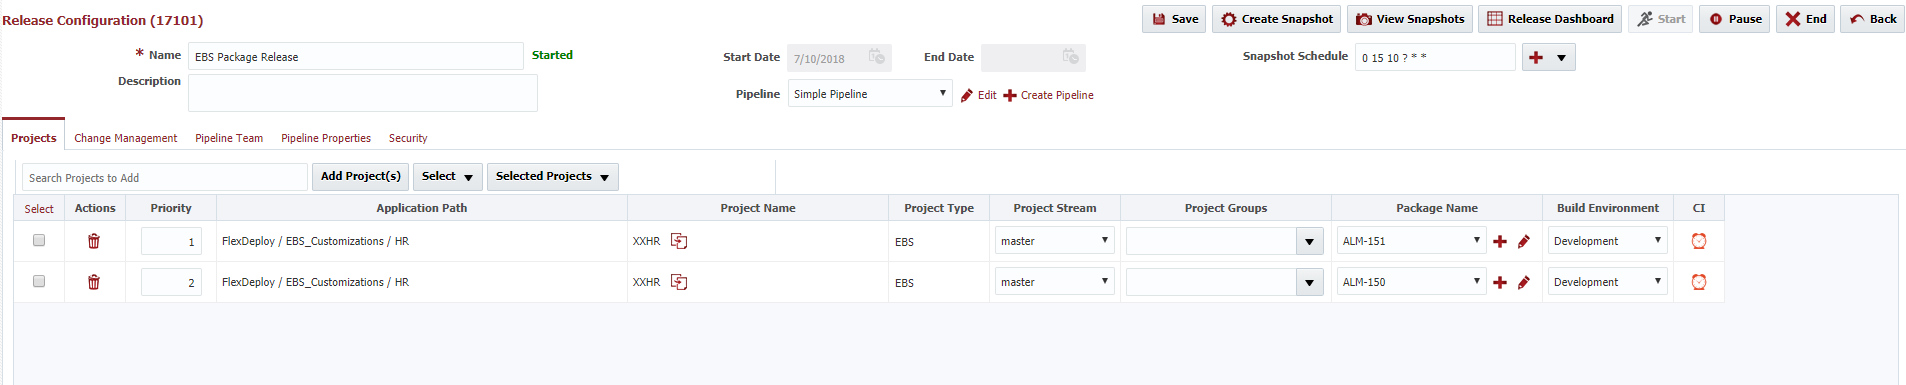
Name | The name of the release. | |||||
| Status | The current status of the release (read-only).
| |||||
Description | An optional description for the release. | |||||
Start Date | The date and time in which the release was started (read-only). | |||||
| End Date | The date and time in which the release was ended/completed (read-only). | |||||
| Pipeline | The pipeline which is used to process snapshots for the release. | |||||
| Snapshot Schedule | Cron expression to initiate the creation of a snapshot using new project versions for all release projects. Project-level Scheduled Build triggers are created, which can be viewed from project screen as well. More than one cron expression can be provided using ; separator. This would allow for more complex schedules. But all projects in the release will use the same schedule. For example,
If a project added to the release does not have Build Environment selected, then it will not be part of snapshot creation. The latest project version will be used for the project. When Release is Ended, all Scheduled Build triggers for each project which are associated with the release will be deleted.
|
...
Column | Description |
|---|---|
Priority | Priority defines sequence of deployment for project/package when release snapshot executes through Deploy All Step. Note that Priority value does not have to be in increments of 1. For example, you can define priority for various project/package to 3, 4, 8, 20. Priority value must be greater than 0. Unlike project priority, this value is not limited to 100, you can use larger values if desired. You can use same number for more than one project/package. For example, if you set 2 for 5 project/package, then all of them will deploy at same time (parallel execution). When Deploy All Step executes it will deploy from lowest to highest priority project/packages. All project/package at same priority are deployed at same time, if successful then next priority project/package are deployed. If deployment fails at any point then next priority project/packages will not be deployed. Priority setting can be used in conjunction with Project Groups, in which case you will have multiple Deploy All Step in your pipeline stage. For example, Deploy EBS Projects, Deploy MuleSoft Projects etc. General recommendation is to use single Deploy All Step and control sequencing (dependency) using Priority. When project is added to release, project's deploy priority is used to default value of priority in release. |
Application Path | The fully-qualified path of the project (read-only). |
Project Name | The name of the project. Project is added using Add buttons, Project Name can not be modified here. |
| Project Type | The type of the project (read-only)
|
| Project Stream | The stream used for the project/package. Only one stream per project/package per release may be used. |
| Project Groups | An optional categorization based on groups defined in associated pipeline. Selection will affect the behavior/implementation of Deploy All, Test All, and Execute All pipeline stage steps. |
| Package Name | The package name for the project, only applies for partial deployment projects. If using All Files, then select (All Files) from package name drop down or select specific package. New Package
Find Existing Package
You can edit package details if using package, See Managing Files for Partial Deployment. |
| Build Environment | If there is only one build environment for project, then this will be defaulted. If no build environment specified and release is setup for Scheduled Build, this project will not be included in Scheduled Build. |
| CI | Defines how build is initiated for the project. This column will appear only if a Snapshot Schedule is configured for the release.
|


...
Once a release is completed, click the  button to end the release. Like paused/suspended releases, snapshots can be created and sent for execution once ended. Ended releases cannot be resumed, and at this point you would need to create a new release.
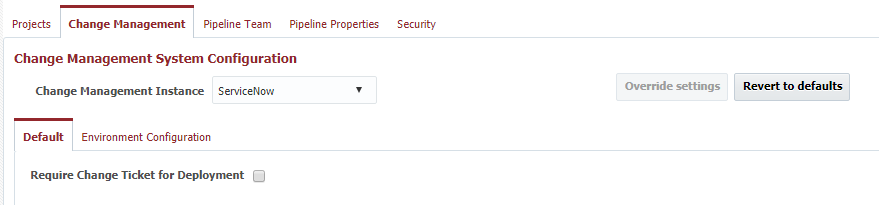
Change Management
The Change Management System tab allows association of the release with any Change Management Instance which was configured in the topology. You must create the instance prior to configuring your release to use it. Edit a Release, and select a Change Management System Instance from the drop down to associate it to the release. Association of a Change Management Instance is optional, and used only to integrate with ServiceNow.
| Info | ||
|---|---|---|
| ||
@since 5.2.0.1 If the referenced pipeline specifies the default CMS instance, the release will automatically select that instance. However, you may still override the instance on the release for rare cases where that makes sense. If all releases for the pipeline should use the same CMS instance, then the default prevents forgetting to select it on each release that is created. |
Field | Description |
|---|---|
Change Management Instance | The Change Management Instance in Topology to associate with this release. Optional. |
The Default tab provides configuration which applies to every stage of the associated pipeline. Check the Require Change Ticket for Deployment checkbox if you want to enforce that every stage in the pipeline have an associated change ticket in order to submit a deployment request for that stage/environment. If any of the execution related steps (e.g. Deploy, Deploy All, etc.) are executed in the pipeline for a stage which requires a ticket, and no ticket is provided, the step will fail indicating a ticket is required.
The Environment Configuration allows configuration by pipeline stage. To override from the default, click the 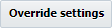 button, and then click the
  button to add a new row. In the row, select the environment/stage, and indicate whether or not you wish to require a change ticket. The execution behavior is the same as with default configuration when execution related steps are performed in the the particular environment within the pipeline. To delete the configuration override for a an environment, click the
  button in the row. The fallback to the settings on the Defaults tab, click the
  button.
| Tip |
|---|
Make sure to check the Require Change Ticket for Deployment checkbox for any stages in the pipeline containing an External Approval Gate. This verifies a change ticket is attached to the approval task that gets created. |

| Tip | ||
|---|---|---|
| ||
To require a change ticket for Production only, set Require Change Ticket for Deployment to "No" on the Defaults tab, and add an override for Production environment with Require Change Ticket for Deployment" set to "Yes" (on the Environment Configuration tab). |
...