Blueprints are a new addition to FlexDeploy which assist users with creating FlexDeploy projects and the associated configuration, accelerating the journey to the ultimate goal - building and deploying software! A blueprint has the understanding of the end goal, and gathers the information necessary to auto-generate the underlying componentry.
Whether you use a blueprint or create objects by hand the componentry is the same. The underlying components consist of a Topology definition, build and deploy workflows, a source code repository connection, and a project definition. Blueprints provide a jump start to get something working quickly, and letting you come back later to enrich and extend. In that spirit, blueprints default many properties and configure a single deployment target - Development.
You can launch Blueprints by clicking on the  icon in the FlexDeploy header. To create a project, complete the 5 simple steps in the wizard.
...
Enter the Blueprint properties and select the Build and Deploy options
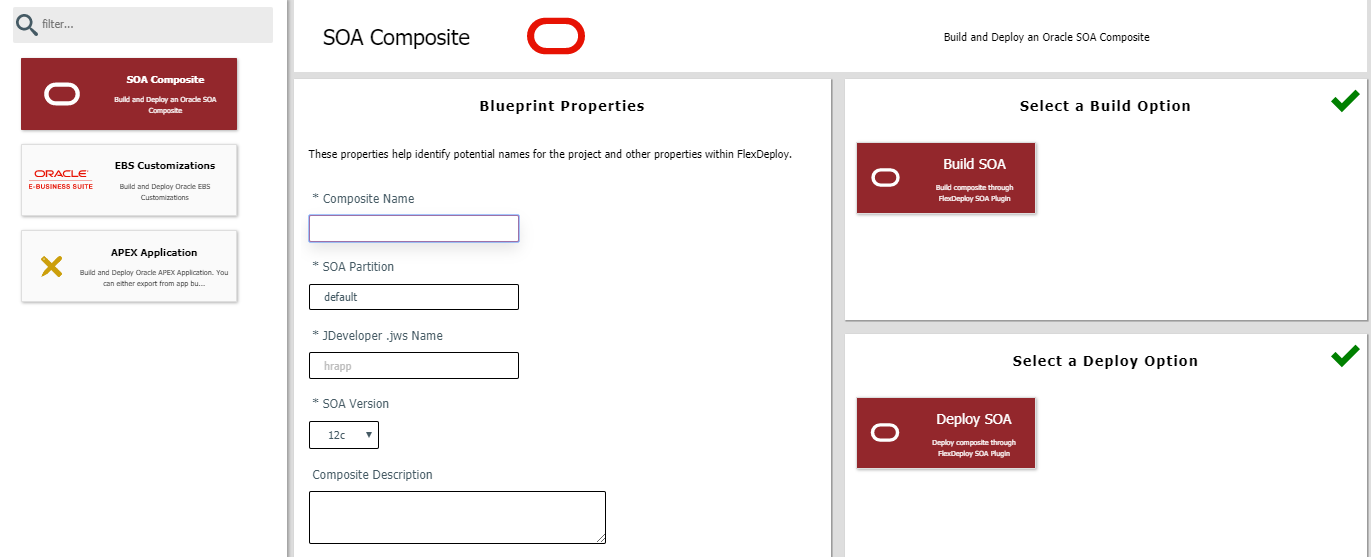
Click Next arrow in the left navigation.
...
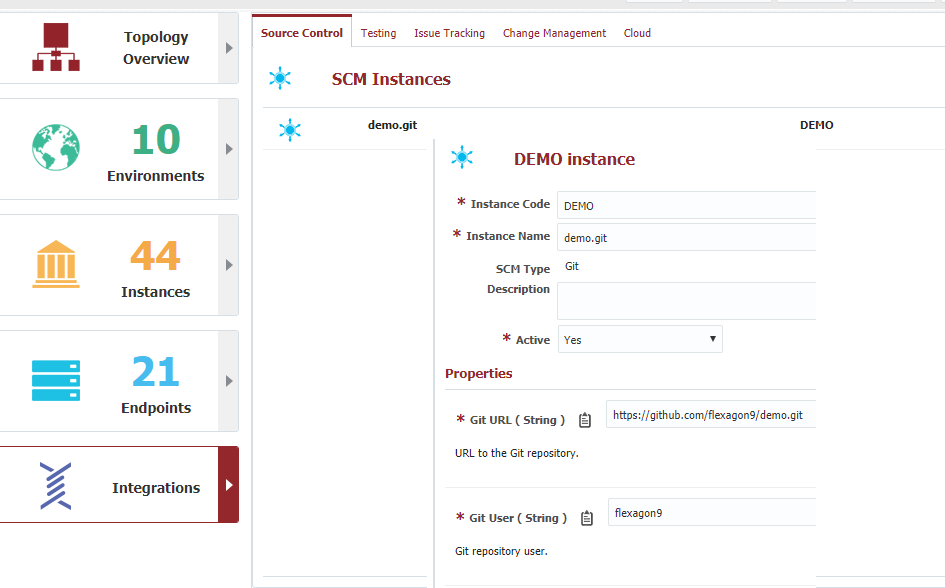
Enter the project configuration for the selected repository. This information identifies the location of the source code within the select repository.
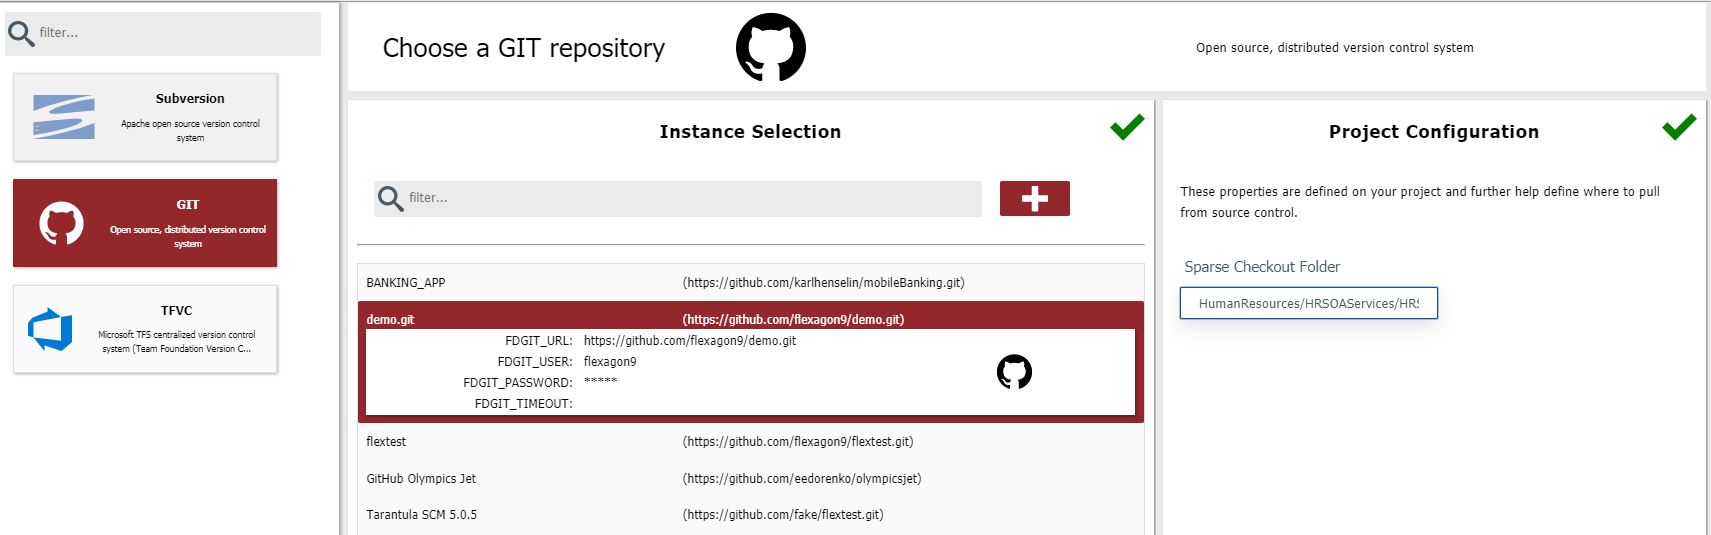
Click Next arrow in the left navigation.
...
This step will collect any environment specific build properties, and identify which endpoint to execute on.

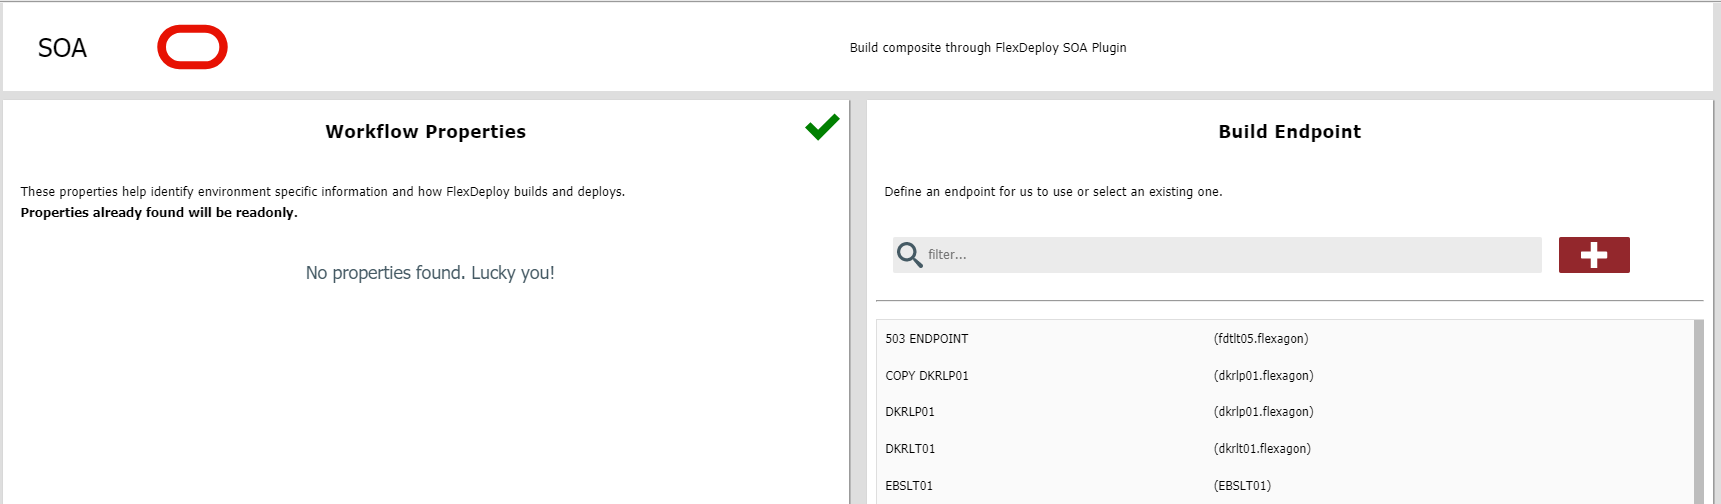
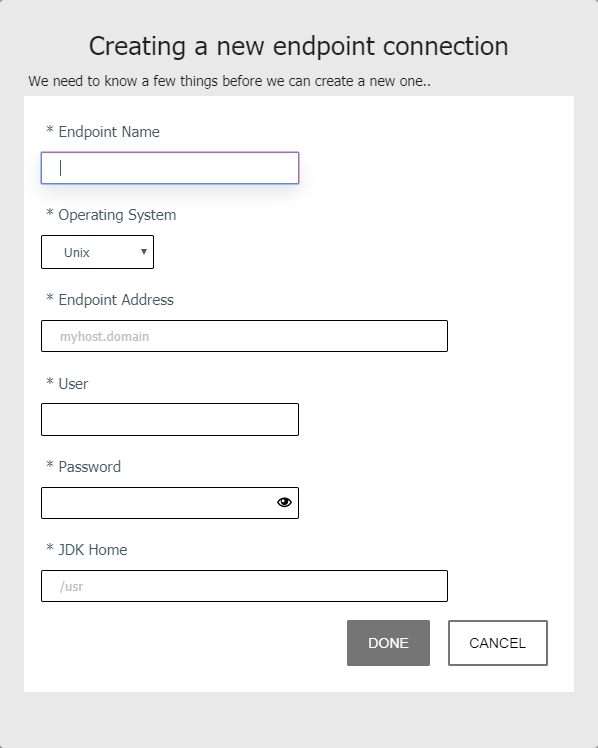
Enter values for any workflow properties which are required for the build. In the image above, no properties are required for this build. Select the target endpoint that this build should execute on, or click the ![]() icon to create a new one.
icon to create a new one.
...
| Tip | ||
|---|---|---|
| ||
Keep in mind that the focus of the Blueprint is to get something working quickly. With that in mind, the blueprint collects information for the Development environment only. You can map and configure as many environments as you wish later. |

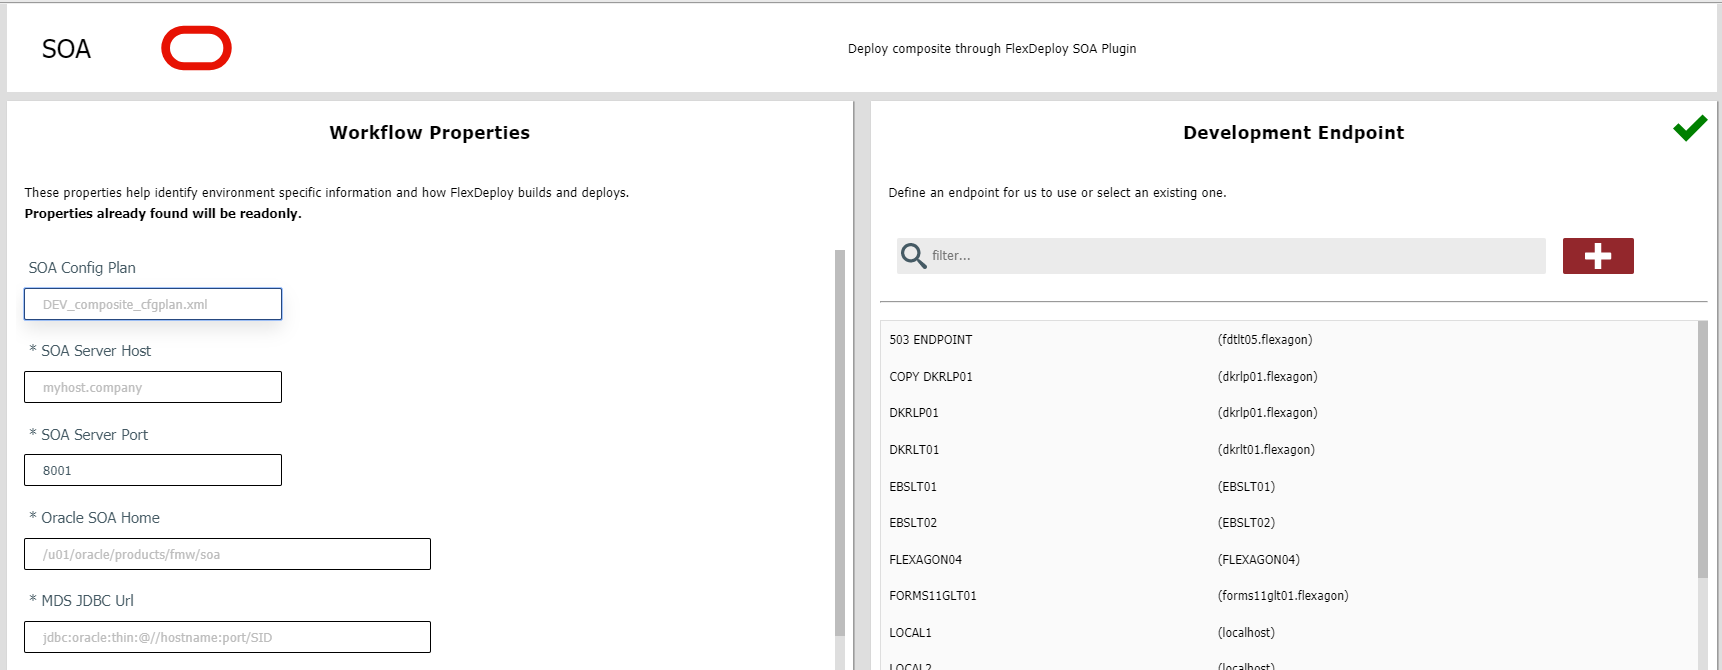
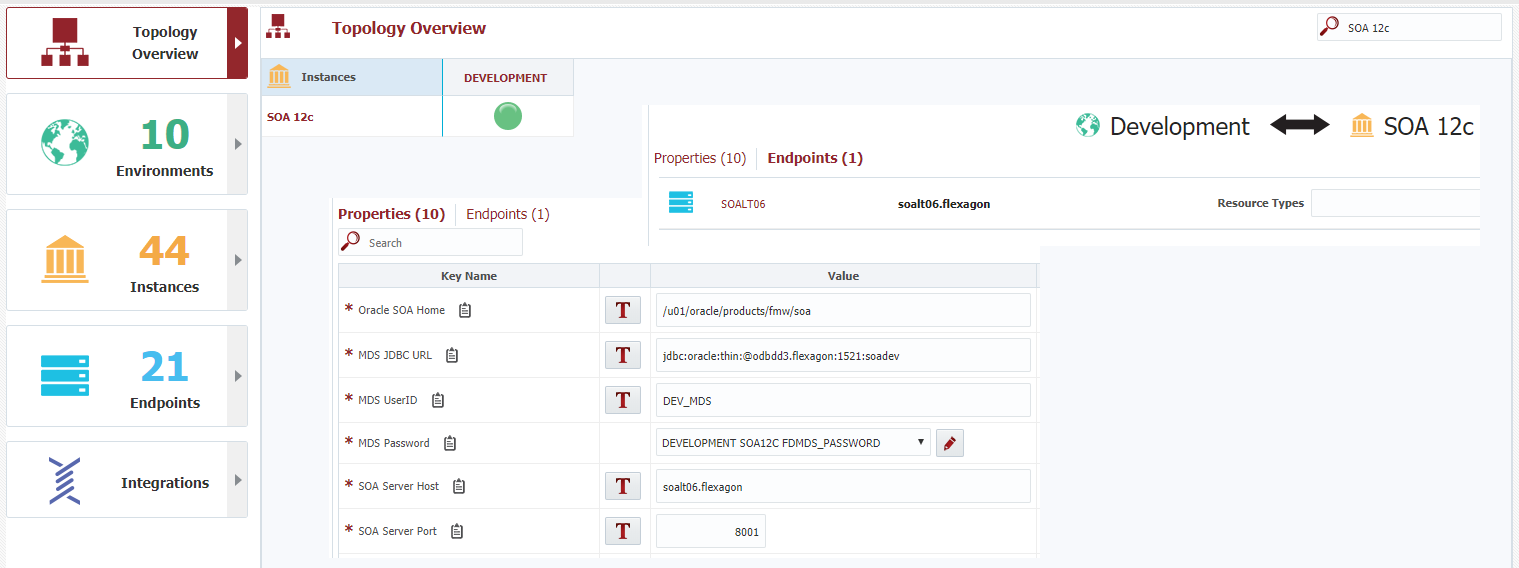
Enter values for any workflow properties which are required for deployment into the Development environment. In the image above, several properties are required for this deployment. Select the target endpoint that this deployment should execute on, or click the ![]() icon to create a new one.
icon to create a new one.
| Tip | ||
|---|---|---|
| ||
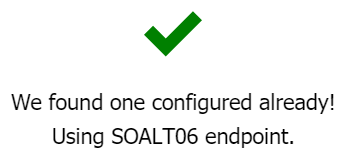
If an Endpoint already exists for the target Development instance, it will be selected automatically (and it cannot be changed). A message will be displayed within the Development Endpoint section similar to the following.
|
Click Next arrow in the left navigation.
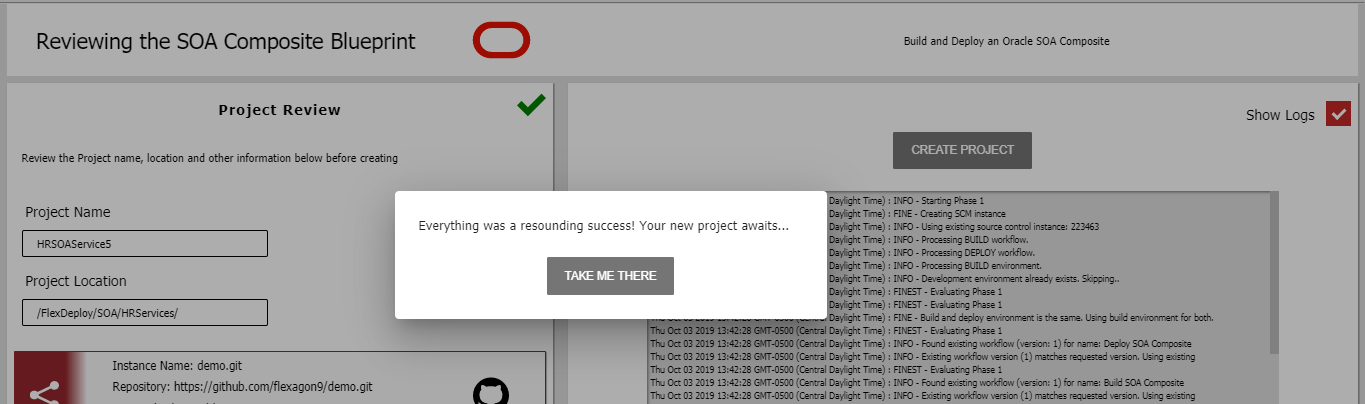
Step 5 - Final Review
The final step is to review the information and generate the project and supporting components. The project name and project location are derived based on other information provided, but can be changed upon final review if desired. You will also see the source code repository and the source code location that has been selected for the project, the build and deploy workflows that will be created or linked, and the build and deploy environments and instances that will be created or linked within the topology.
Check the Show Logs option to view detailed information about the generation process. Click Take Me There to go to your new project.
Summary
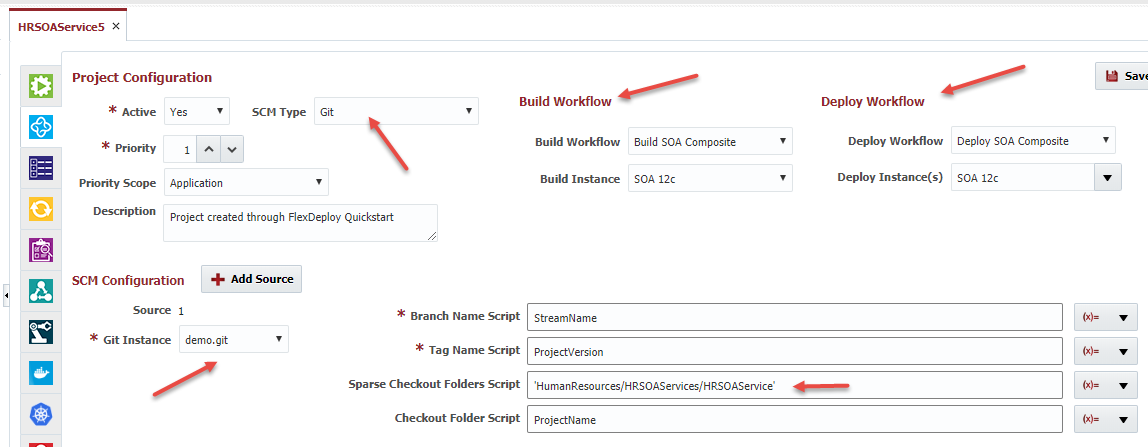
The Blueprint creates the Topology configuration, the build and deploy workflows, the source code repository connection, the project, and the linkages between them.
Topology

Source Code Repository Connecton (SCM Instance)

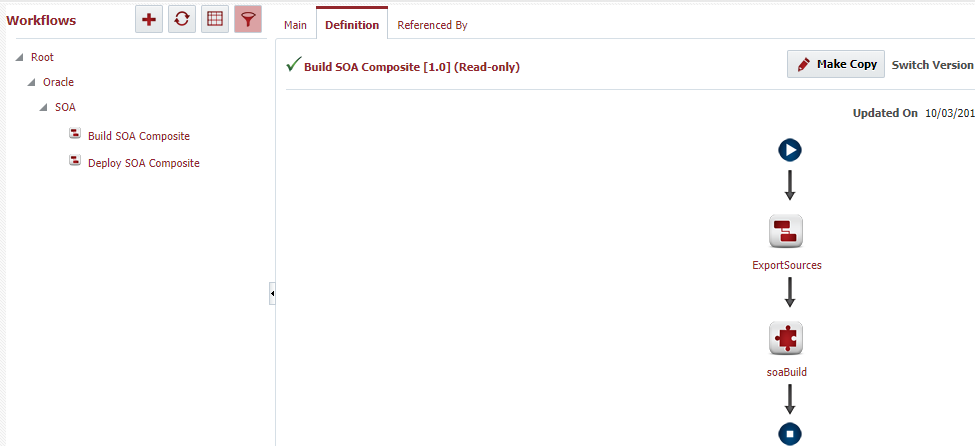
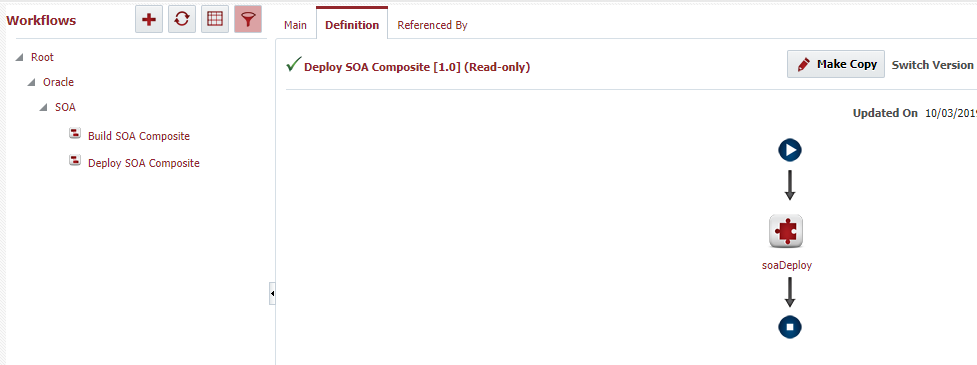
Workflows
Project