It is recommended that you use both plugins (the FlexDeploy and Jenkins ) plugins together to make your projects as efficient as possible. This way you can continue to build projects using Jenkins, and also use all of the features provided by FlexDeploy. Here we'll walk through a basic example of how to use these plugins to build a project with Jenkins, and then kick off a FlexDeploy workflow that will get the finished artifact and put it in the FlexDeploy artifact repository.
| Table of Contents | ||||
|---|---|---|---|---|
|
Jenkins Configuration
...
Installing the Plugin
First we will need to download the Jenkins FlexDeploy Plugin from here.[MAKE SURE TO MAKE THIS A LINK TO A PLACE THEY CAN GET THE PLUGIN.]
- If you downloaded the source code, you'll need to build the
.hpifile by navigating to the directory containing thepom.xmland runningmvn package.If you just downloaded the compiled
JenkinsFlexDeployPlugin.hpi, you can skip this step and just move on to step 3.
- To upload the plugin, connect to your Jenkins server and click "Manage Jenkins" then choose "Manage Plugins".
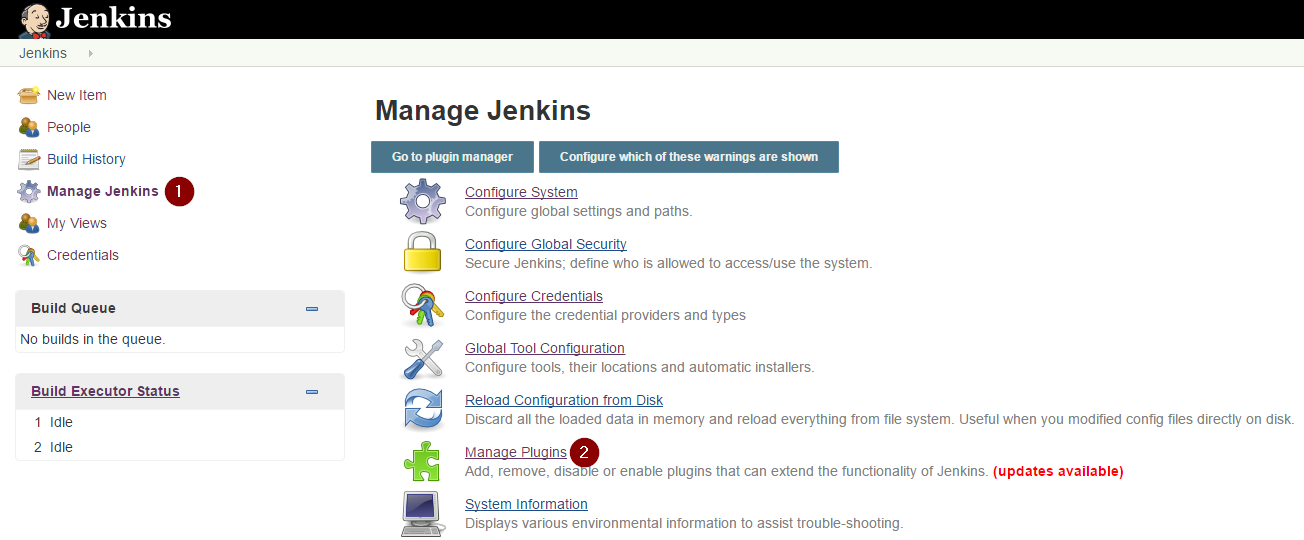
- To upload the plugin, connect to your Jenkins server and click "Manage Jenkins." Then choose "Manage Plugins."
From here, you can either go to the "Available" tab, and search for FlexDeploy.
Info If you don't see the FlexDeploy Plugin in the update center, you can still download it directly from here.
Expand a. Download the Jenkins FlexDeploy Plugin from the Jenkins Support Site.
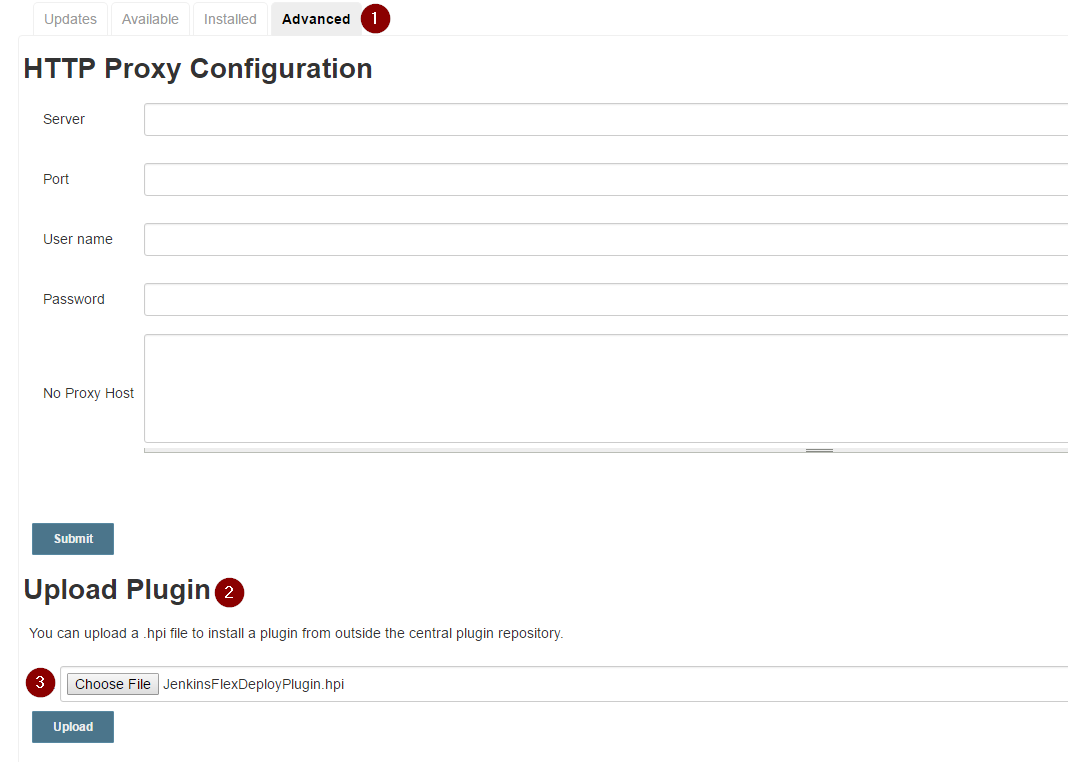
b. On the "Manage Plugins" page, choose the "Advanced" tab, then click "Choose File" under the "Upload Plugin" section.
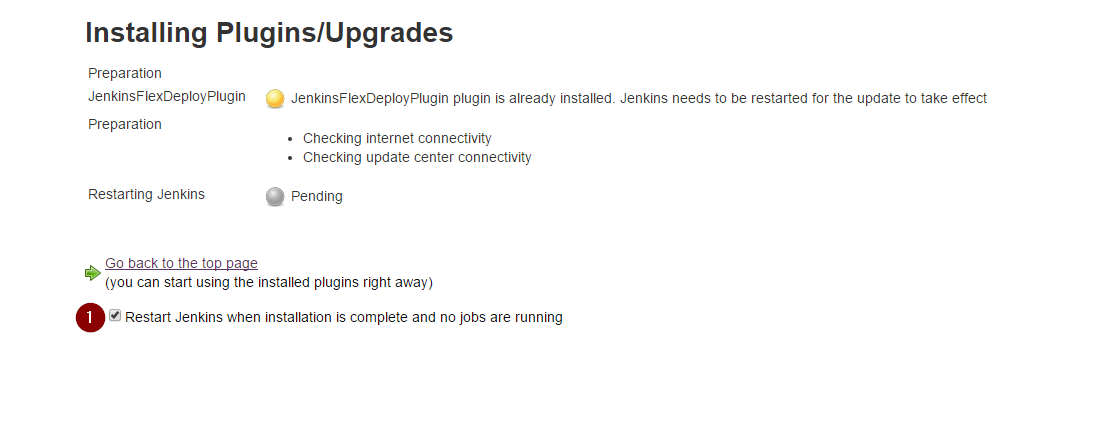
After clicking Uploadinstalling the plugin, you may need to restart the Jenkins server for the changes to take effect. Just check the box on the next screen if it says "Jenkins needs to be restarted for the update to take effect".
Configuring the Plugin to work with FlexDeploy
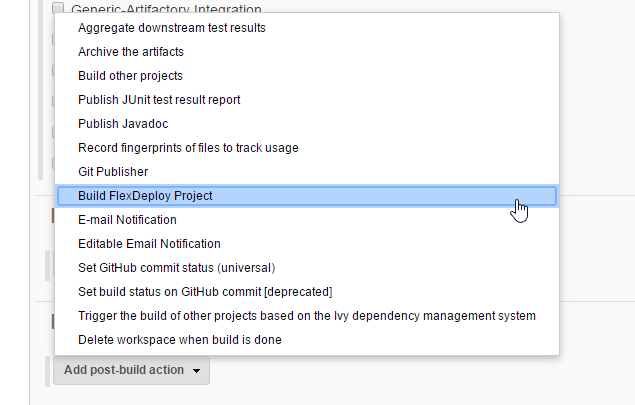
In your Jenkins project configuration, scroll down to the "Post-Build Actions" section, and click "Add Post-Build Action".
Info Make sure that you use place the "Archive the artifacts" step before using the FlexDeploy plugin , step so the plugin can find the proper artifacts.
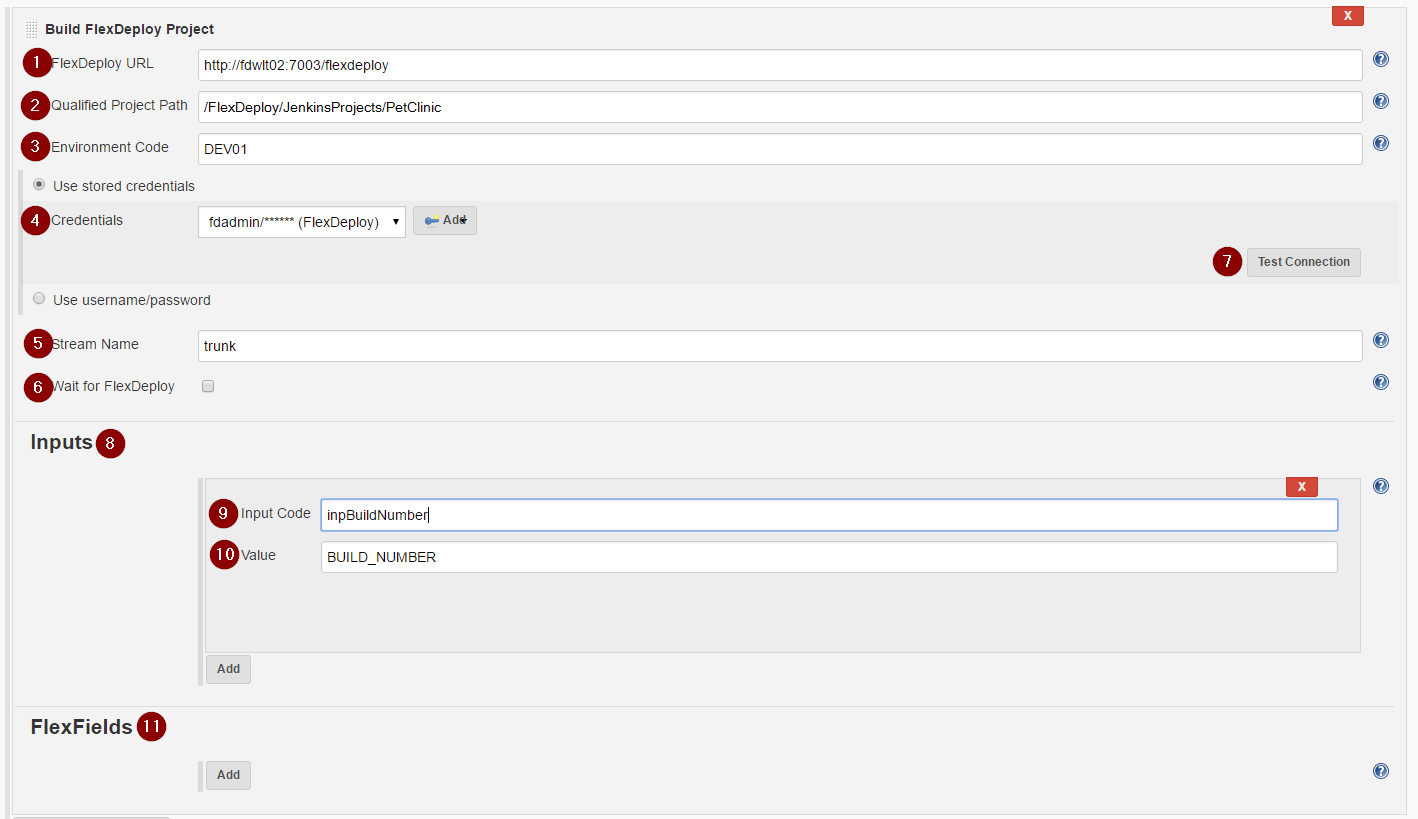
- Choose "Build FlexDeploy Project" from the menu.
- Once you've added the Build FlexDeploy Project step, you should see a configuration page like this.
...
- After uploading the FlexDeploy Jenkins Plugin to FlexDeploy, go to your Environment/Instance configuration for the Environment and Instance you plan to run this plugin in. You should see a page like this:

- Jenkins Username - The username to connect to Jenkins as.
- Jenkins Password - The password for the Jenkins User
- Jenkins URL - The URL of the Jenkins server to connect to.
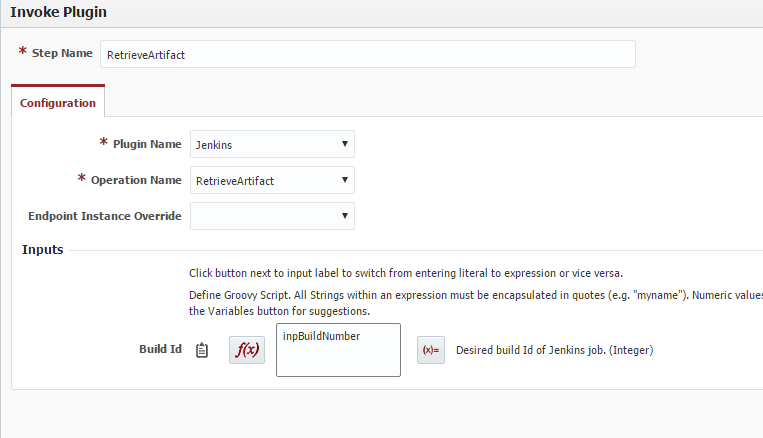
- Once your Environment/Instance is configured, you're ready to use the Jenkins plugin in a workflow. Create a new workflow for your project to use, and add the retrieveArtifacts step from the Jenkins Plugin.

- Create a workflow input called
inpBuildNumber.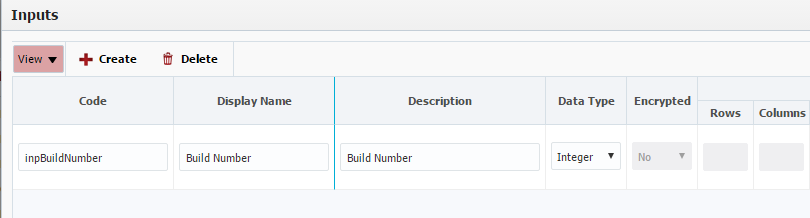
- Drag in the plugin step, change the input type to script, and enter the name of the input we just created.
- Create a workflow input called
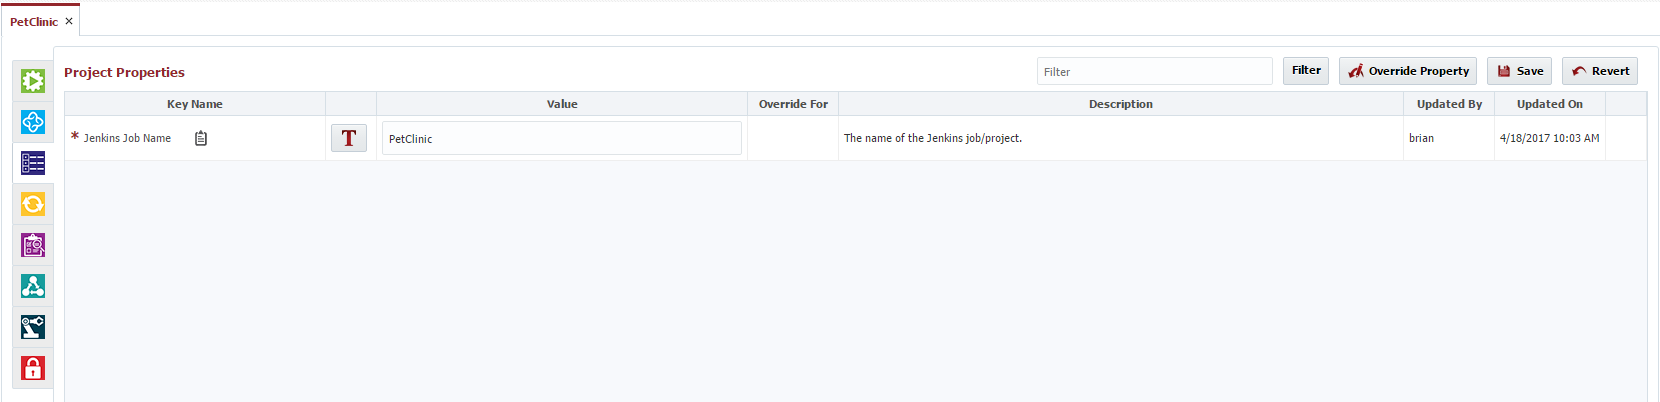
- Now, create the FlexDeploy project that Jenkins will execute. Once you choose the Build Workflow we just created, you should be able to see a project property called "Jenkins Job Name". Enter the name of your Jenkins job/project here.
Once you've configured the workflow and the project property, you should be set up to do a build!
Info If you want to use FlexDeploy to deploy an artifact build built in Jenkins, simply set up a Post Build Trigger on your FlexDeploy project, and choose the Environment and Stream Name that you're using from Jenkins, then configure a deploy workflow to deploy a file from the FlexDeploy artifact repository.
...
- Go to your Jenkins server where you configured a project using the FlexDeploy plugin.
- Click "Build Now" and you should see the project start to execute.
- Now go back to your FlexDeploy server and navigate to the project you set up to get an artifact from Jenkins. Once the Jenkins build is finished, you should see FlexDeploy start building the project.
- From there you can use any of FlexDeploy's many plugins to manage deploy the artifacts.