- Understand how to request a build for a Tomcat application
- Understand how to request a deployment of the build artifact to an environment
- Understand the FlexDeploy deployment model of build once and deploy to many environments
- Understand how to view the execution data
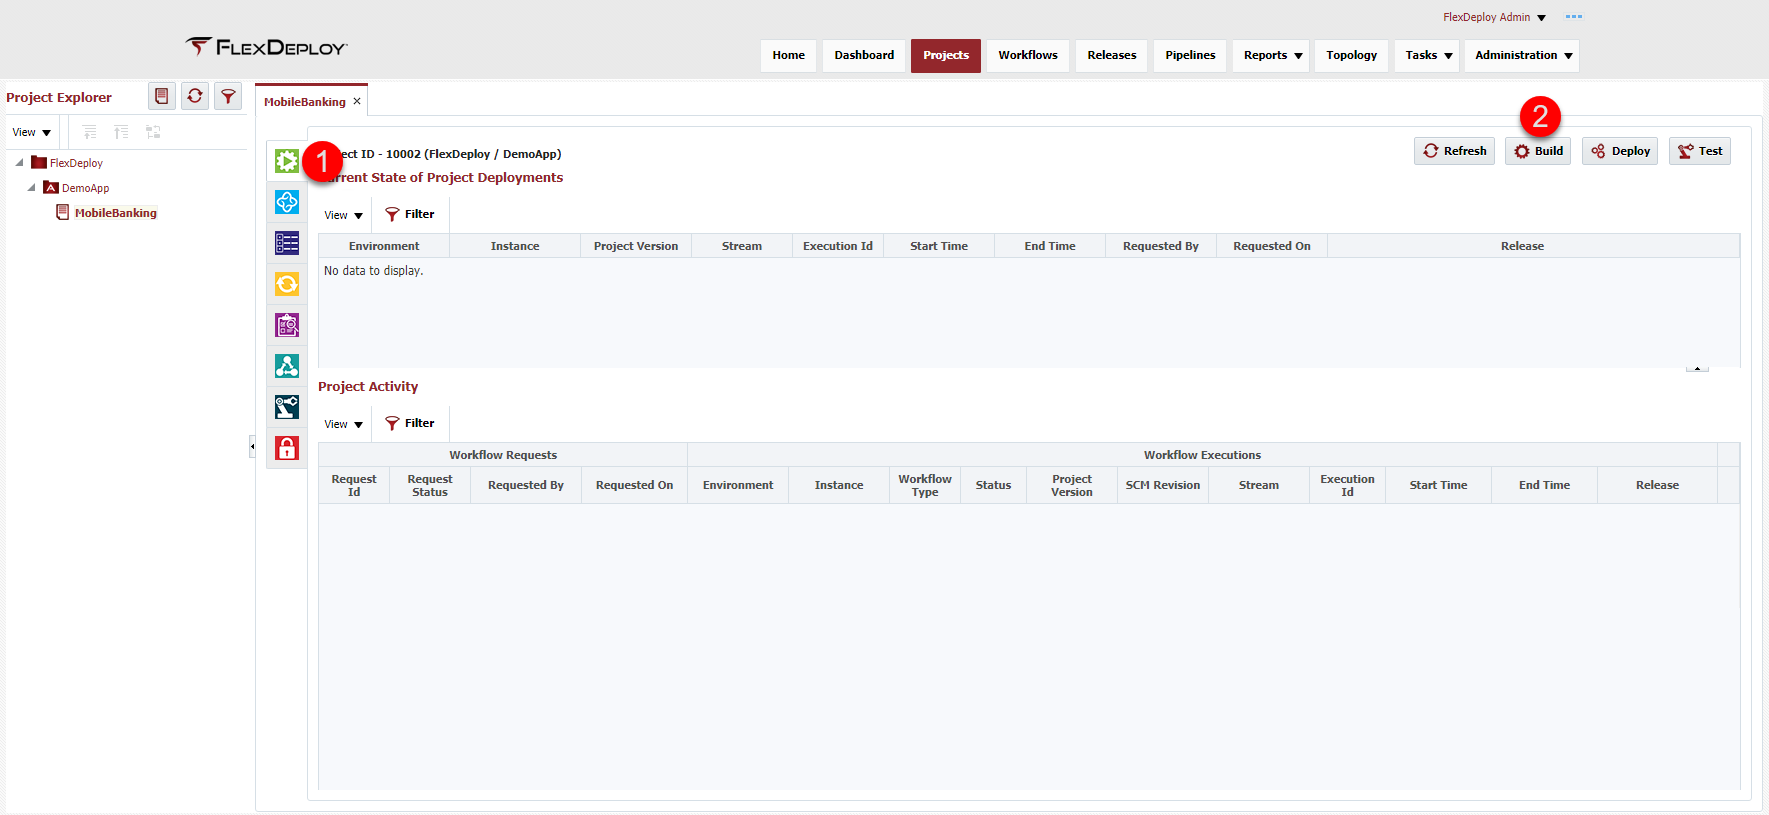
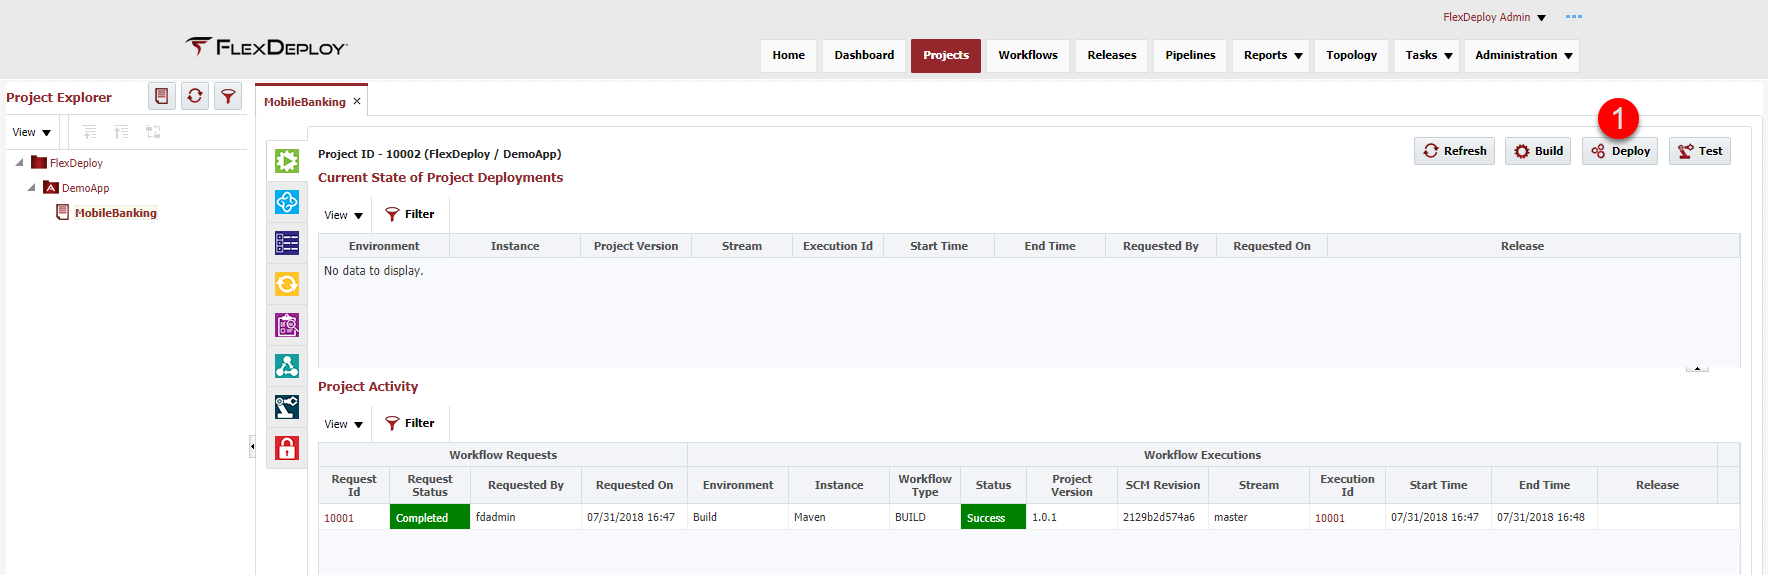
Now that FlexDeploy is configured with everything that is required to execute a build and deploy request for the application, we can execute the first build. On the Project, select the first tab (green - Execution) and select the Build button.
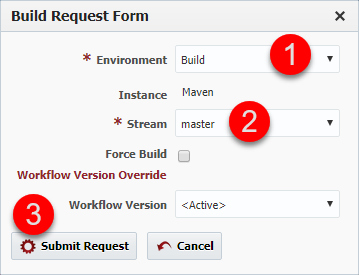
The Build Request Form will appear and we need to:
- Select the environment we want to build the application in,
- the environments
- that had the Build Environment checkbox will appear in the dropdown
- Select the SCM stream that was configured on
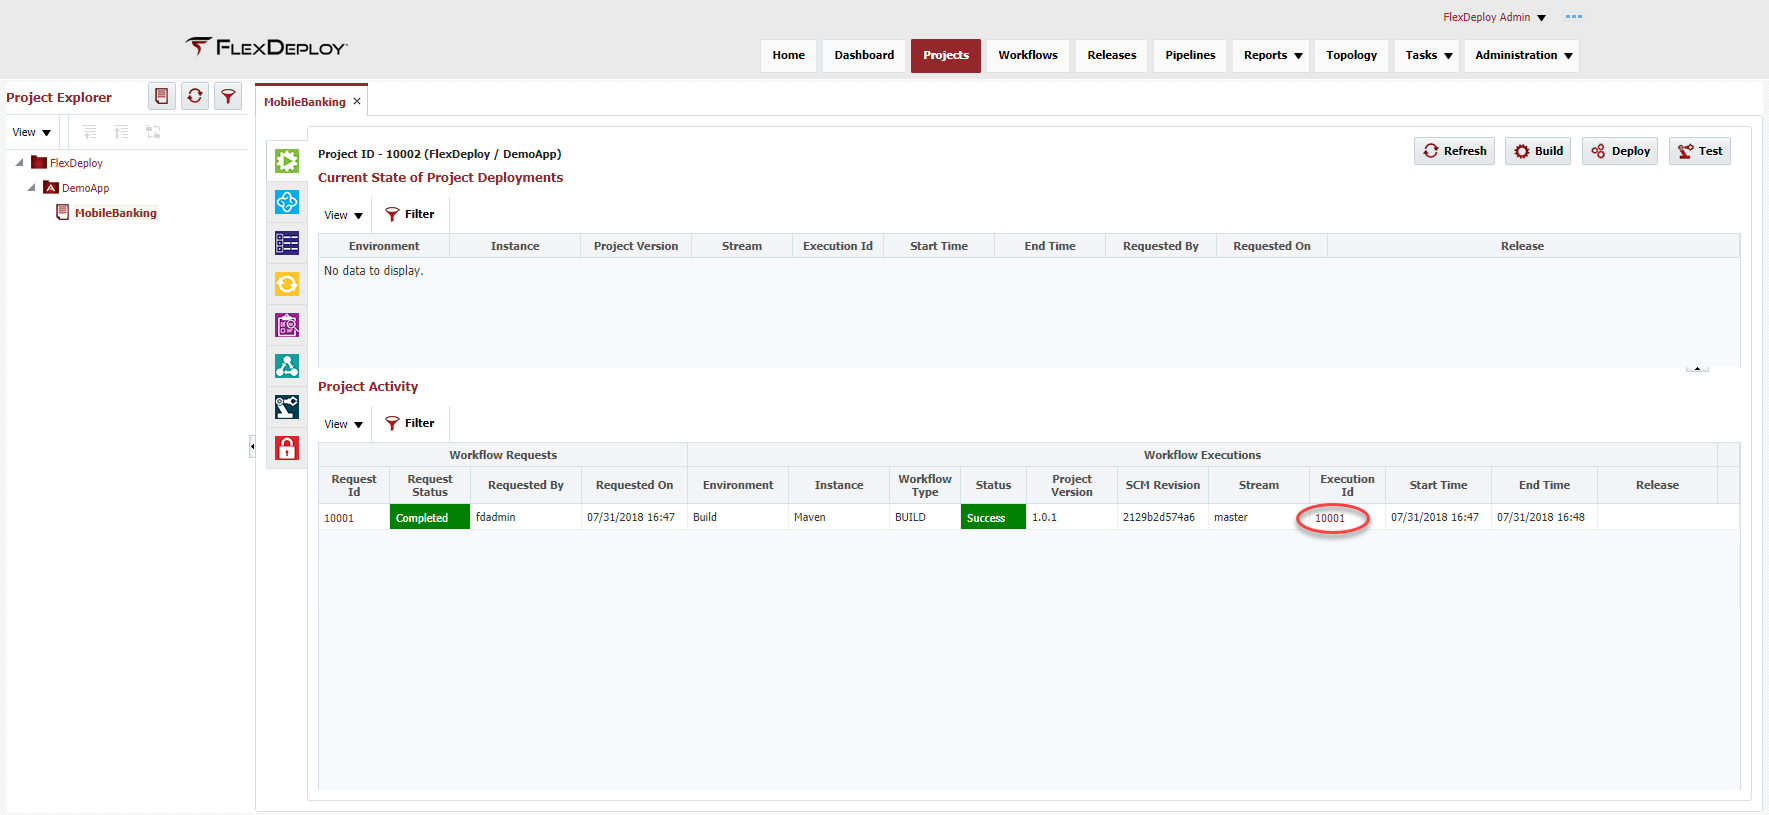
Upon submission, the build workflow is initiated and the workflow steps are executed on the Maven instance
in the BLD environment, utilizing the
MVNBLD endpoint. Upon completion of the workflow, the execution status will be successful.
More information about the workflow execution can be viewed from the Execution Id link.
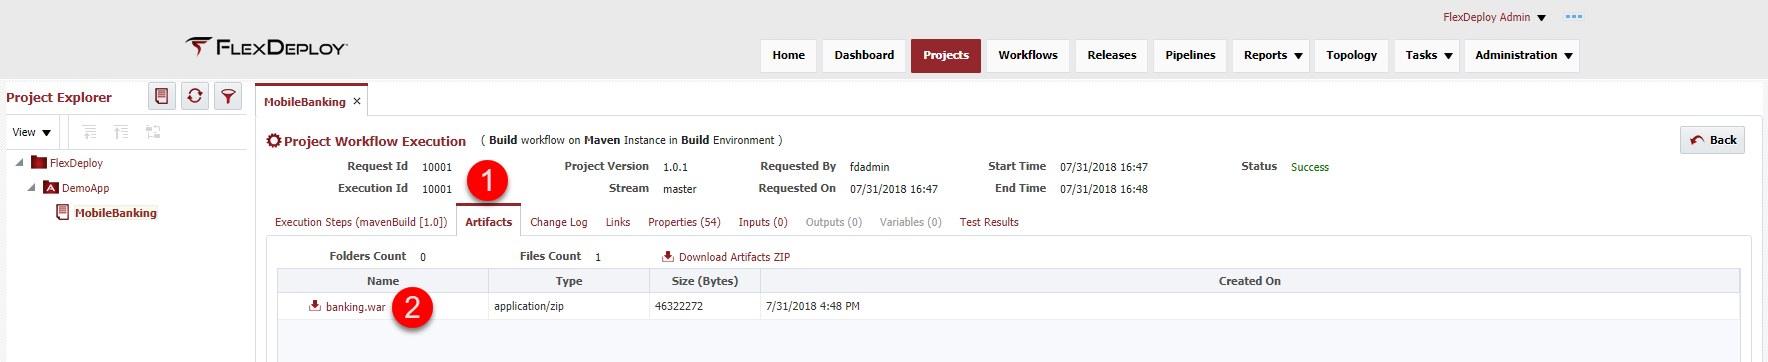
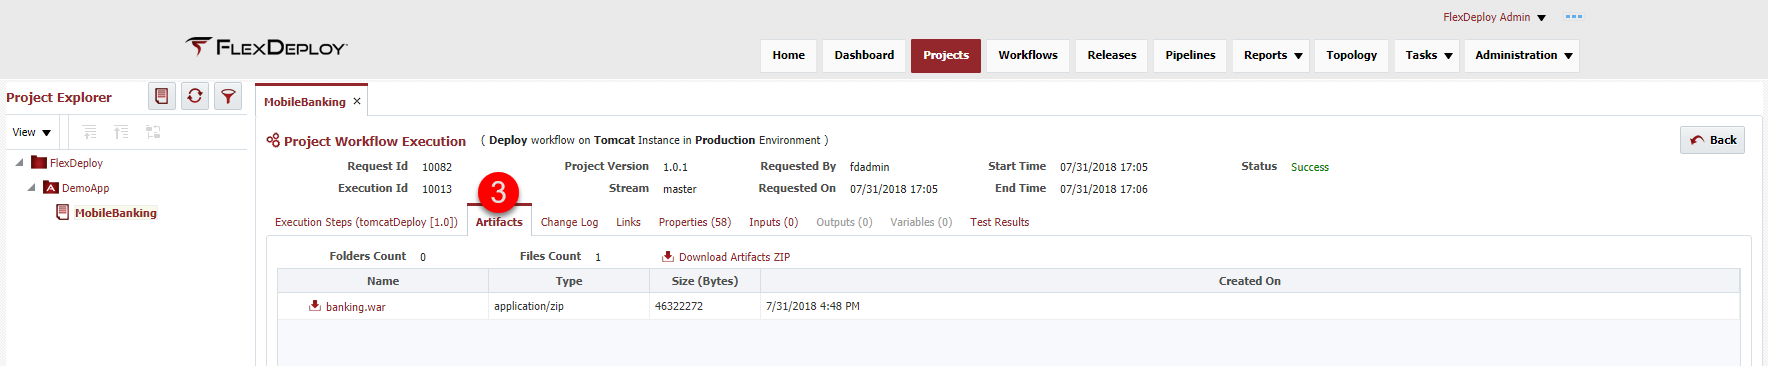
With the successful execution of the build, a WAR file artifact is created, stored in
and marked with the Project Version. Every build will generate a new Project Version. The generated WAR artifact can be viewed from the
Artifacts tab.
Now the application can be deployed to
an environment
by selecting the Deploy button.
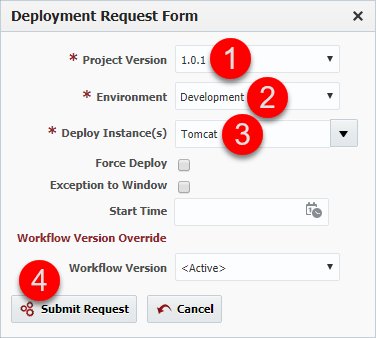
The Deploy Request Form will appear and we need to:
- Select the Project Version, the form will default to the latest Project Version but the dropdown will contain all previously create Project Versions
- Select the Environment
- that the deployment will be executed in
- Select the
- Deploy Instance, will be default from the Project configuration. Deployments can happen on multiple instances.
- Submit the request, this will initiate the tomcatDeploy workflow
Upon submission, the
deploy workflow
is initiated and the workflow steps are executed on the TOMCAT instance in the DEV environment, utilizing the TCATDEV endpoint. Upon completion of the workflow, the execution status will be successful.
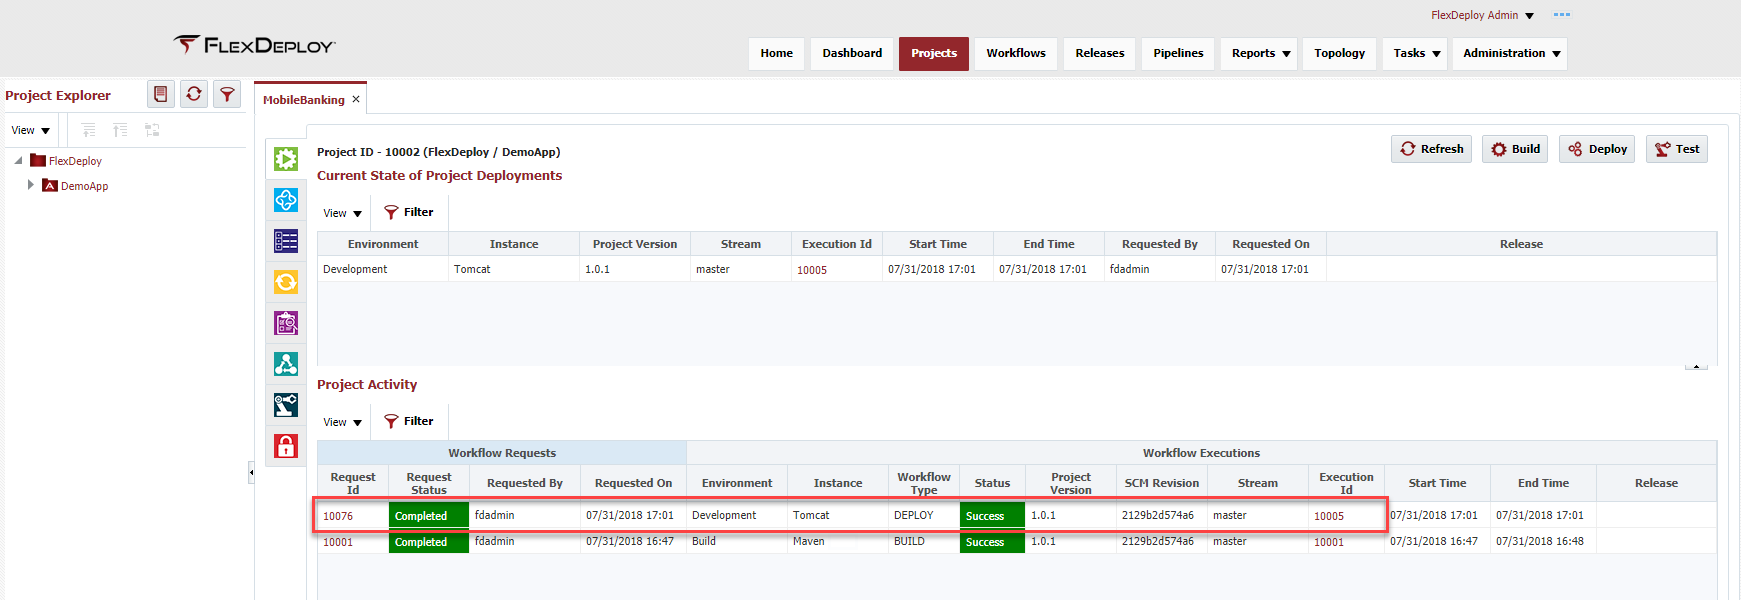
With the successful execution of the deploy, the WAR file artifact will be deployed to the DEV environment. Now follow the same deployment steps and deploy the composite to the QA and PROD environments. Upon completion of the deployments, the execution screen should show the Current State of Project Deployments with the same Project Version in all three environments.

The Execution Id is a link to all of the execution data related to each request, such as
- The workflow execution steps
- The logs for each workflow step, click on the link under step
- The artifact which can be downloaded
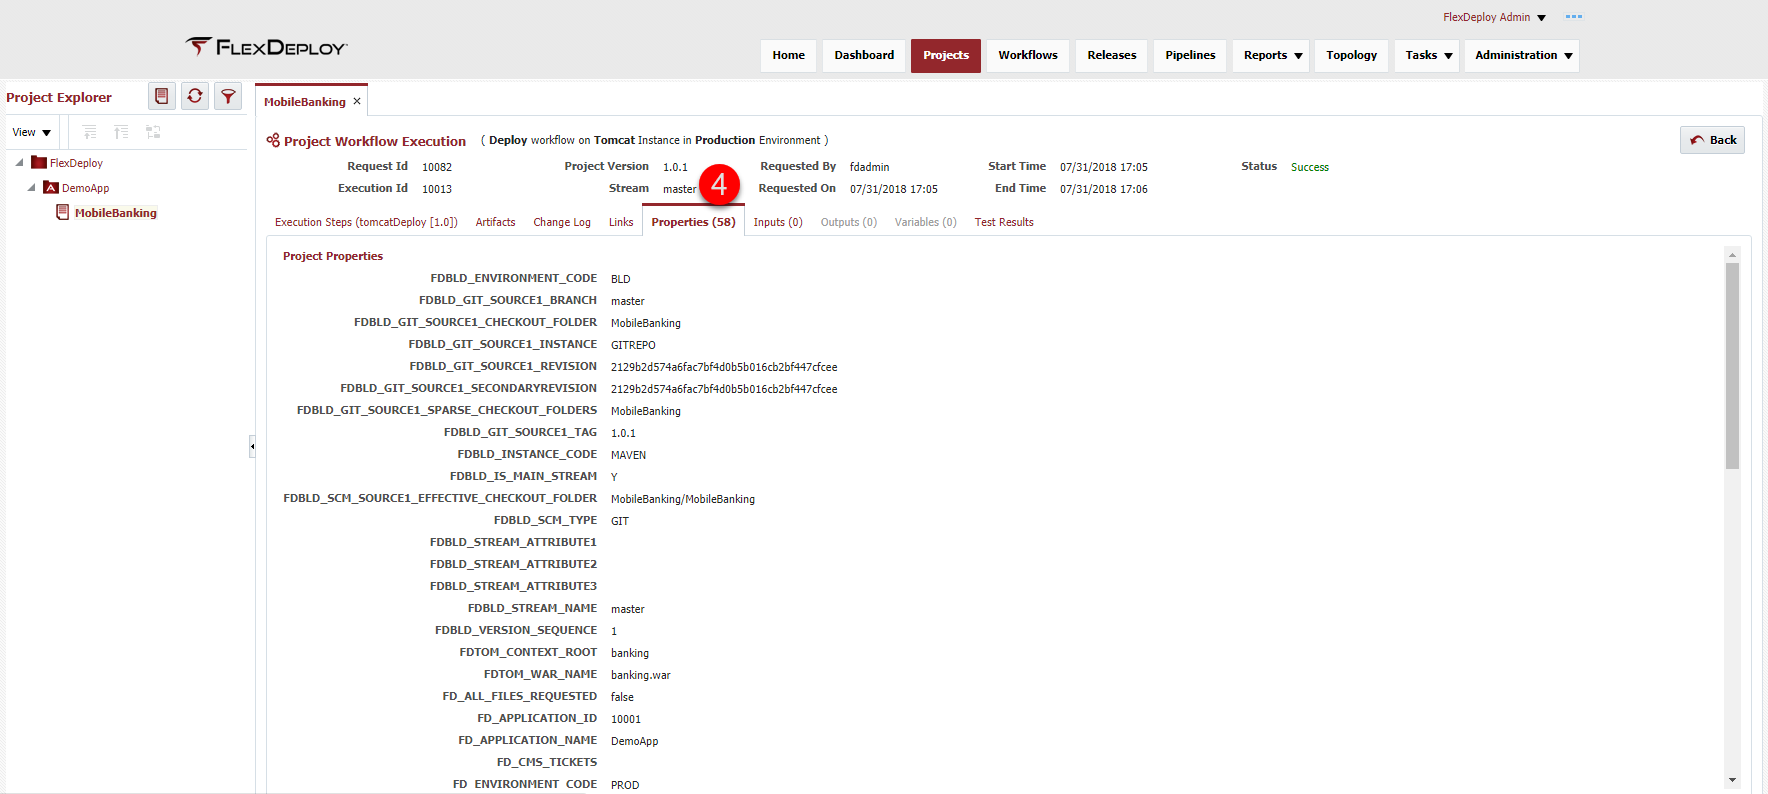
- The project and environment instance property values at the time of execution
================================== Workflow Steps Tab
================================== Artifacts Tab
================================== Properties Tab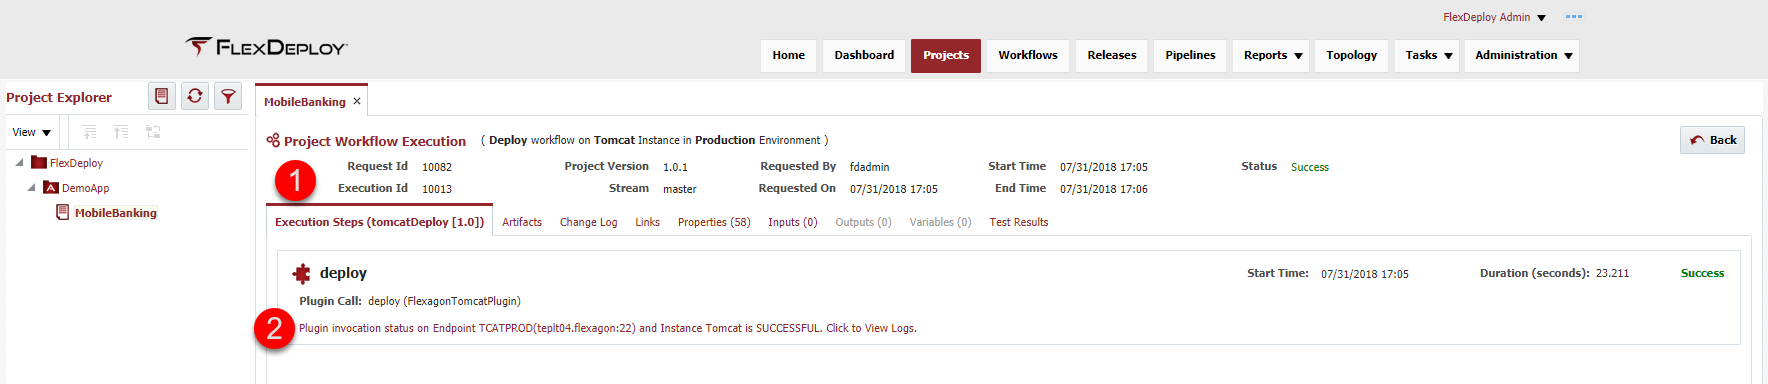
| Completed 10 of 11 Sections | Continue to Congratulations | Back to Project Creation |
|---|
...