...
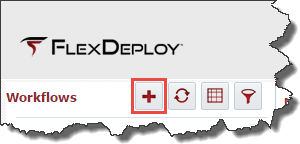
Select Workflows from the menu. Click the plus icon in the Workflows navigation tree to create a workflow for building an Oracle ADF application.

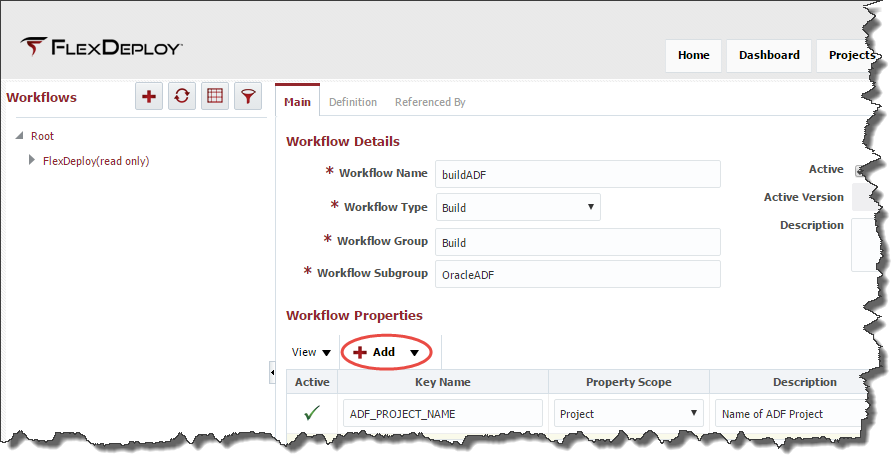
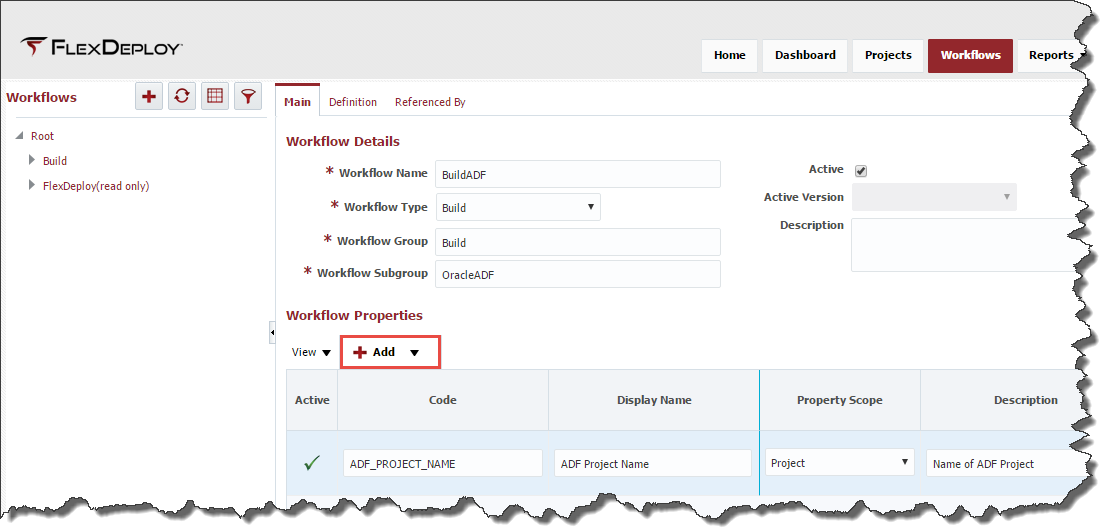
Enter the details for the workflow in the Workflow Details form as shown below. Use the You can use Add button to create a workflow property named ADF_PROJECT_NAME of String data type and Scope set to Project.
Click the Save button, and then click the Definition tab to begin designing the workflow.
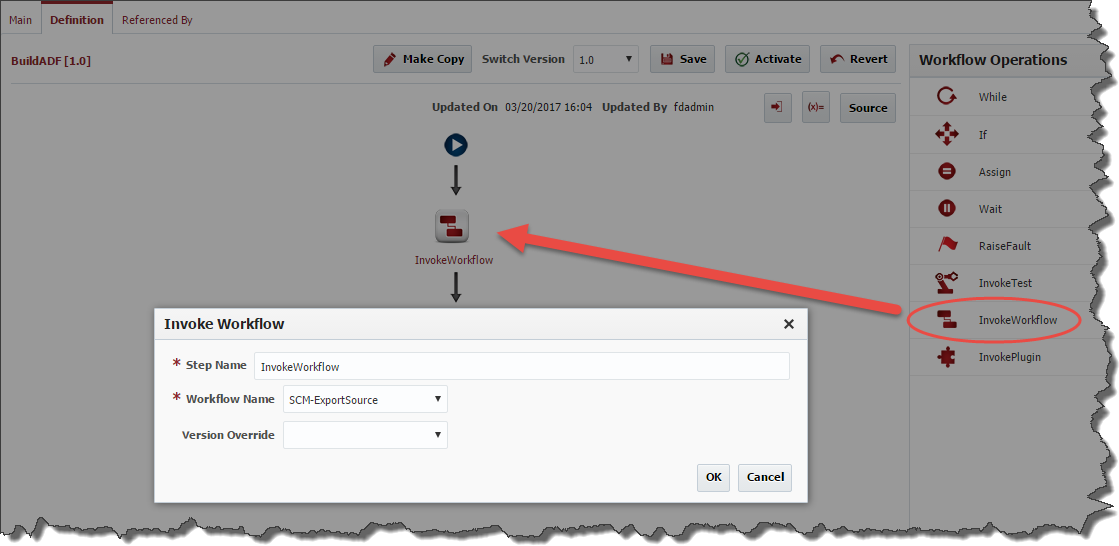
Locate the Plugin Workflow Operations pane on the lower upper-right-hand corner of the screen . Expand FlexagonSVNPlugin, and drag the exportProjectSources InvokeWorkflow operation onto the workflow editor pane. The SVN information will be configured in the project, so you don't need to fill in the inputs
Rename the Step to exportSource so that you will be able to figure out what it is doing without opening it that next time that you see it.
Choose the Workflow named SCM-ExportSource. This is a read-only workflow provided by Flexagon which will automatically determine which SCM system your project uses and pull the correct sources for your build to complete.
Click the OK button to save the changes.
Expand the FlexagonJDeveloperPlugin Oracle JDeveloper, and drag the applicationBuild operation onto the workflow editor pane. You can just type applicationBuild in filter box to quickly find plugin operation as well. Enter the following details when prompted.

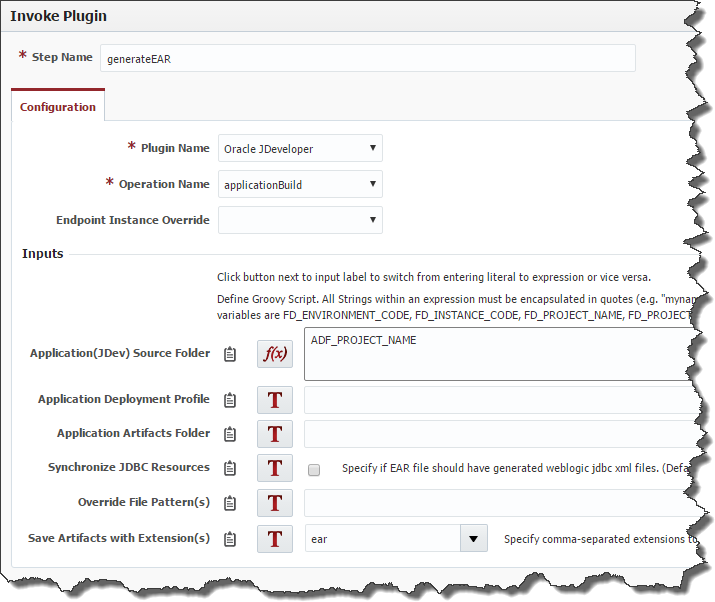
Click the OK button to save the changes. Verify that the workflow now looks as follows.
...
Click Activate button to save and activate your changes.
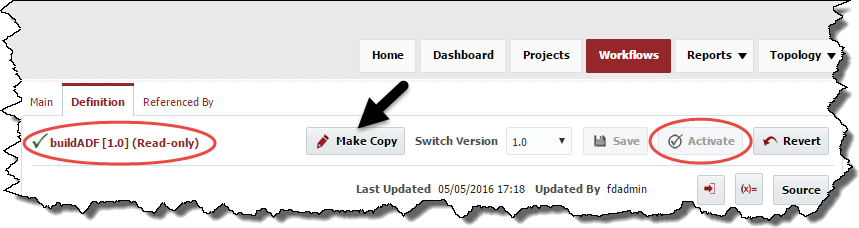
When you activate the workflow version (in this case 1.0) it becomes read-only and is unavailable for future edits. To make new changes you must make a copy by clicking the Make Copy button. The active workflow is executed at runtime unless overridden.
Repeat the steps in this section to create the following workflows.
Workflow Name | Workflow Steps |
|---|---|
deployADF | FlexagonWebLogicPlugin->deploy (to deploy the EAR) |
buildSOA | InvokeWorkflow -> SCM-ExportSource (to checkout the composite project) |
deploySOA | FlexagonSOAPlugin->soaDeploy (to build the SOA artifacts) |
Associate Workflow to various Instances
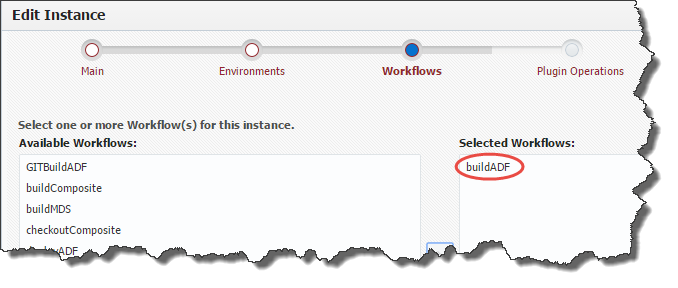
Finally, we must make the workflow properties we created available to projects which use those workflows. This is accomplished by associating the workflow to the instance(s) the workflow will run on (note that we skipped this step when we created the BuildInstance). Edit the BuildInstance instance and associate the buildADF workflow to it by shuttling it from the list of available workflows on the left to the list of selected workflows on the right.
...
Workflow Name
...
Workflow Steps
...
deployADF
...
FlexagonWebLogicPlugin->deploy (to deploy the EAR)
...
buildSOA
...
FlexagonSVNPlugin->exportProjectSources (to checkout the composite project)
FlexagonSOAPlugin->soaBuild (to build the SOA artifacts)
...
deploySOA
...
FlexagonSOAPlugin->soaDeploy (to build the SOA artifacts)
Don't forget to associate the *buildSOA workflow to the BuildInstance instance.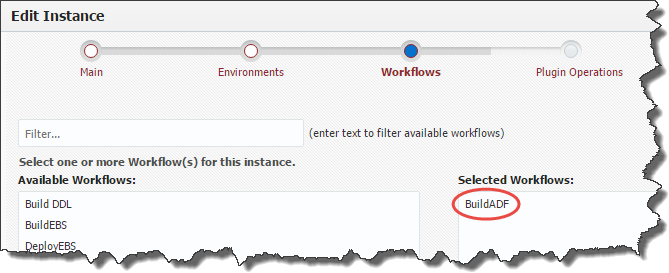
Don't forget to associate other instances to workflows, see details below.
| Instance | Associated Workflow(s) |
|---|---|
| BuildSOA | BuildSOA |
| BuildInstance | BuildADF |
| SOA1 | DeploySOA |
| ADF1 | DeployADF |
For more information regarding inputs for these plugin operations refer to the plugin guides. See FlexDeploy Community Edition for more documentation.