...
To configure the Project Files for a Partial Deployment project, click on the Project Files tab.


Initially Populating Project Files
...
- Use the Populate from <SCM> button, SCM can be Subversion, Git, TFVC, CVS etc. This will add all files from defined source configurations, so if you are only interested in adding specific files, then use Create button.
- Manually add files using the Create button.

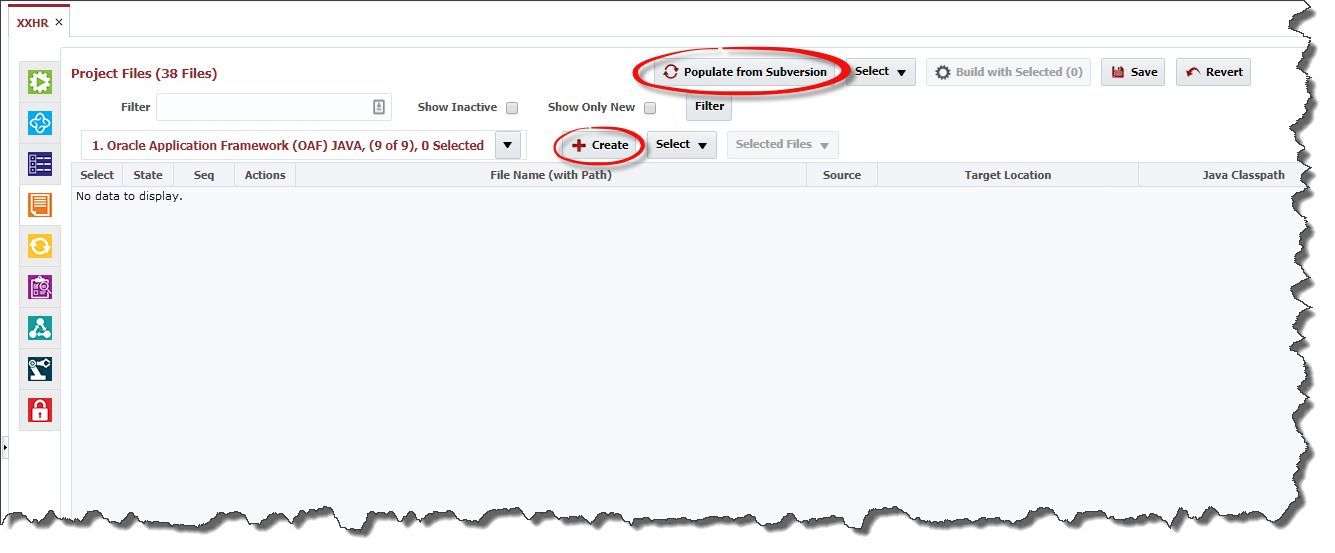
Using the Populate from <SCM> button
When you click the Populate from <SCM> button, the following screen will pop up. Depending on how many files you have, this operation can take several minutes.

The Populate from SCM operation will iterate through each of the SCM Projects Sources you have configured, and will configure files. Based on your properties, the populate operation will complete the configuration required for each file based on its object type.
...
When you click the Create button, the following screen will pop up.

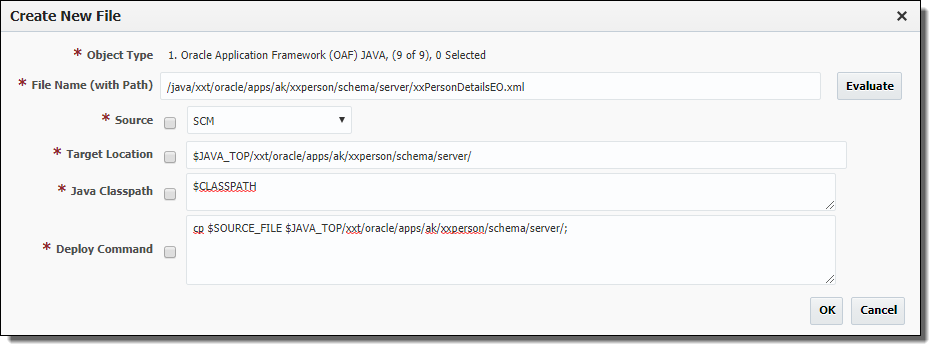
Enter the File Name (with Path) as indicated above, then click the Evaluate button. Based on the rules for that object type and configured project properties, the remaining fields will populate. These fields will vary based on the plugin and object type. Optionally, you can adjust the configuration based on you requirements. In the example above, if you adjust the Target Location and click the Evaluate button again, all fields except Target Location will be reevaluated and Deploy Command will reflect manual change done on Target Location.
...
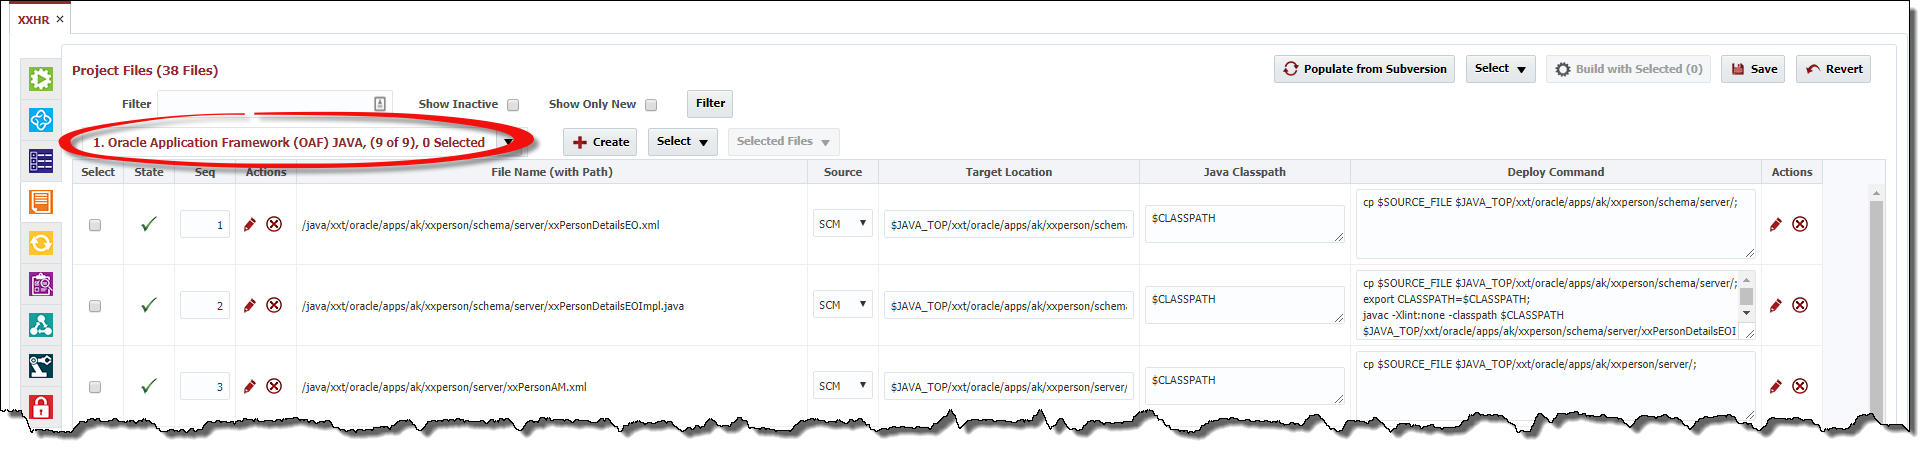
The Project Files contents are organized based on the Object Type Drop down (circled in image below).

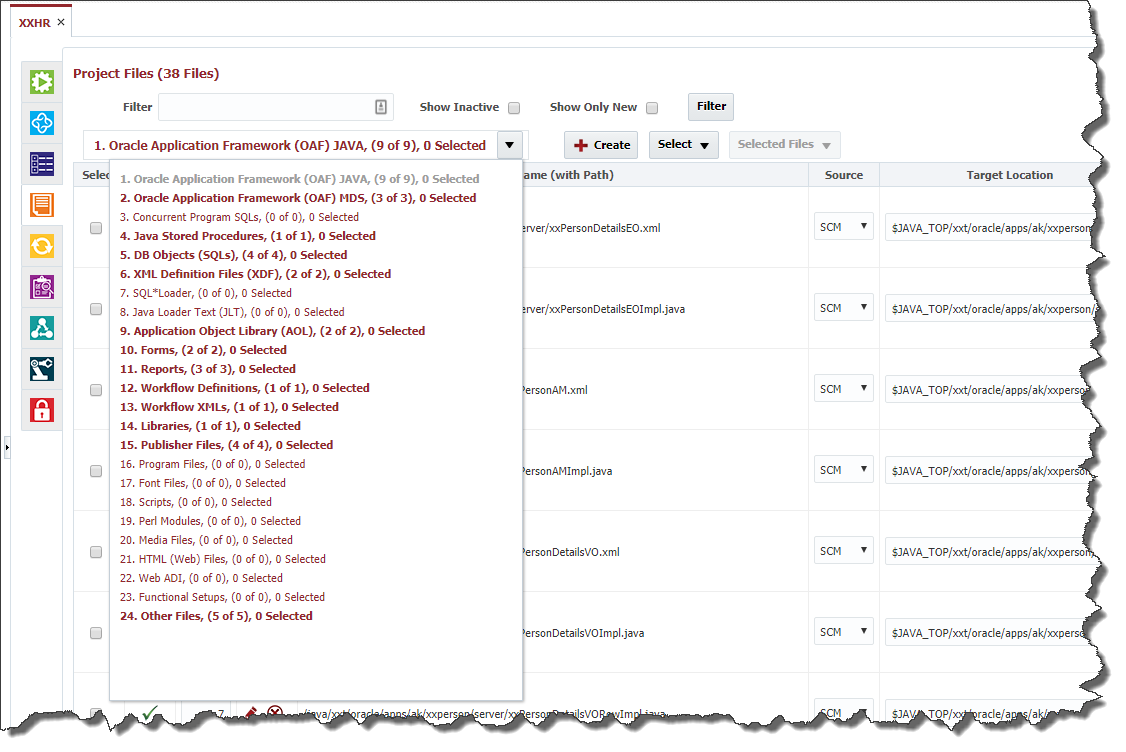
When selecting the drop down, you see the list of Object Types supported for the Project Type you selected when you created the project. In the figure below, the information displayed for each object type is
- The Object Type Name
- N of M where N is the number of files which are of the type that match the filter, and M is the total number of files of that type. If the number of files for that type which also match the filter is greater than 0, then the line in the drop down will be bold.
- Number of files that are selected
- The currently selected object type will be in gray, so it can not be clicked again.

Updating the List of Files
...
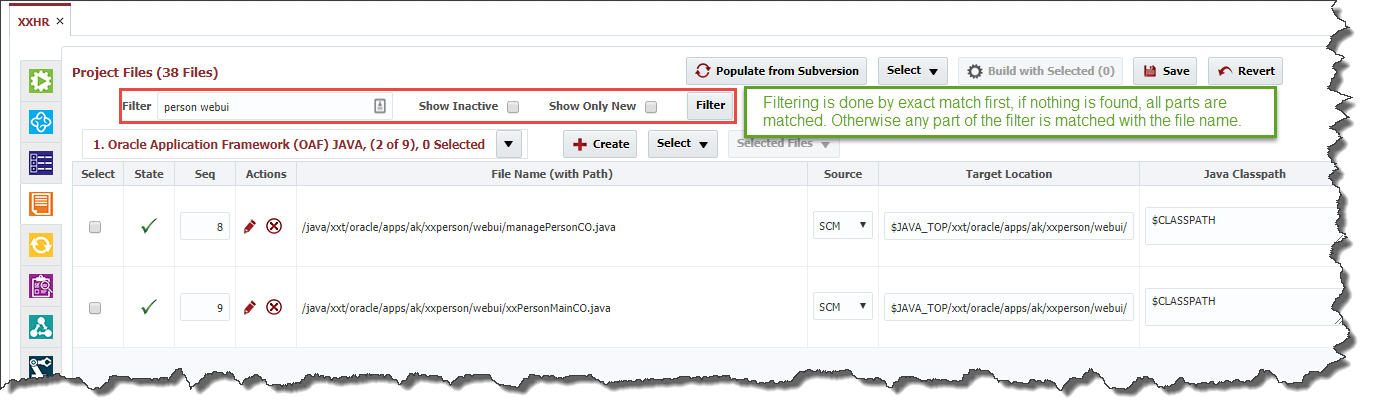
The filtering is done across all Object Types. Filtering is based on the Filter text. If the Filter text is found in the File Name (with Path) column, then the file matches the filter and will be displayed in the table. Optionally, you can select to Show Inactive files or Show Only New files. To use the filter, set the criteria and click the Filter button. You can also hit Enter key after entering Filter text.

Editing a File Row
There are 2 actions that you can perform on the row. The Pencil allows you to edit the Row.


The second icon is either a red circle with an X icon or a green circle with a check mark, the red icon allows you to inactivate the row, and the green icon allows you to activate the row.
When you click the Pencil icon to edit the row, the Edit File screen will pop up.

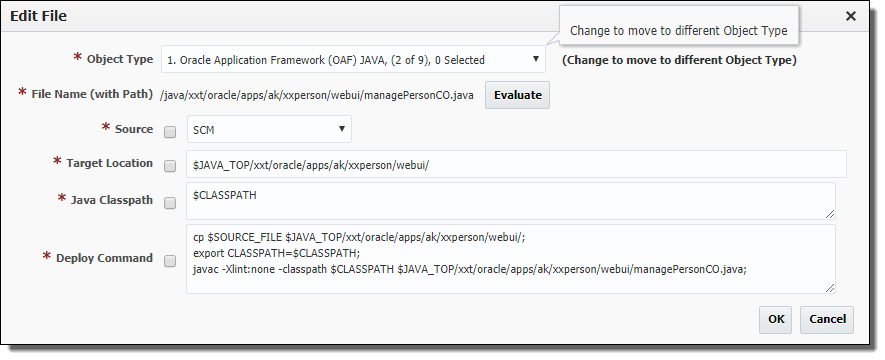
The Edit File pop up screen allows you to update the values for the following fields:
...
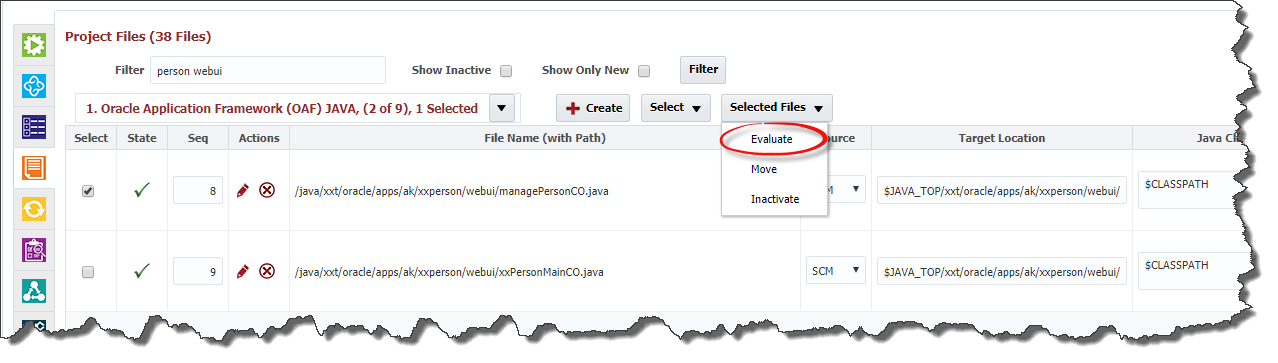
You can select one or more files in order to either Inactivate, Move to a different Object Type or Reevaluate file attributes. See below.

Build with Selected
...
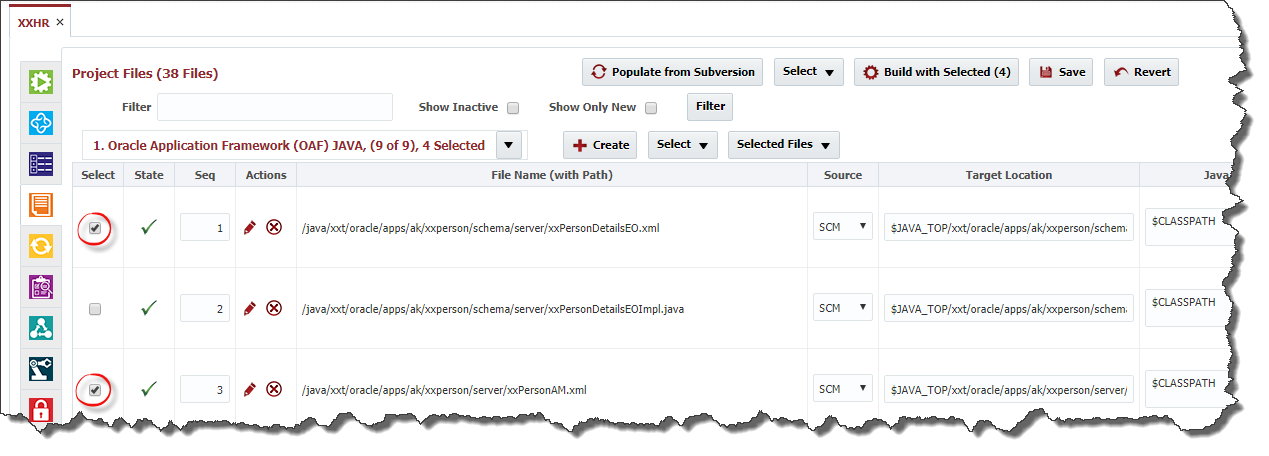
The first column in the table is a check box that allows you to select and unselect files individually as shown in the following figure.

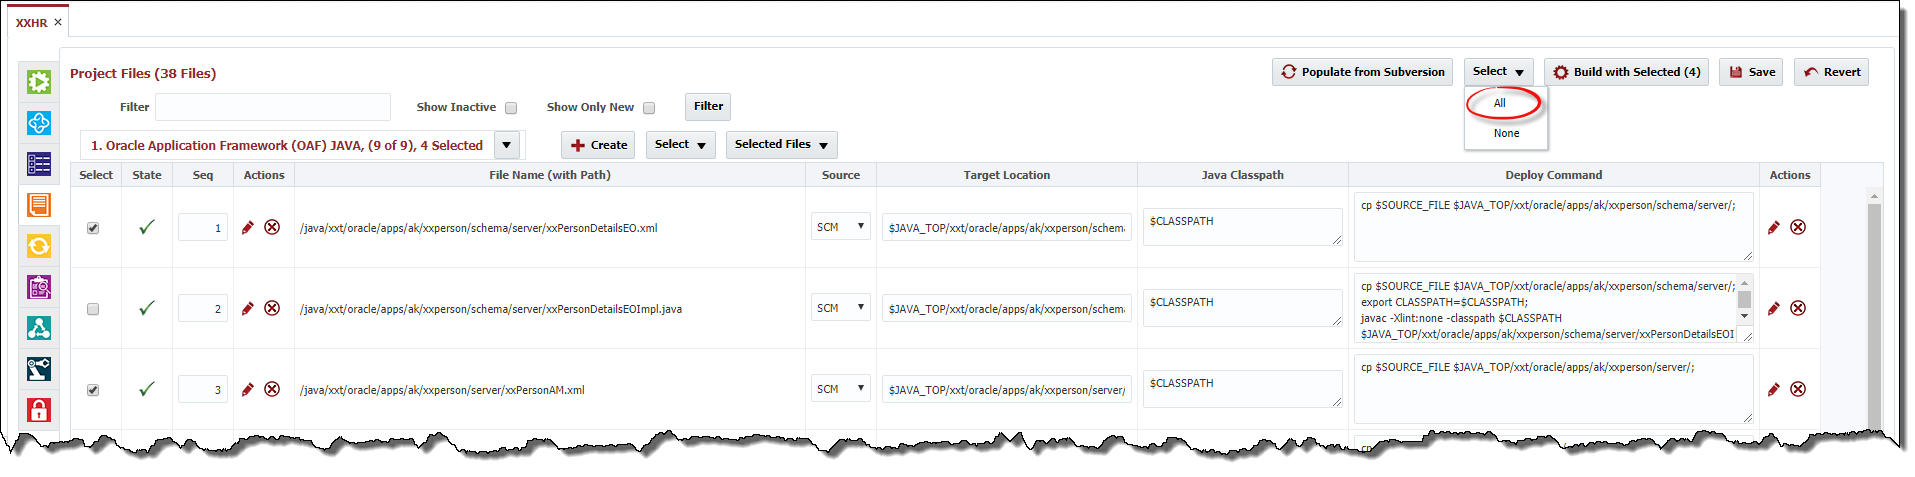
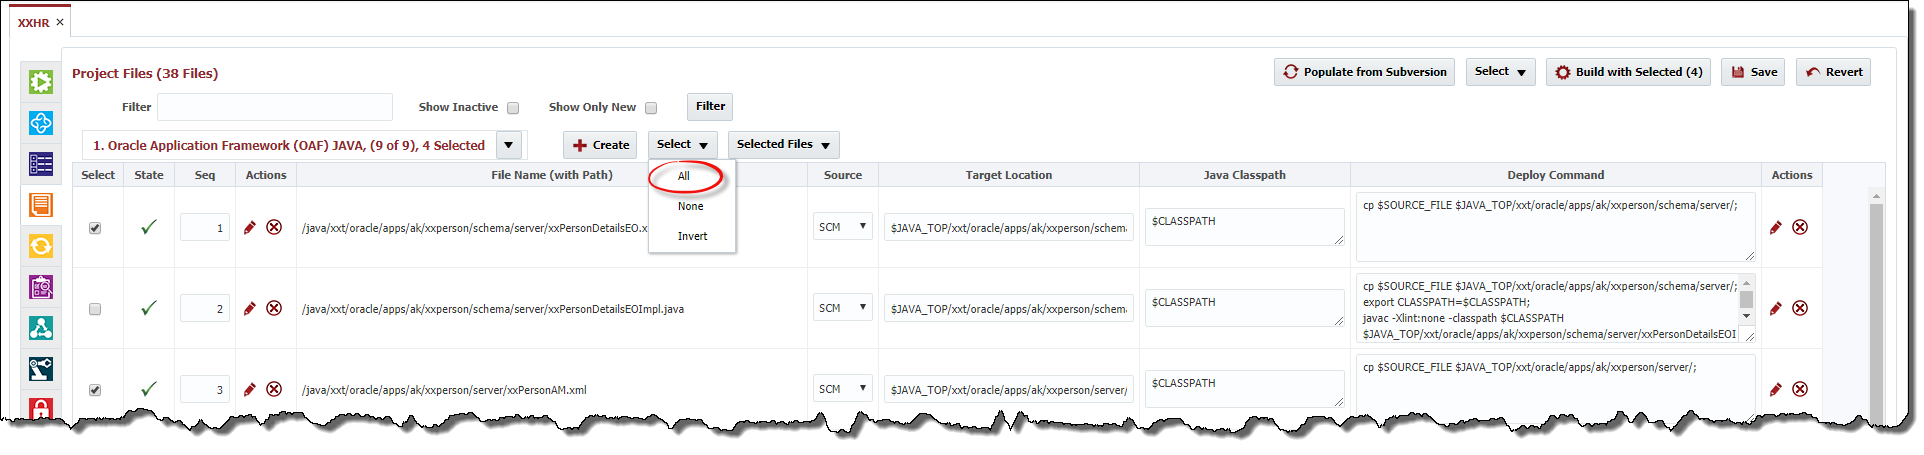
At the Object Type level there are three menu options for Select as shown in the figure below. These menu options do the following:
- All – Selects all of the files for that Object Type based on current filter
- None – Unselects all the files for that Object Type based on current filter
- Invert - Unselects all the files that are currently selected and selects all the files that are currently unselected based on current filter.

To manipulate the files across project types use the buttons shown in the figure below. These button do the following:
- All – Selects all the files across all Object Types based on current filter
- None – Unselects all the files across all Object Types based on current filter