...
- To upload the plugin, connect to your Jenkins server and click "Manage Jenkins." Then choose "Manage Plugins."
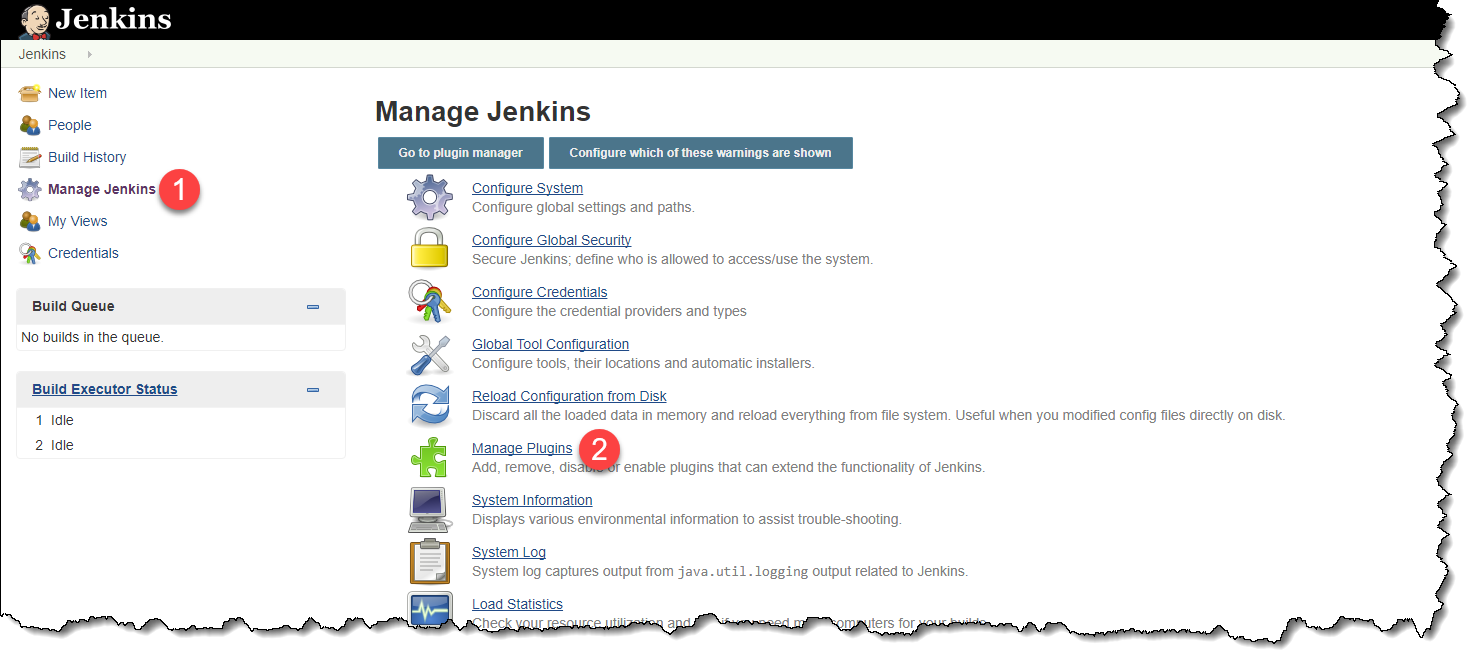
From here, you can either go to the "Available" tab, and search for FlexDeploy.
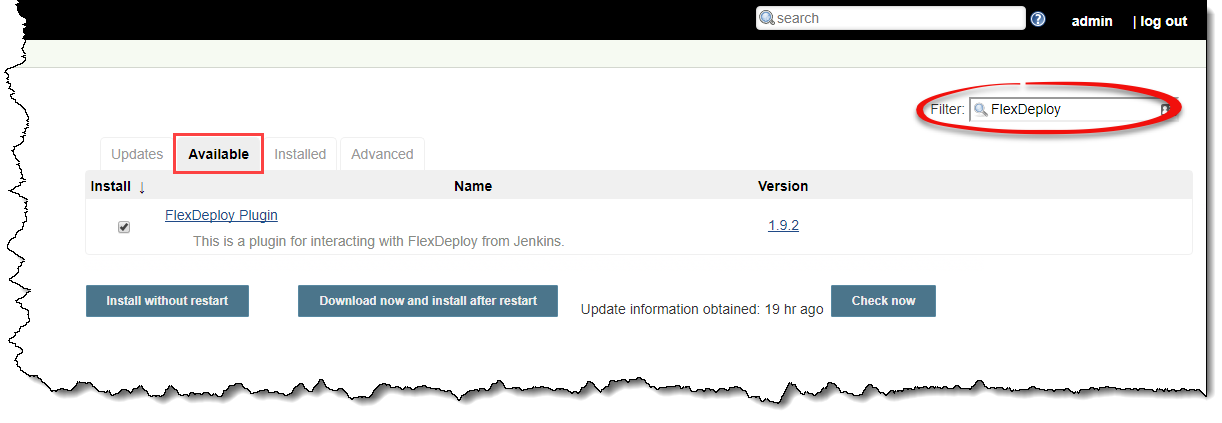
Info If you don't see the FlexDeploy Plugin in the update center, you can still download it directly from here.
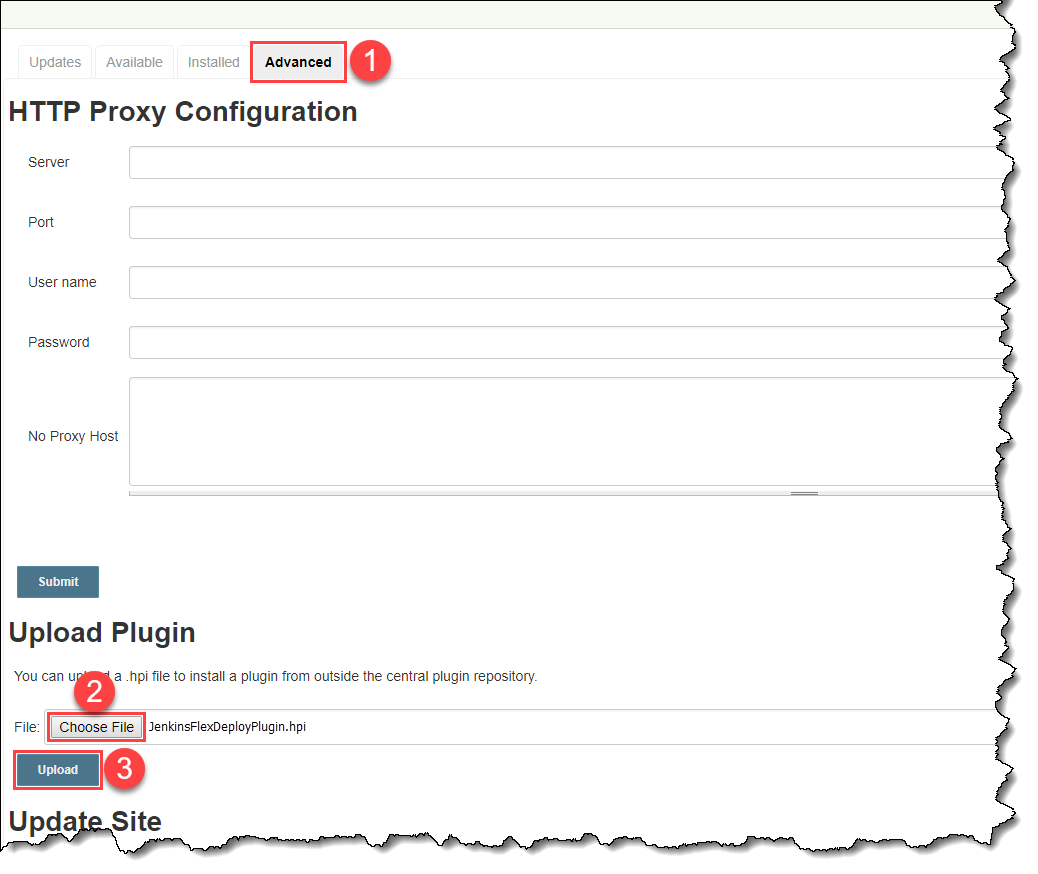
Expand a. Download the Jenkins FlexDeploy Plugin from the Jenkins Support Site.
b. On the Manage Plugins page, choose the Advanced tab, then click Choose File under the Upload Plugin section.
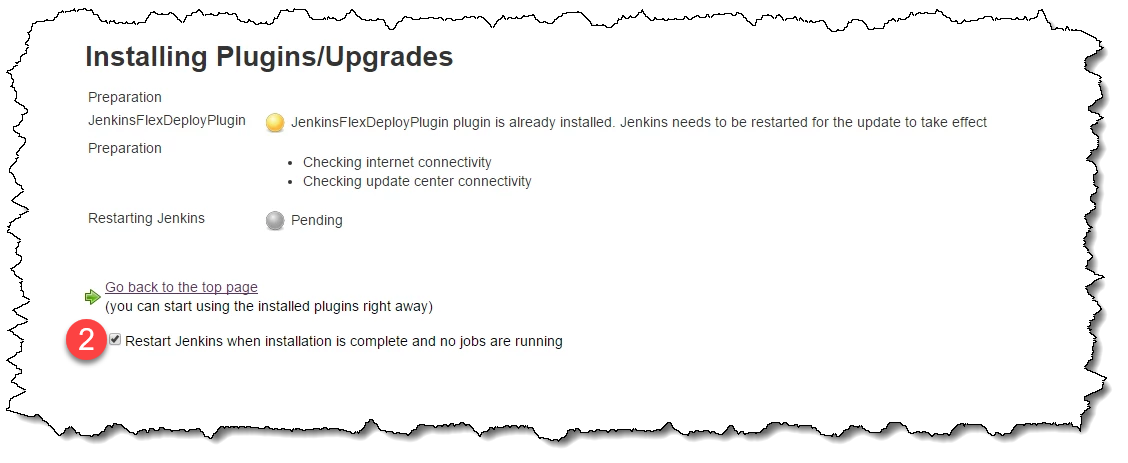
After installing the plugin, you may need to restart the Jenkins server for the changes to take effect. Just check the box on the next screen if it says "Jenkins needs to be restarted for the update to take effect".
Configuring the Plugin to work with FlexDeploy
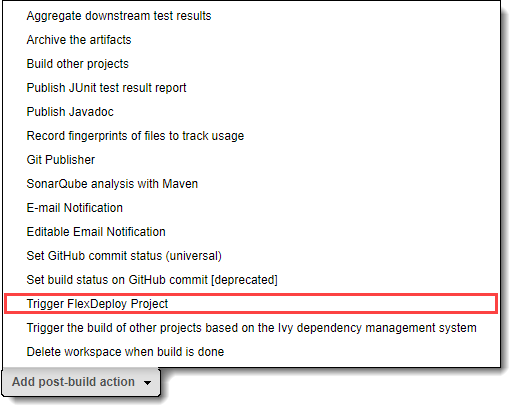
In your Jenkins project configuration, scroll down to the Post-Build Actions section, and click Add Post-Build Action.
Info Make sure that you place the Archive the artifacts step before the FlexDeploy plugin step so the plugin can find the proper artifacts.
- Choose Trigger FlexDeploy Project from the menu.
- Once you've added the Build FlexDeploy Project step, you should see a configuration page like this.
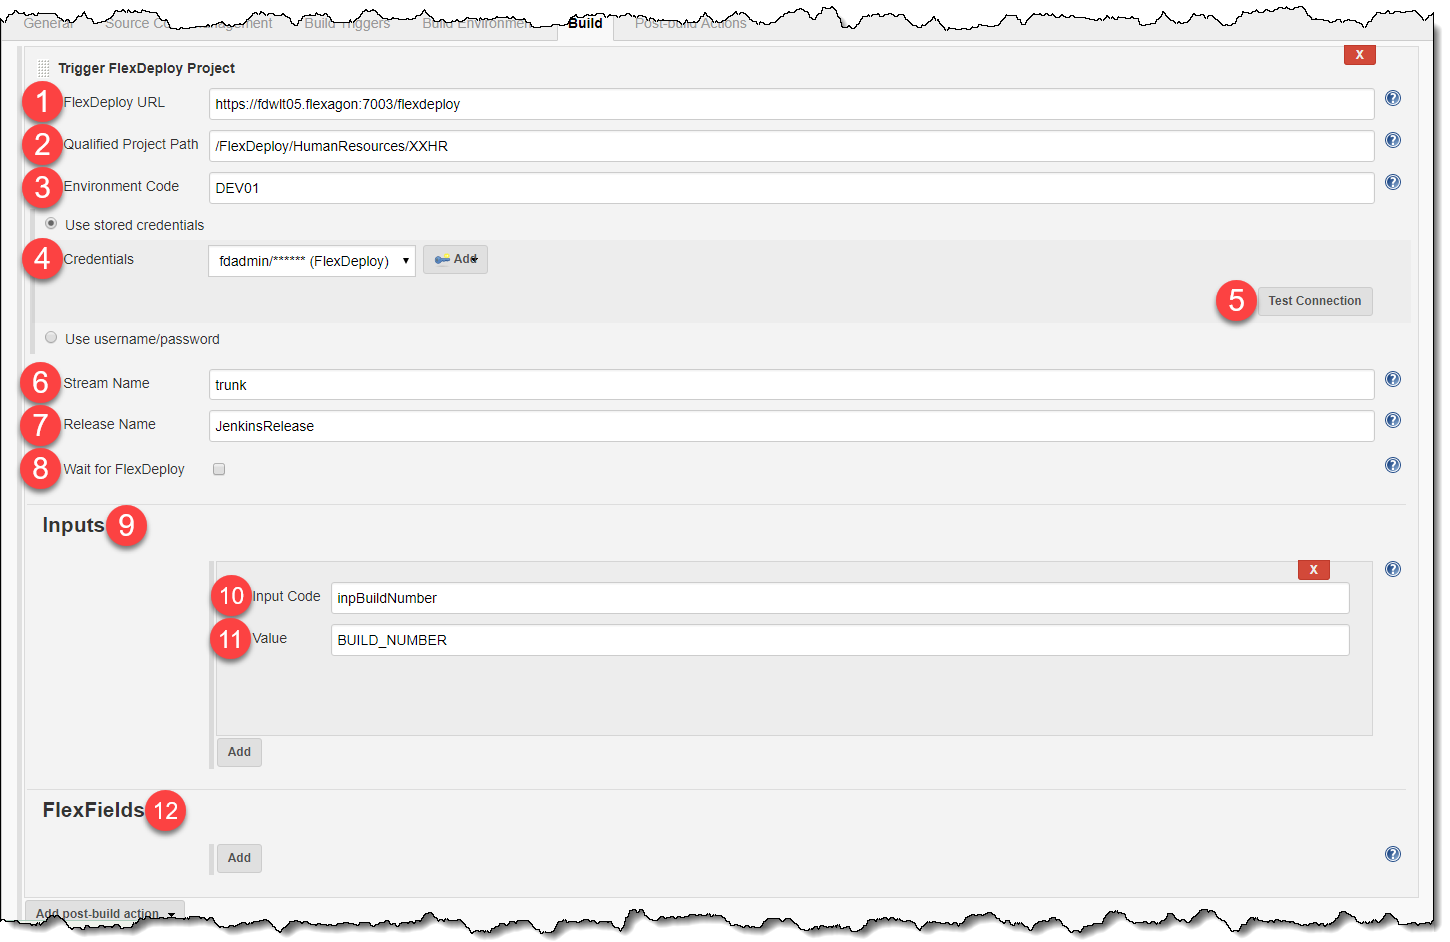
- FlexDeploy URL - This is the URL to FlexDeploy on your server.
- Qualified Project Path - I left this blank, because it will most likely be set at the individual project level.
- Environment Code - This is the environment we will be building in. I chose to use my development environment in this example, but this could be any environment code you want.
- Credentials - The credentials Jenkins should use to connect to FlexDeploy with. Can be stored using the Credentials plugin, or you can enter a username and password.
- Wait for FlexDeploy -Check this box to make the plugin remain in a 'Running' state until the FlexDeploy workflow completes, then mark the Jenkins build as failure or success based on the FlexDeploy workflow status. If workflow execution takes longer than 15 minutes, the plugin will stop polling and report success.
- Stream Name - This is the stream to build your FlexDeploy project in. Note that this will almost always be the default stream name, as the build workflow will probably not actually need to use it. The default value is trunk, but it should be changed to match the stream name setting in your Project Defaults configuration in FlexDeploy.
- Wait for FlexDeploy - Check Release Name - Fill in this box to make the plugin remain in a 'Running' state until the FlexDeploy workflow completes, then mark the Jenkins build as failure or success based on the FlexDeploy workflow status. If workflow execution takes longer than 15 minutes, the plugin will stop polling and report successif the project you're building is part of a release.
Test Connection Button - This button can verify that your FlexDeploy URL and Credentials are valid.
- Inputs - This section is where you would define any workflow inputs you have configured.
- Input Code - The code of the workflow input to pass in.
Value - The value to be passed in with the workflow input. You can use environment variables (Like
BUILD_NUMBER) to pass in values.Info For a full list of available variables, take a look at this page. - FlexFields - This section is where you would define any build FlexFields that need to be passed in for your build
...