...
To configure the test to be run for a project click on the Test Automation tab.
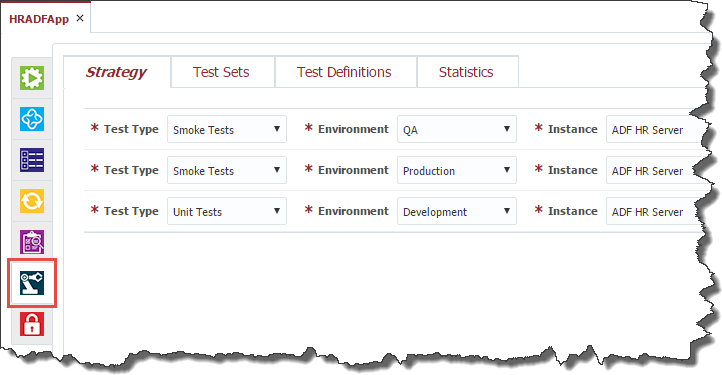 Figure 9.41
Test Automation Strategy
Test automation strategy defines test types that can be performed for a project at each environment and instance where the project is deployed. Usually QA engineers set up different instances of the application for performing different test types. For example, one instance is good enough for functional testing, providing a lot of available functionality, but it may not be suitable for performance testing. There is a separate instance with huge amount of data for performing testing To set up a new combination of the test type, environment and instance click the "+" button and select values from the drop down lists. To delete a combination click the "-" button.

Figure 9.42
To save test automation strategy for the project click the Save button. To cancel the changes click the Revert button.
...
To view the list of test definitions defined for the project, select Test Definitions tab.
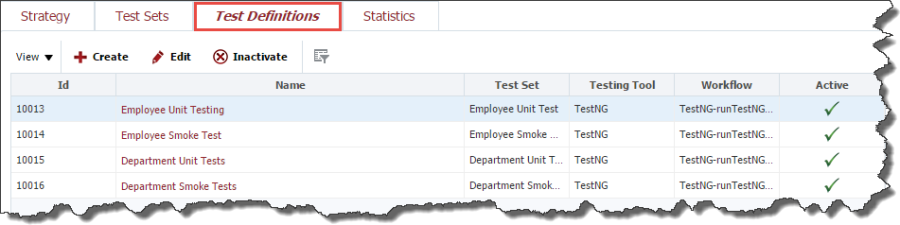 Figure 9.43
Creating a Test Definition
To create a test definition click the Create button.
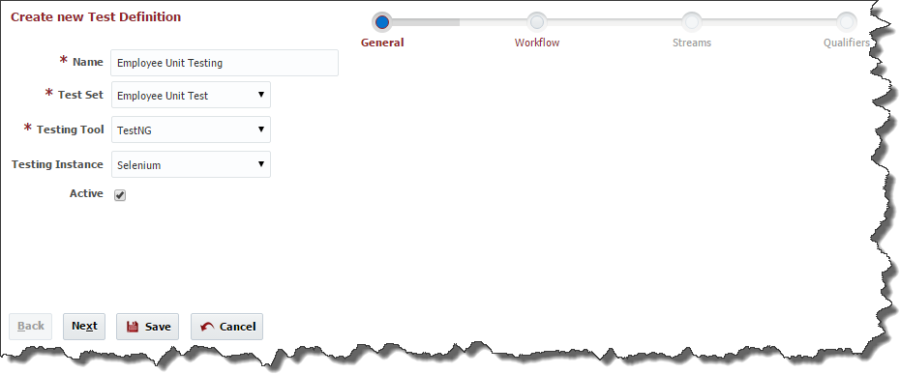 Figure 9.44
At the General step of the wizard enter values for the following fields:
...
Field Name | Required | Description |
|---|---|---|
Name | Yes | Name for the test definition. |
Test Set | Yes | Select Test Set for which the test definition belongs. |
Testing Tool | Yes | Select Testing Tool which should be used to run tests |
Testing Instance | No | Enter Select Testing Instance where the testing tool is installed. This can be useful for testing tools like OATS, Selenium, Test Complete, etc. These tools usually have their own standalone installations. For testing tools like JUnit or TestNG this filed should be empty, which means that the testing tool is installed and running on each environment/instance where the project is deployed. |
Active | Yes | A flag indicating whether this test definition is active. Defaults to "Yes". |
Figure 9.45
Click the Next button in order to specify a workflow for test executions.
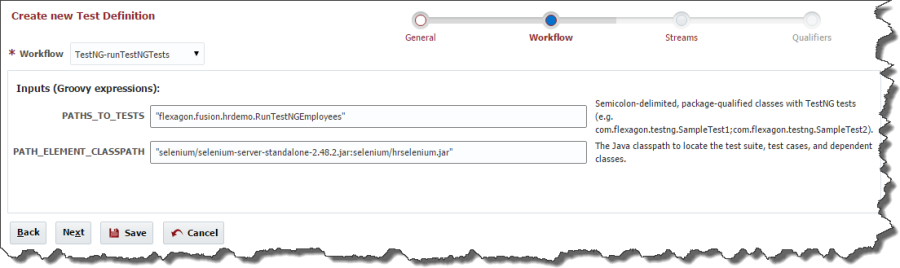 Figure 9.46
At the Workflow step of the wizard select a workflow which is going to be used to run tests. Note, that only a workflow of Test Definition type can be selected here. Enter values for any inputs that are configured for the workflow.
Click the Next button in order to configure the Streams for the test definition.
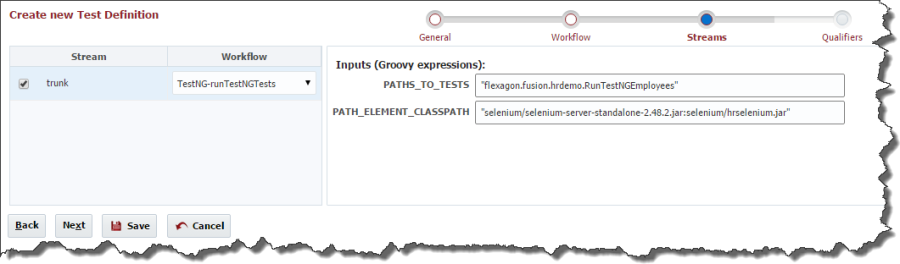
Figure 9.47
At the Streams step of the wizard select project streams for which the test definition is suitable. By default, all project streams are selected. It is possible to override workflow input values for each stream. It is also possible to change a workflow which is going to be used to run tests for each project stream. By default, all project streams will use the workflow and input values defined at the Workflow step.
...
Click the Next button in order to configure Qualifiers for the test definition.
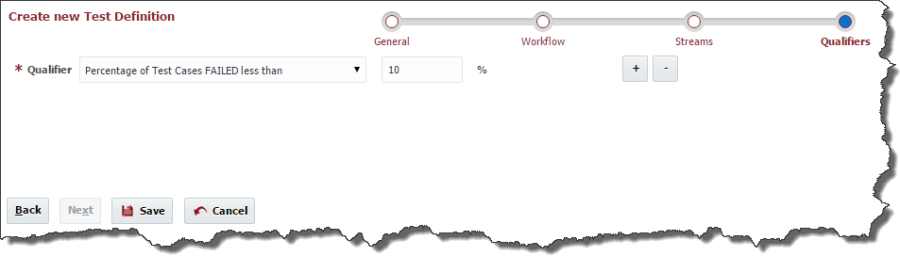
Figure 9.48
To add a new qualifier to the test definition click "+" button. Click "-" button in order to remove a qualifier from the test definition.
FlexDeploy comes out-of-the-box with the following predefined test qualifiers:
...
Qualifier | Argument |
|---|---|
Number of Test Cases PASSED greater than "X" | Integer value |
Number of Test Cases FAILED less than "X" | Integer value |
Percentage of Test Cases PASSED greater than "X" % | Percentage value |
Percentage of Test Cases FAILED less than "X" % | Percentage value |
Figure 9.49
Click the Save button to save the changes to the test definition and return to the list of test definitions defined for the project or click on the Test Definition Name.
...
To edit or view a test definition, select an existing test definition and click the Edit button.
 Figure 9.50
The edit screen contains all attributes of the test definition and displays Workflow, Streams and Qualifiers data on separate tabs. Click the Save button to save the changes to the test definition or click the Back button to cancel the changes and return to the list of test definitions defined for the project.
...
The test definition view screen also contains Statistics tab representing historical information about test definition executions.
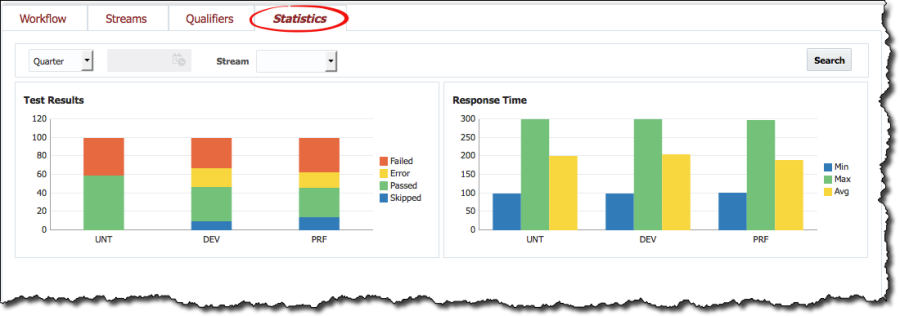
Figure 9.51
There are two charts on the Statistics tab: Test Results and Response Time. The charts represent the same data that is described in the Dashboard section, only related to the Test Definition.
...
To view the list of test sets defined for the project, navigate to the Test Automation tab, as it is described in the Project Configuration section and select Test Sets tab.
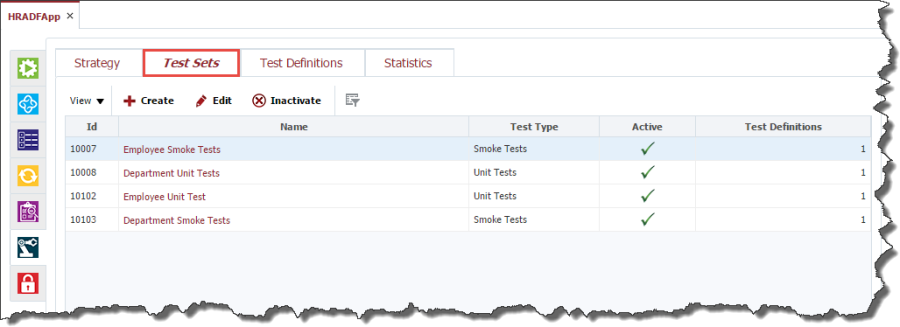
Figure 9.52
Creating a Test Set
To create a test set click the Create button.
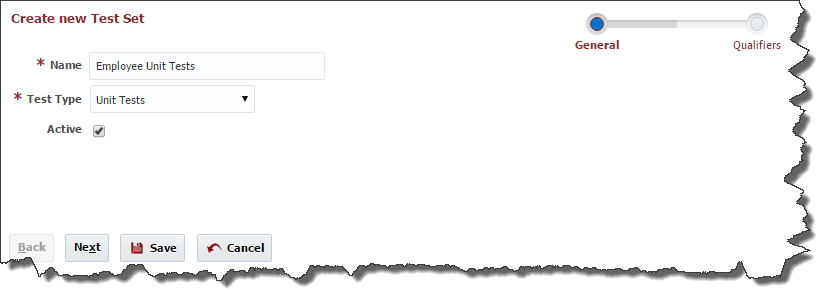
Figure 9.53
At the General step of the wizard enter values for the following fields:
...
| Required | Description |
|---|---|---|
Name | Yes | Name for the test set. |
Test Type | Yes | Select Test Type for the test set. The test set contains a bunch of test definitions related to this test type. |
Active | Yes | A flag indicating whether this test set is active. Defaults to "Yes". |
Figure 9.54
A test set can contain its own qualifiers in order to check whether the entire set of test definitions passed or failed. The same rule as for the test definitions works for the test sets as well. If all test qualifiers, defined at the test set, return true, then the test set run is considered successful.
Click the Next button in order to configure Qualifiers for the test set. Adding and removing test set qualifiers for the test set is performed in the same way as it is done for the test definitions.
For Test Sets FlexDeploy provides the following preconfigured qualifiers:
| Argument |
|---|---|
Number of Test Definitions PASSED greater than "X" | Integer value |
Number of Test Definitions FAILED less than "X" | Integer value |
Percentage of Test Definitions PASSED greater than "X" % | Percentage value |
Percentage of Test Definitions FAILED less than "X" % | Percentage value |
...
Click the Save button to save the changes to the test set and return to the list of test sets defined for the project.
...
To edit or view a test set, select an existing test set and click the Edit button.
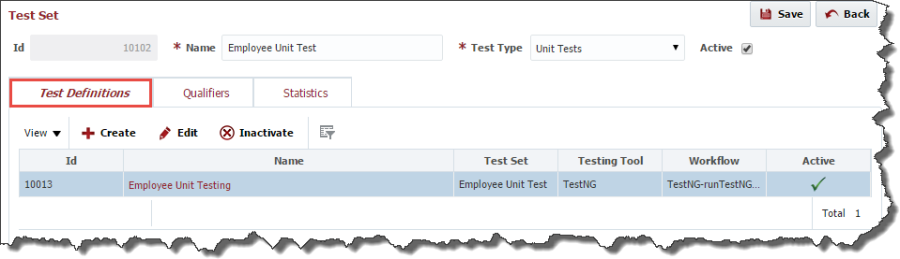
Figure 9.56
The edit screen contains all attributes of the test set and displays Test Definitions, Qualifiers and Statistics data on separate tabs. The Test Definitions tab shows all test definitions related to this test set. The tab allows you to create and edit test definitions in the same way as it is described in the Test Definitions section.
...
The test set view screen contains Statistics tab representing historical information about test set executions. The tab contains Test Results and Response Time charts representing the same information that is described in Dashboard section, only related to this test set.
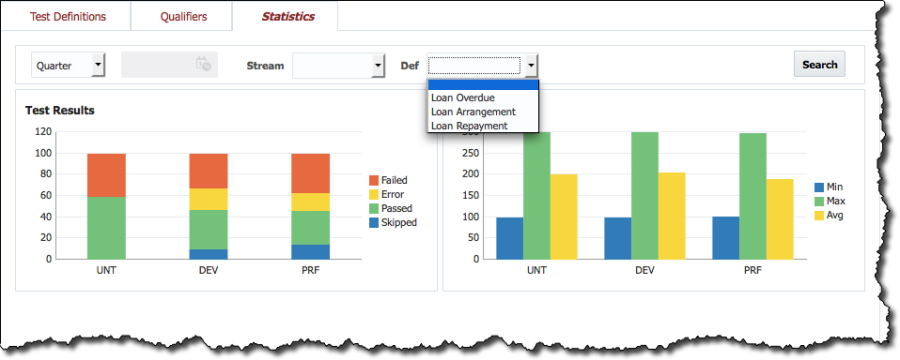
Figure 9.57