| Table of Contents |
|---|
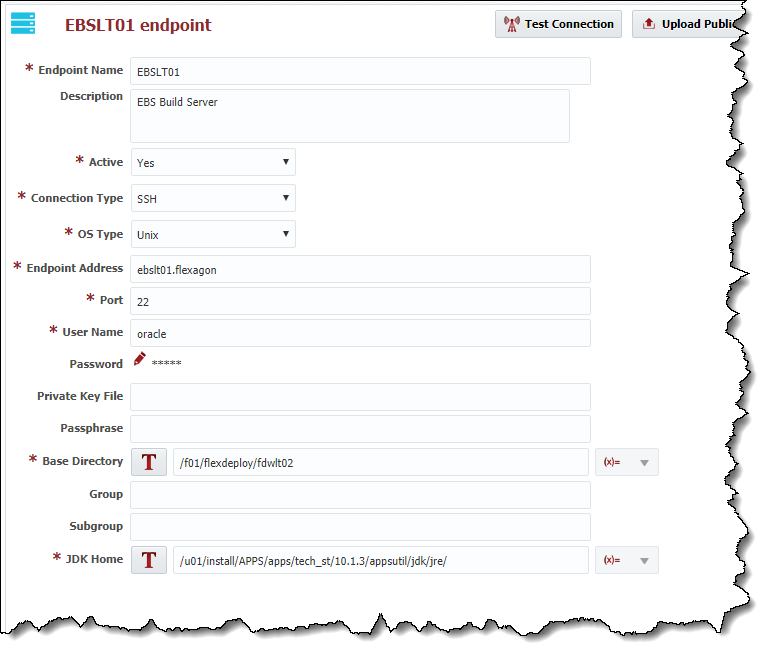
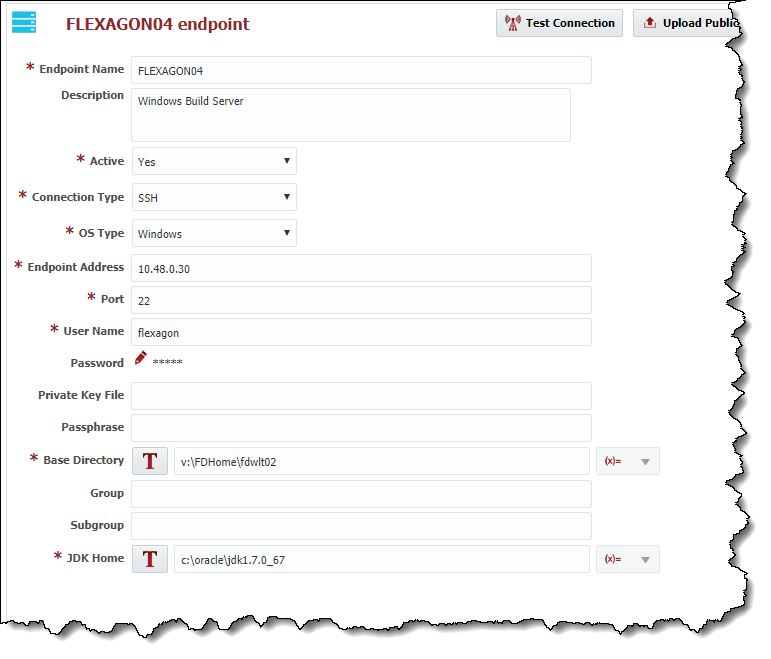
Click the  button to create a new Endpoint, or select an existing Endpoint by clicking on the desired row. Enter the required fields as defined in the table below.
...
To inactivate an endpoint click the Active link on the desired Endpoint, and it will toggle to Inactive. This will hide that Endpoint after leaving the screen, until the Active checkbox is unchecked. To reactivate an Enpoint, click the Inactive link and it will toggle back to Active. This endpoint is now active in the system again and ready for use.
SSH Authentication
FlexDeploy utilizes SSH to connect to its configured Endpoints. SSH uses public-key cryptography to authenticate the remote computer and allow it to authenticate the user. FlexDeploy supports Password Authentication and Public-Private Key Authentication.
Password AuthenticationAnchor PasswordAuth PasswordAuth
| PasswordAuth | |
| PasswordAuth |
The first mechanism is to use automatically generated public-private key pairs to simply encrypt a network connection, and then use password authentication to log on. In this case you must provide a User Name and Password to connect to the endpoint.
| Unix Example | Windows Example (using Cygwin) |
|---|---|
|
|
Public-Private Key AuthenticationAnchor ppk ppk
| ppk | |
| ppk |
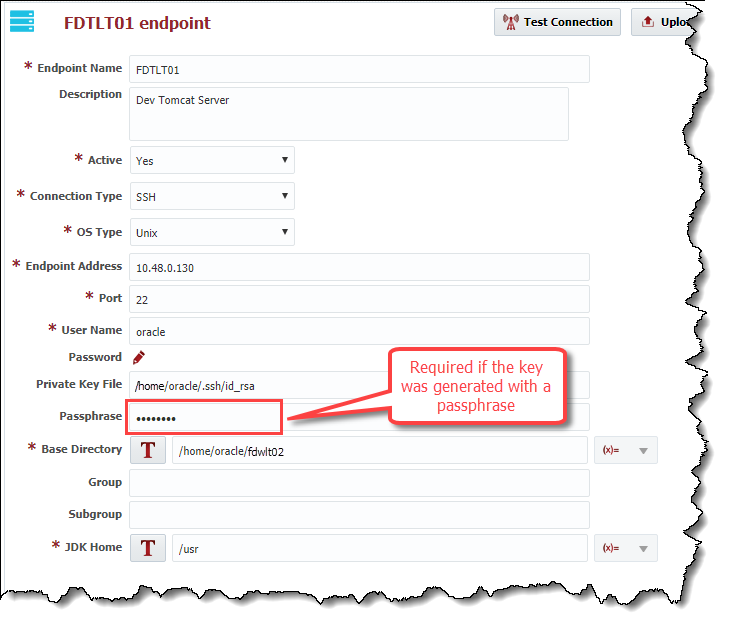
The second technique is to use a manually generated public-private key pair to perform the authentication, allowing the FlexDeploy server to connect to endpoints without having to specify a password. In this scenario, a public and private key pair are generated on the FlexDeploy server. The private key is kept secretly on the server by setting the permissions such that only the owner can read it (the userid which the FlexDeploy server is running as). The public key is copied to all endpoint computers which must allow access to the owner (user running FlexDeploy server) of the matching private key. While authentication is based on the private key, the key itself is never transferred through the network during authentication. SSH verifies whether the same person offering the public key also owns the matching private key. In this case you must provide the User Name, the path to the Private Key File on the server, and an optional Passphrase (an optional password assigned to the private key when it was generated).
Creating a Public-Private Key Pair
If you do not already have SSH keys generated for the host where FlexDeploy is installed, login (or switch user) as the user which FlexDeploy runs as, and run the following OpenSSH command.
...
It is typical to use the default file name and location to store the private key (which is in the .ssh subfolder of the user's home directory). You can optionally secure the private key file with a passphrase. It is an SSH requirement that the private key be readable only by its owner (e.g. oracle in the example above). So you must change the permissions accordingly (e.g. chmod 600 /home/oracle/.ssh/id_rsa). You will receive an error at connection time similar to the following if you omit this step.
Permissions 0777 for '/home/oracle/.ssh/id_rsa' are too open.
It is recommended that your private key files are NOT accessible by others otherwise private key will be ignored.
| Tip |
|---|
The /home/oracle/.ssh folder on the endpoint must have drw------- permissions. For example,
|
Uploading the Public Key
We must now copy the contents of the public key to each endpoint host. This step can be performed manually or using FlexDeploy UI. To save time and avoid errors, use Upload Public Key button on FlexDeploy UI for specific Endpoint.
...