When a project is being deployed to a K8s Cluster, FlexDeploy offers the ability to configure a Helm Chart and/or deployment strategies for the deployment. Both configurations are done on the follow tab:
...
| Name | Description | Notes | ||||||||||||||||||||||||||||||
|---|---|---|---|---|---|---|---|---|---|---|---|---|---|---|---|---|---|---|---|---|---|---|---|---|---|---|---|---|---|---|---|---|
| Deployment Name | This is the K8s deployment name. The field is a groovy script by default so be sure to enclose literal strings in quotes. | Result after a deployment: kubectl get deployments NAME | ||||||||||||||||||||||||||||||
| Manifests to deploy | Actual K8s manifest files for your deployment. Files will run from top to bottom. | Usually consists of a deployment.yaml and service.yaml. File paths can be absolute or relative to the temp directory. To make use of the Deployment Name field above, your deployment.yaml should use FD_KN_DEPLOYMENT_NAME flexdeploy property and can also use the FD_PROJECT_DOCKER_IMAGE_NAME property configured on the docker tab.
| ||||||||||||||||||||||||||||||
| Blue/Green Istio Manifest | Istio manifest file to apply when running BlueGreen deployment strategies. If using a different strategy you can leave this blank. | The BlueGreen strategy is effectively an 'On/Off Switch' for your pods. When using this strategy all of your pods will deploy with a BLUE label, meanwhile traffic is always routed to GREEN labels. Testers and QA will test BLUE pods through back doors and other means. When ready you can 'flip' the switch to label all BLUE pods as GREEN resulting in them opening up for regular traffic. As you can see in the below manifest file, the GREEN route will always receive 100 percent of the traffic through the Istio Mesh.
| ||||||||||||||||||||||||||||||
| Canary Istio Manifest | Istio Manifest file to apply when running the Canary deployment strategy. If using a different deployment strategy you can leave this blank. | Canary is similar to the BlueGreen strategy but instead of being an 'On/Off Switch' think of it as a 'Dimmer Switch'. Instead of cutting all traffic over in one moment you can adjust the weights as you go. For example, you can start at routing 90 percent of traffic to GREEN and 10 percent to BLUE, then 70/30, then 50/50, then full cut-over at 0/100. You will notice the the manifest file looking similar to the BlueGreen manifest with the exception that we can see FlexDeploy variables used in the weight fields (Check out the pipeline documentation to see where these weights are set):
| ||||||||||||||||||||||||||||||
| AB Istio Manifest | Istio Manifest file to apply when running the AB deployment strategy. If using a different deployment strategy you can leave this blank. | The AB deployment strategy still involves BLUE and GREEN pods like BlueGreen and Canary. The difference here is that BLUE traffic is only ever open based on a 'Routing Rule' which could be an http header of your choosing. For example, below we can anyone with the 'end-user' header set to a FlexDeploy property configured on the pipeline will get sent to a BLUE pod, and everyone else is routed to GREEN. After the end-user has validated the BLUE pods, we flip them all to GREEN similar to the BlueGreen strategy.
| ||||||||||||||||||||||||||||||
| Helm Chart | The Helm chart to apply during deployment. | Can be a chart in the repository configured on the deploying endpoint, a folder with a chart, a chart package or URL. | ||||||||||||||||||||||||||||||
| Helm Release Name | Release Name in Helm to easily track all deployments on the endpoint. Has nothing to do with FlexDeploy Release* | If it is unspecified, Helm will generate a random name. | ||||||||||||||||||||||||||||||
| Parameters Map | Parameters to pass to the Helm Chart |
...
| Expand | |||||
|---|---|---|---|---|---|
| |||||
In this example we will walk you through deploying your Kubernetes project through FlexDeploy. In this example we are assuming you have Kubernetes/Docker installed on a specific endpoint. SCM SetupFor our first step we will add our Kubernetes manifest files to some sort of SCM. For this example we will be adding a deployment manifest to a git repository. Below you can see our .yaml file we added.
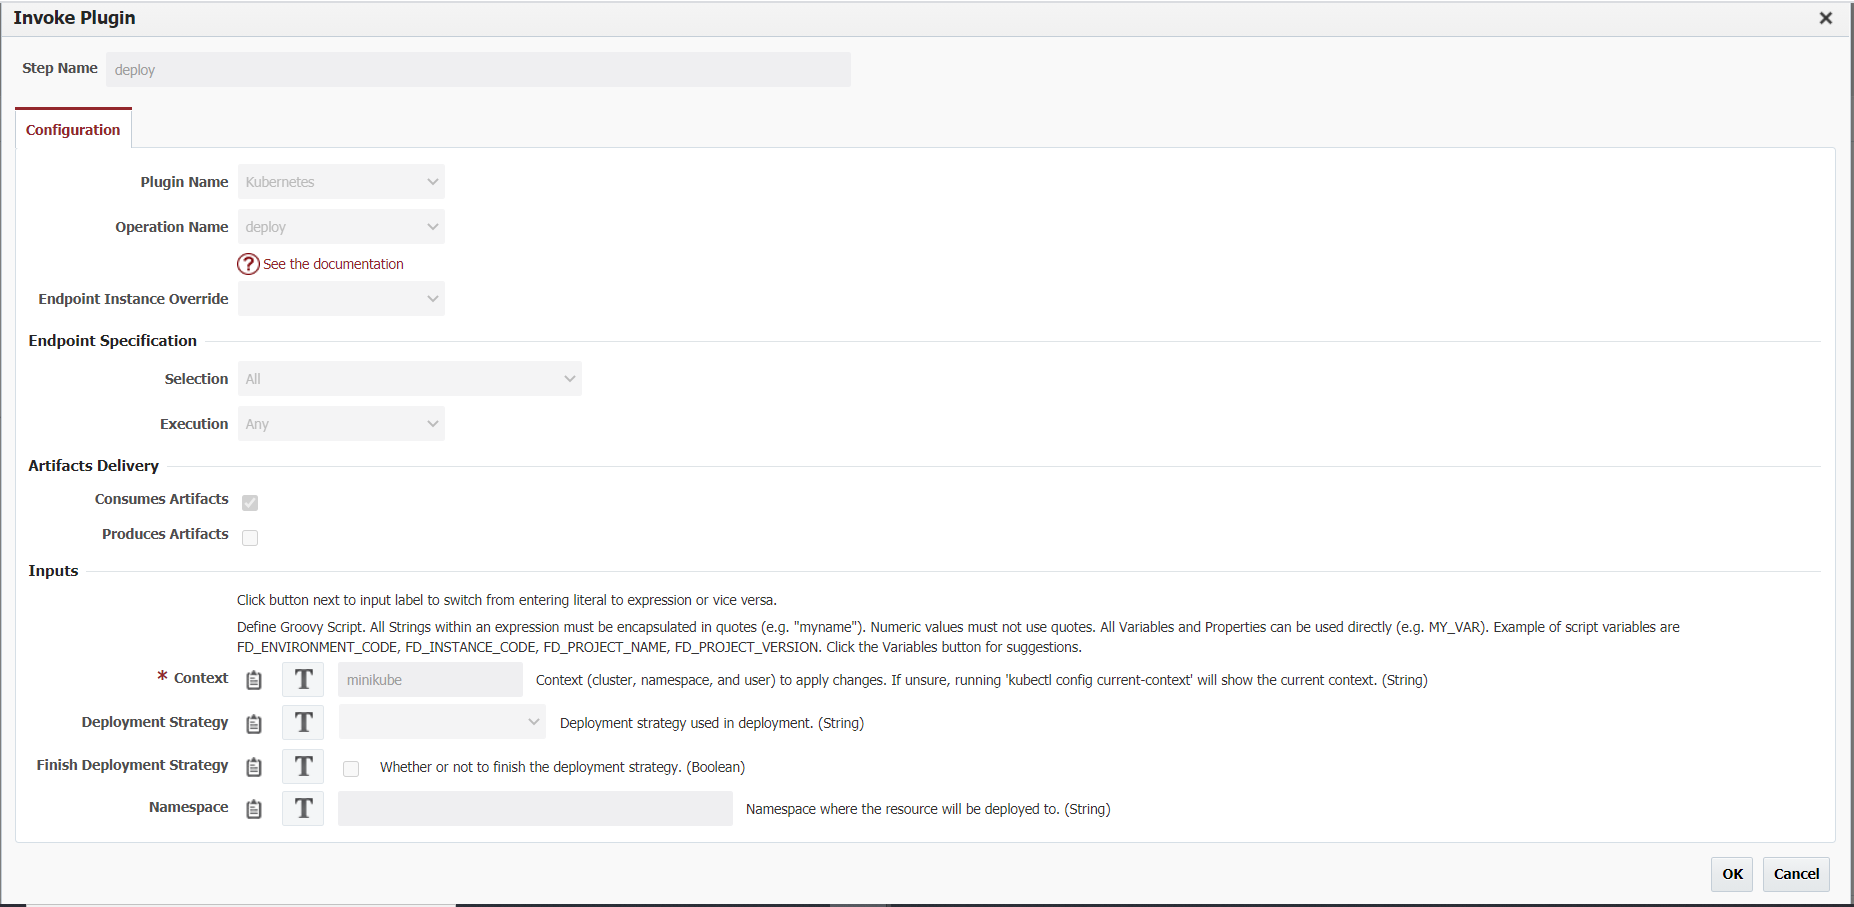
WorkflowsWe will now create a workflow to build and deploy our manifest files. For our build we will use an existing workflow so we will not need to create a new one. For our deploy workflow we will add the Kubernetes deploy operation. For the inputs on this operation you will just need to add the context which in our case is minikube.
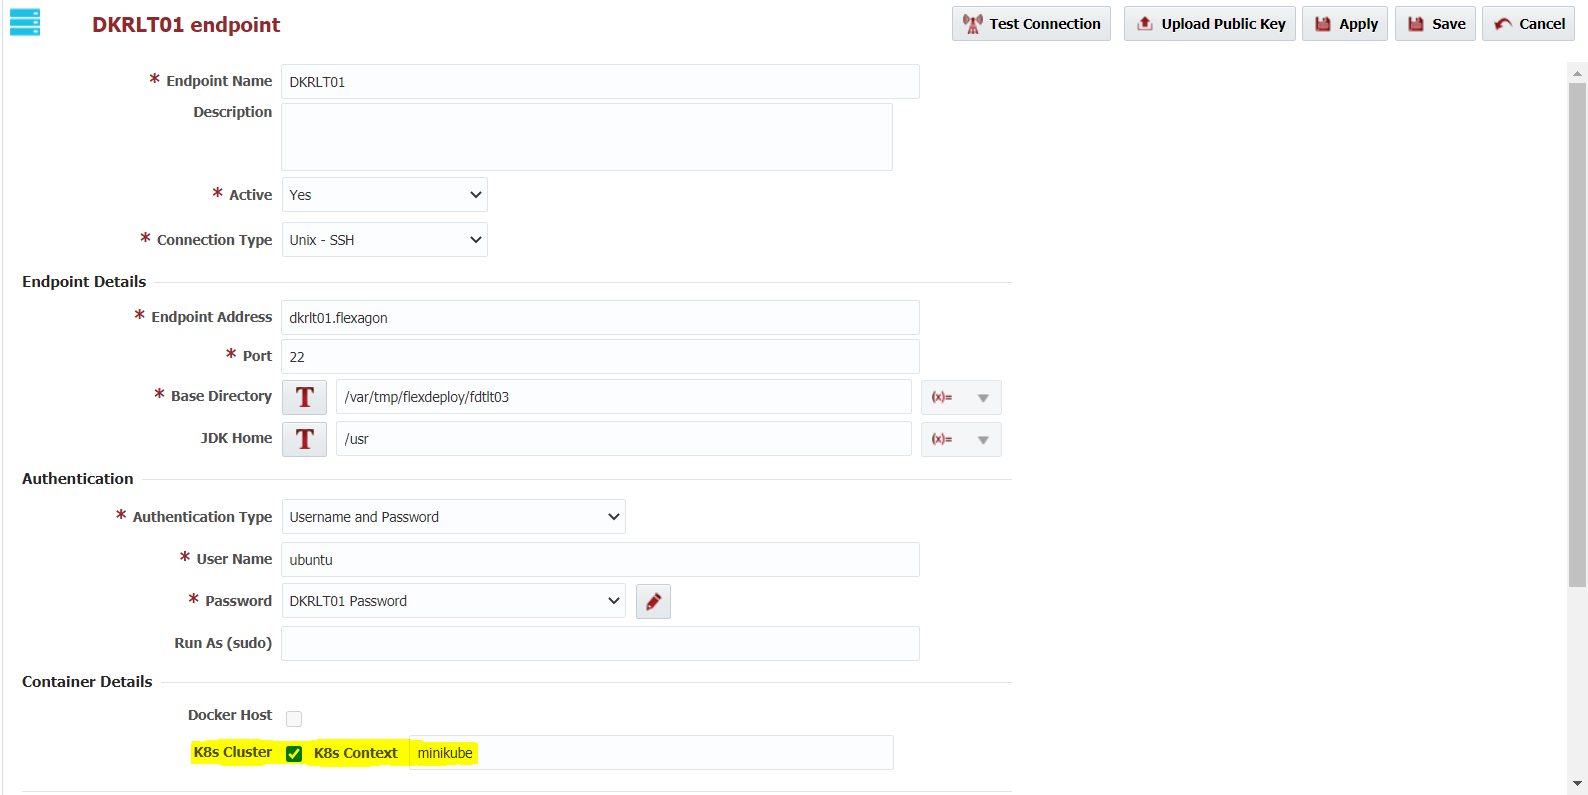
Once we have added this we will then activate the workflow. TopologyWe will now create our topology. First we can create our endpoint if not already created. One thing we will need to update is the k8s cluster and give our context.
After creating an environment and instance and associating our workflow and endpoint with our new environment instance we can set all of the properties. The main property you will need to set is the kubernetes context and kubernetes home if it is not added to the path on the endpoint.
We will also need to create our SCM instance in topology. This integration instance will point to our repository containing our manifest files. ProjectWe will now set up our project by configuring our workflows, instance and SCM instance.
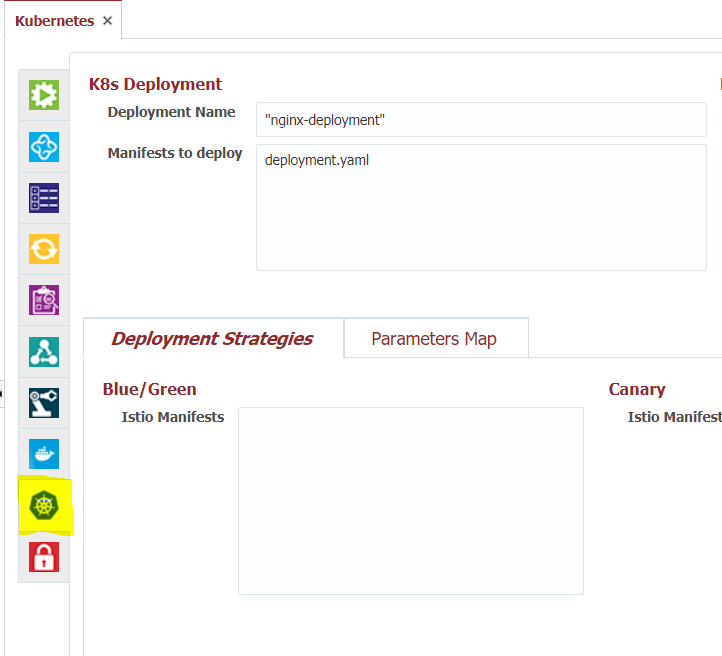
We will then go to our kubernetes config tab and set some information. First we will need the deployment name. This will be the name the deployment is given. This will be returned by kubectl get deployments once the deployment is finished. We will also set our manifest files. This will be the path to the manifest files relative to our artifacts directory. In this example we will only need to give them the name of the file.
Build and deployWe will now build and deploy the project. The build will pull our manifest files from git and put them in our artifacts directory. Our deploy will use those manifest files in the kubectl deploy command. If everything worked you should be able to see your new deployment on kubectl get deployments and see your new deployment. |


...