To start FlexDeploy server in the background on Windows server, you can use Windows Service. It is similar in concept to a Unix daemon. A Windows service must conform to the interface rules and protocols of the Service Control Manager, the component responsible for managing Windows services. This document explains how to install the Windows Service and configure it to start automatically.
| Info | ||
|---|---|---|
| ||
This document covers Tomcat FlexDeploy Server start. Database server need to be started before the FlexDeploy Server. |
...
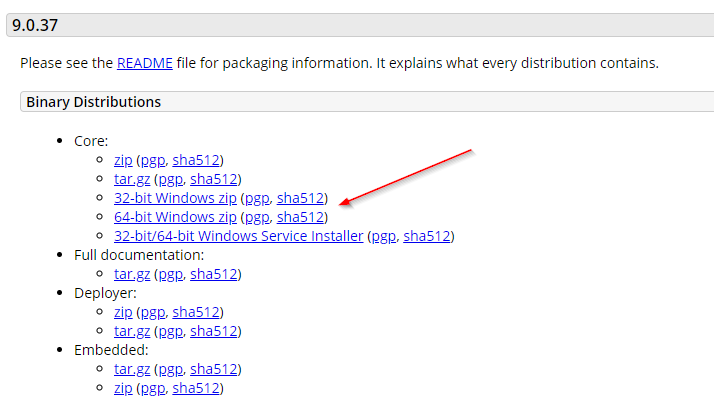
Step 1: Current FlexDeploy distribution doesn’t come with the Tomcat service out of the box, but it is easy to add. Go to the Apache Tomcat site and download the Windows distribution
URL is currently here: https://tomcat.apache.org/download-8090.cgi

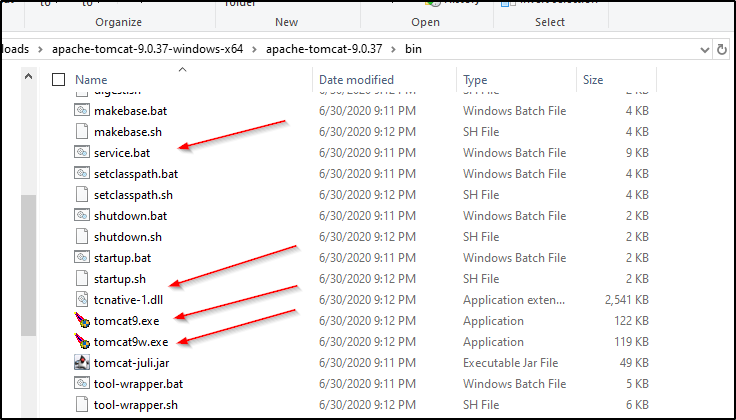
Step 2: Unzip the archive and move the following files into <FlexDeploy Home>/apache-tomcat-flexdeploy\bin folder of FlexDeploy distribution( From: C:\apache-tomcat-89.50.5737-windows-x64\apache-tomcat-89.50.57 37\bin to C:\FD53FD54\Tomcat_Complete-5.34.0.30\apache-tomcat-flexdeploy\bin )
service.bat
tcnative-1.dll
tomcat8tomcat9.exe
tomcat8wtomcat9w.exe

Step 3: Open a command line as an administrator and run the command service.bat install from the<FlexDeploy Home>/apache-tomcat-flexdeploy/bin folder
| Code Block | ||||
|---|---|---|---|---|
| ||||
C:\FD53FD54\Tomcat_Complete-5.34.0.30\apache-tomcat-flexdeploy\bin>service.bat install Installing the service 'Tomcat8Tomcat9' ... Using CATALINA_HOME: "C:\FD53FD54\Tomcat_Complete-5.34.0.30\apache-tomcat-flexdeploy" Using CATALINA_BASE: "C:\FD53FD54\Tomcat_Complete-5.34.0.30\apache-tomcat-flexdeploy" Using JAVA_HOME: "C:\Program Files\Java\jdk1.8.0_231" Using JRE_HOME: "C:\Program Files\Java\jdk1.8.0_231\jre" Using JVM: "C:\Program Files\Java\jdk1.8.0_231\jre\bin\server\jvm.dll" The service 'Tomcat8Tomcat9' has been installed. |
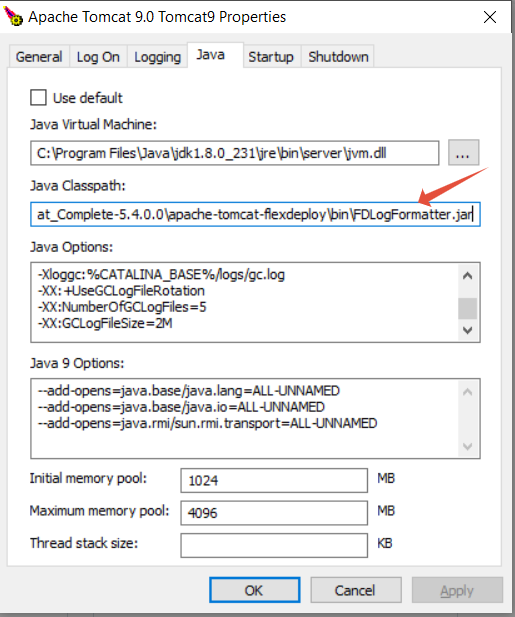
Step 4: Now you can open the <FlexDeploy Home>/apache-tomcat-flexdeploy/bin/tomcat8w.exe executable to configure the service.

Step 5: Add the following on the Java tab.
...
- Please make sure to change C:\FD53FD54\Tomcat_Complete-5.34.0.30 to your FlexDeploy Home.
- Please make sure to change values for-Dflexagon.fd.install.root and -Dflexagon.fd.repository.root as you configured working directory and artifact repository in setup.bat.
- Please make sure no spaces at the end of each line
| Code Block | ||||
|---|---|---|---|---|
| ||||
-Dcatalina.home=C:\FD53FD54\Tomcat_Complete-5.34.0.30\apache-tomcat-flexdeploy -Dcatalina.base=C:\FD53FD54\Tomcat_Complete-5.34.0.30\apache-tomcat-flexdeploy -Dignore.endorsed.dirs=C:\FD53FD54\Tomcat_Complete-5.34.0.30\apache-tomcat-flexdeploy\endorsed -Djava.io.tmpdir=C:\FD53FD54\Tomcat_Complete-5.34.0.30\apache-tomcat-flexdeploy\temp -Djava.util.logging.manager=org.apache.juli.ClassLoaderLogManager -Djava.util.logging.config.file=C:\FD53FD54\Tomcat_Complete-5.34.0.30\apache-tomcat-flexdeploy\conf\logging.properties -Doracle.mds.cache=simple -Dorg.apache.el.parser.SKIP_IDENTIFIER_CHECK=true -Dflexagon.fd.install.root=C:\FD53\/flexdeploy/Tomcat_Complete-5.34.0.3\0/application -Dflexagon.fd.repository.root=C:\FD53\/flexdeploy/Tomcat_Complete-5.34.0.3\0/artifacts -Djava.awt.headless=true -verbose:gc -XX:+PrintGCDetails -XX:+PrintGCDateStamps -Xloggc:%CATALINA_BASE%/logs/gc.log -XX:+UseGCLogFileRotation -XX:NumberOfGCLogFiles=5 -XX:GCLogFileSize=2M |

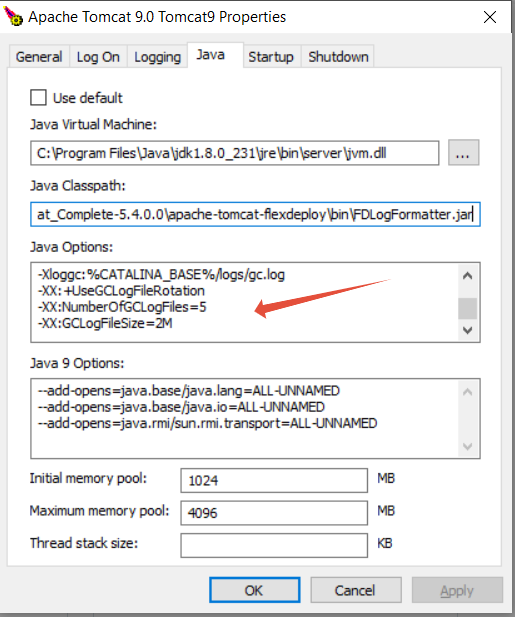
b. Set the initial memory pool and the maximum memory pool - This will be based on the values that were in the setenv.sh If you had the following:
...
| Code Block | ||
|---|---|---|
| ||
;C:\FD53\Tomcat_Complete-5.3.0.3\apache-tomcat-flexdeploy\bin\FDLogFormatter.jar |

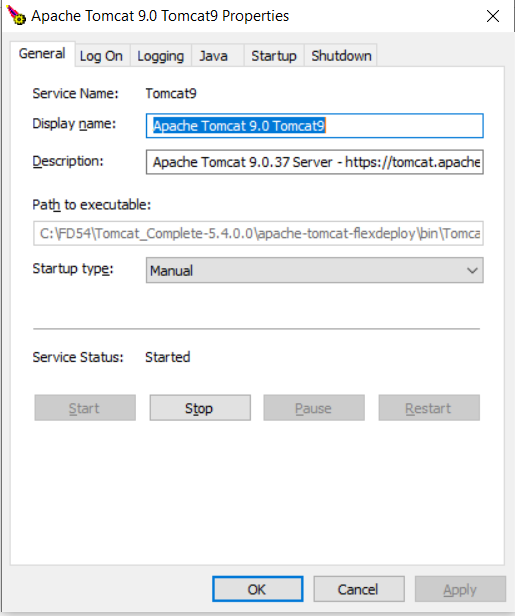
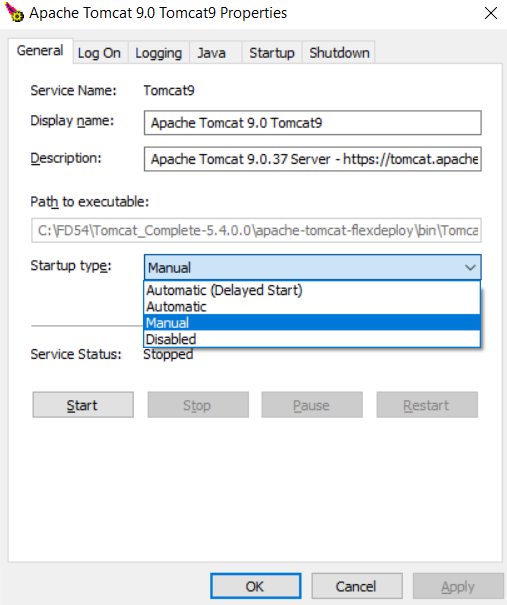
Step 6: Start the service using the tomcat8 GUI.
Note: Before starting the Service check DB server running or not, if not started, Start the DB server.
Startup type: Automatic
If you want to start manually keep Startup type: Manual

Step 7: Launch FlexDeploy in your browser to verify.
...